17
January,
2024
3 MINUTE READ
Overview
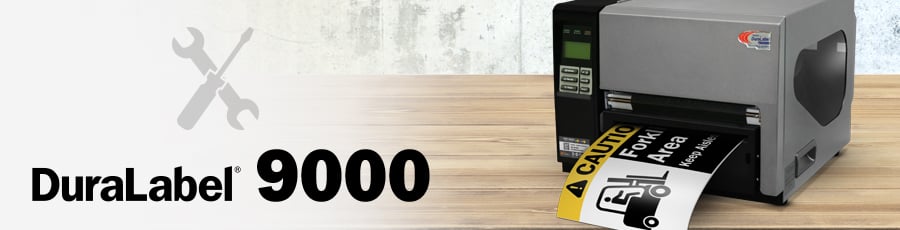
If something seems to be wrong with your DuraLabel 9000, refer to the solutions below. If the problem is not resolved by following the recommended steps, please contact our support team.
Like visuals? You can view examples here: DuraLabel 9000 User Guide
Speckles Appear Throughout Label
Possible Cause: Supply has not been stored properly and dirt has contaminated the supply.
Solution: Replace the label supply if the problem persists after the first few prints. Store supplies in a dust-free environment.
Fading of Text/Graphics Occurs During Printing
Possible Cause: The darkness is set too low.
Solution: Increase the darkness.
Possible Cause: The print speed is set too high.
Solution: Decrease the print speed or refer to the Adjusting Print Speed section of the User Guide.
Hash Marks Appear Throughout Printing
Possible Cause: The darkness is set too high.
Solution: Decrease the darkness.
Possible Cause: The print speed is set too low.
Solution: Adjust the darkness setting. If this does not eliminate or satisfactorily reduce the hash marks, increase the print speed or refer to the Adjusting Print Speed section of the User Guide.
Solid Printed Line Appears Across Entire Label
Possible Cause: Print head is damaged.
Solution: Contact customer service at 800.788.5572.
Unprinted Horizontal Lines Appear
Possible Cause: If the horizontal lines run partially through the label, there may be foreign particles on the print head.
Solution: Clean the print head.
Possible Cause: If horizontal lines run through the entire label, the print head is defective.
Solution: Replace the print head.
LED Flashes Between Green ?ON-LINE? and Red ?ERROR?
Possible Cause: Printer doesn?t recognize supply.
Solution: Follow these steps:
- Turn printer OFF.
- Turn printer back ON and try printing again.
Possible Cause: Supply roll may be defective.
Solution: Replace supply roll.
- If printer begins working, previous supply roll was defective.
- Call DuraLabel for return instructions and replacement.
Printer is Printing Labels but not Cutting Them
Possible Cause: Your printer is looking for gaps but it?s printing to a continuous roll.
Solution: Follow these steps:
- Save the template you?re using and close any labeling program.
- Open Devices and Printers in your Start
- Right-click on the DuraLabel DuraLabel 9000 icon and select Printing Preferences.
- Select the Stock
- Set Type to Continuous.
- Click OK.
- Reopen your template and try printing again.
Possible Cause: You may be using pre-printed labels with gaps your printer doesn?t see.
Solution: Follow these steps:
- Ensure the Stock tab is set to Labels with Gaps.
- Open the printer cover.
- Ensure label guides are closed around label supply.
- Check that Media Sensor Bar is positioned properly.
- Calibrate label supply:
- Press the Menu
- Select Setup.
- Select Sensor.
- Select Calibration.
- Select Gap Mode.
- Select Automatic.
- Follow directions in Driver Settings section of the User Guide.
- Close printer cover.
- Try printing again, with printer set to Labels with Gaps.
Receive a ?No Ribbon? Error Message
Possible Cause: Ribbon is loaded incorrectly.
Solution: Refer to the Loading Ribbon section of the User Guide.
Receive a ?No Paper? or ?Paper Jam? Error Message
Possible Cause: Vinyl is loaded incorrectly.
Solution: Follow these steps:
- Ensure vinyl is loaded correctly.
- Initialize printer, recalibrate, and try printing again.
- To initialize, press Menu, then select Initialization. When asked Yes or No, press Initialize one more time to initialize the printer. Recalibrate per instructions in the User Guide for die-cut label supply or B Mark label supply.
- Call DuraLabel if printing issue persists.
Printer Cuts Labels Off-Center or into the Next Label
Possible Cause: Feed Offset is not on correct setting.
Solution: Adjust Feed Offset to proper setting.
Possible Cause: Media sensor is reading B Mark label content.
Solution: Move media sensor to edge of the supply, away from any printed content, but still positioned under the supply.
Wrinkles Appear on Half of Label
Possible Cause: The ribbon wrinkles due to uneven print head pressure.
Solution: Set the adjustable pressure knobs. Increasing the pressure sometimes helps reduce unprinted specks, as well.
Setting left adjustable pressure knobs: For wrinkles on the right side of the printed label, set the two left adjustable pressure knobs.
- Press down on the far-left adjustable pressure knob while turning it clockwise to the desired pressure setting.
- Press down on the adjacent left adjustable pressure knob while turning it clockwise to the same pressure setting as the far-left pressure knob.
NOTE: You may need to experiment to determine best setting, based on type of label or sign.
Setting right adjustable pressure knobs: For wrinkles on the left side of the printed label, set the two right adjustable pressure knobs.
- Press down on the far-right adjustable pressure knob while turning it clockwise to the desired pressure setting.
- Press down on the adjacent right adjustable pressure knob while turning it clockwise to the same pressure setting as the far-right pressure knob.
More Support Options
If you have any questions about using your DuraLabel 9000 printer, get help from DuraLabel? world-class support team by calling 800-788-5572 or visiting DuraLabel.com. We?re here to help with all your labeling needs!


