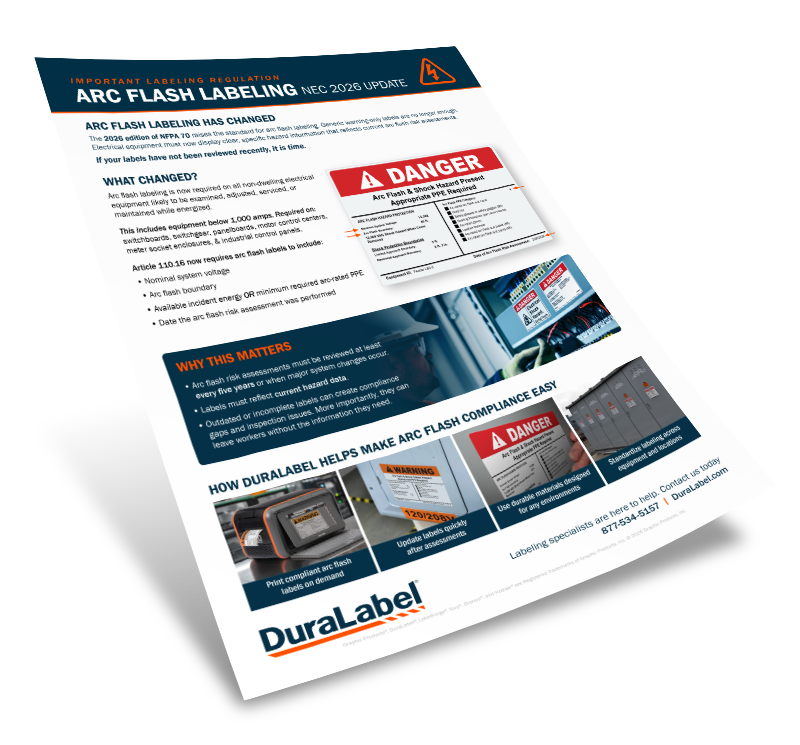
Arc Flash Labeling Changes Under NEC 2026
Not sure what’s changing with arc flash labeling under NEC 2026? This flyer breaks down the latest updates and what they mean for a facility—helping ...
Download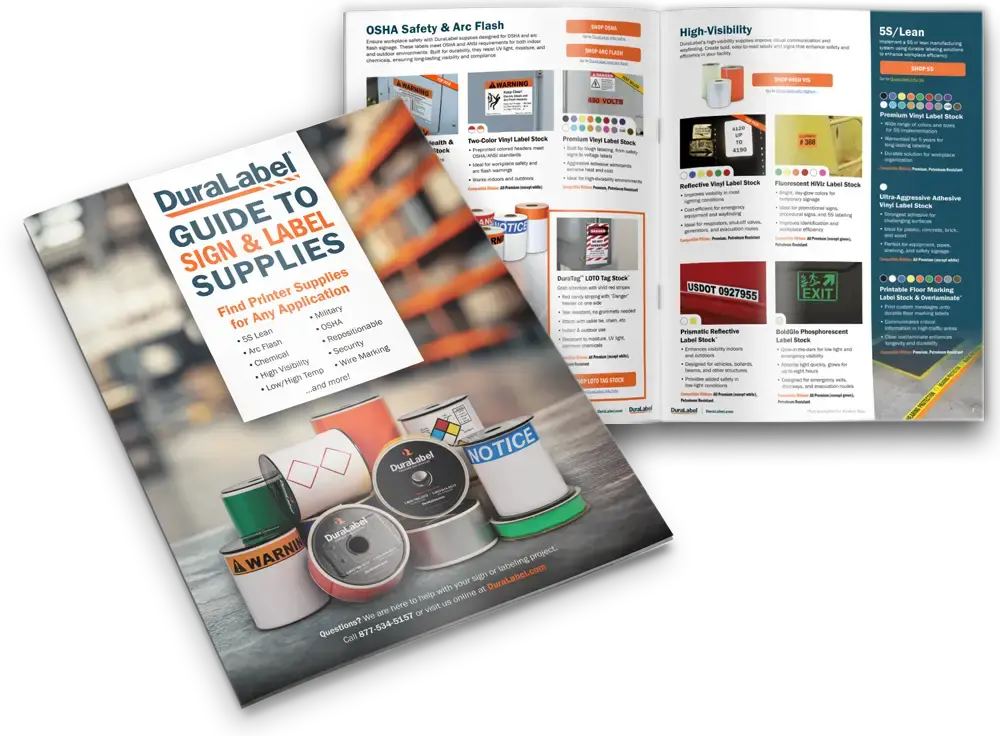
This resource covers industrial labeling solutions, compliance standards, and supply recommendations to help ...
Download%20(1)-1.webp)
Not sure where to start with facility signage? This free guide will help you determine what's required for ...
Download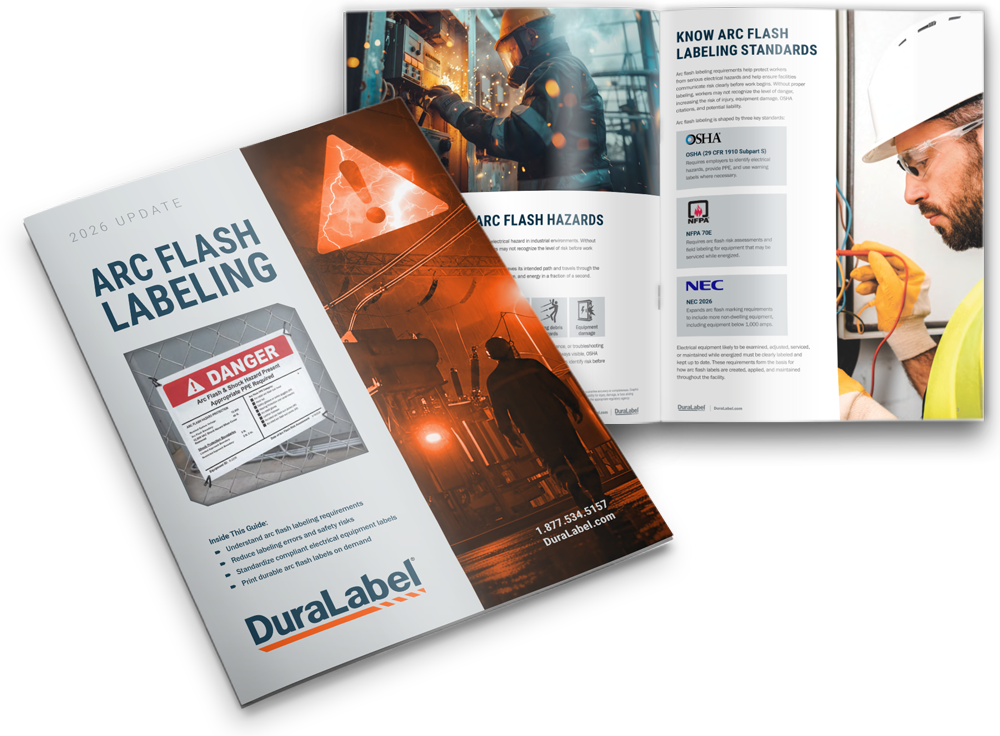
Accurate arc flash labels play an important role in worker safety and regulatory compliance. This quick start ...
Download
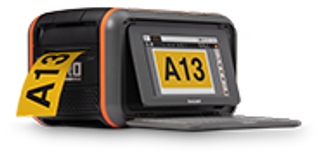
Upgrade your facility's labeling process with the DuraLabel Toro Max Print System, designed for on-site ...
Download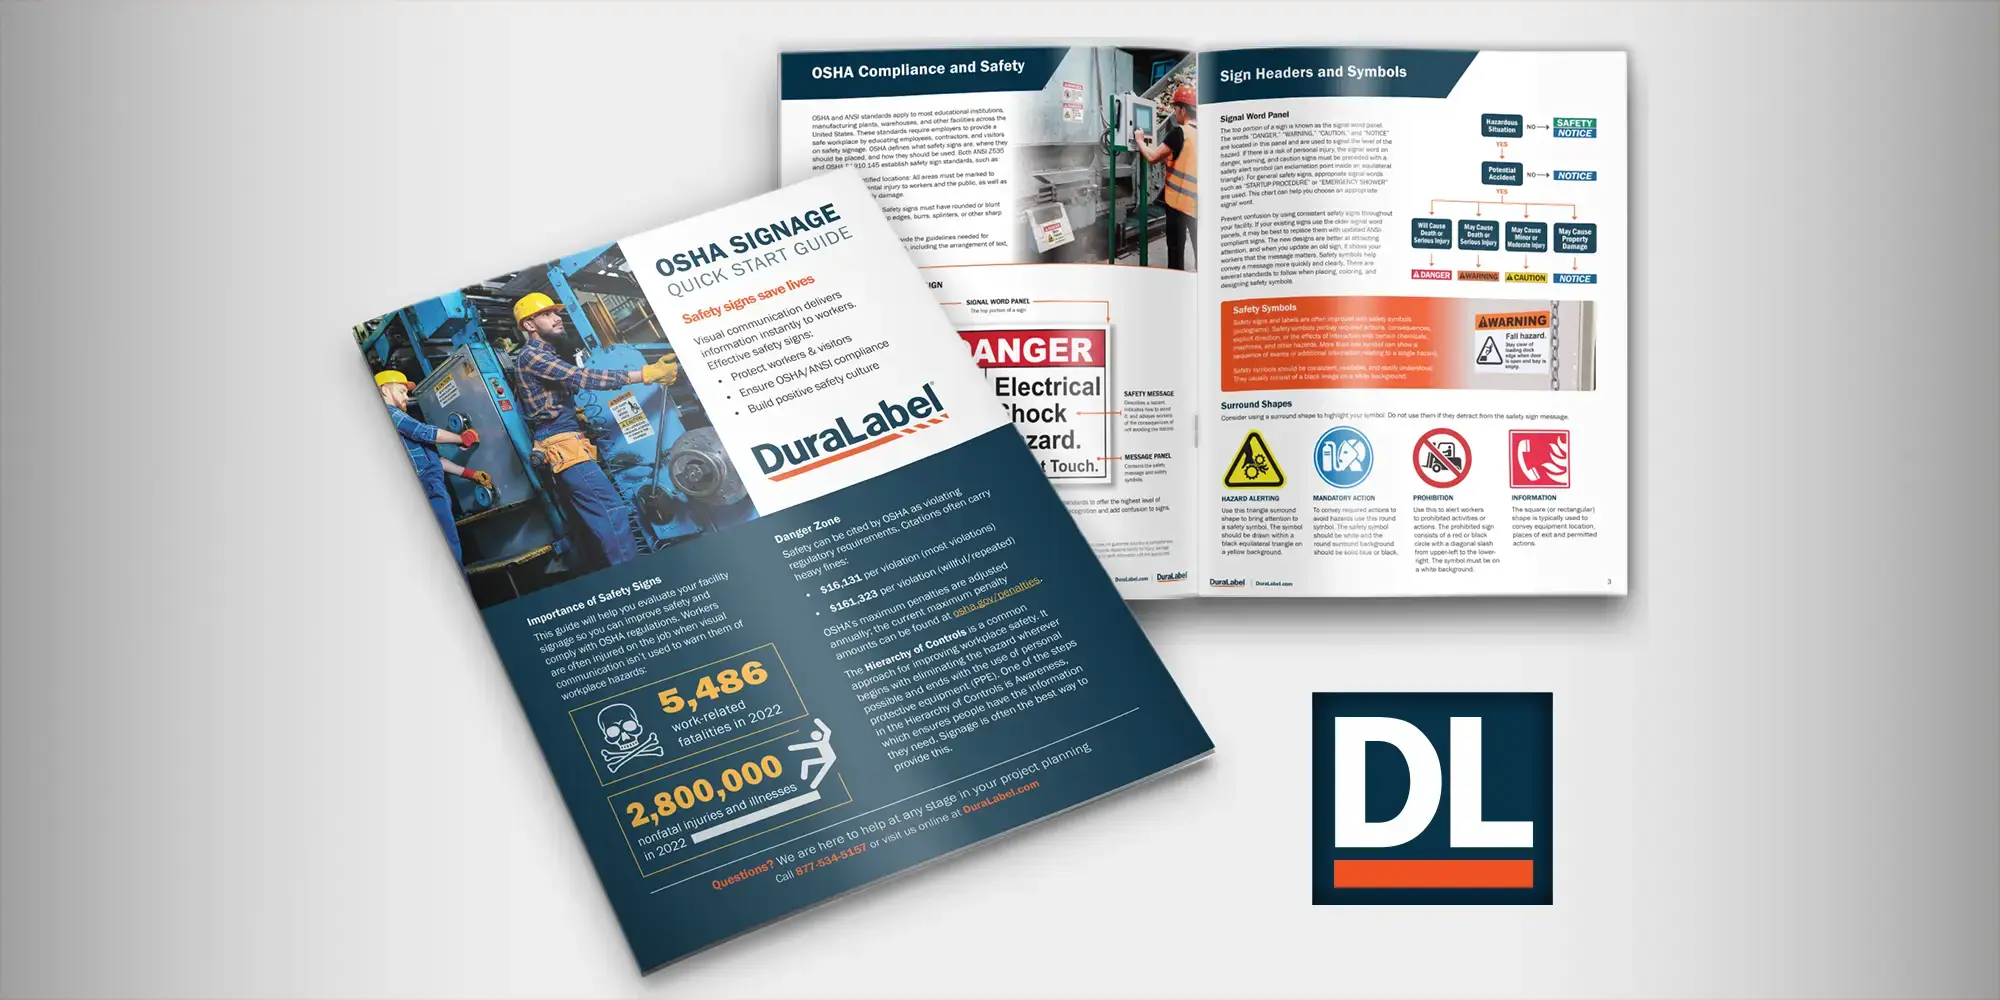
This 8-page guide offers straightforward, best practices for labeling your facility according to OSHA and ...
Download
Not sure what’s changing with arc flash labeling under NEC 2026? This flyer breaks down the latest updates and what they mean for a facility—helping ...
Download.webp)
Not sure where to start with warehouse labeling? This free guide outlines the key steps for building a safe, efficient, and compliant labeling ...
Download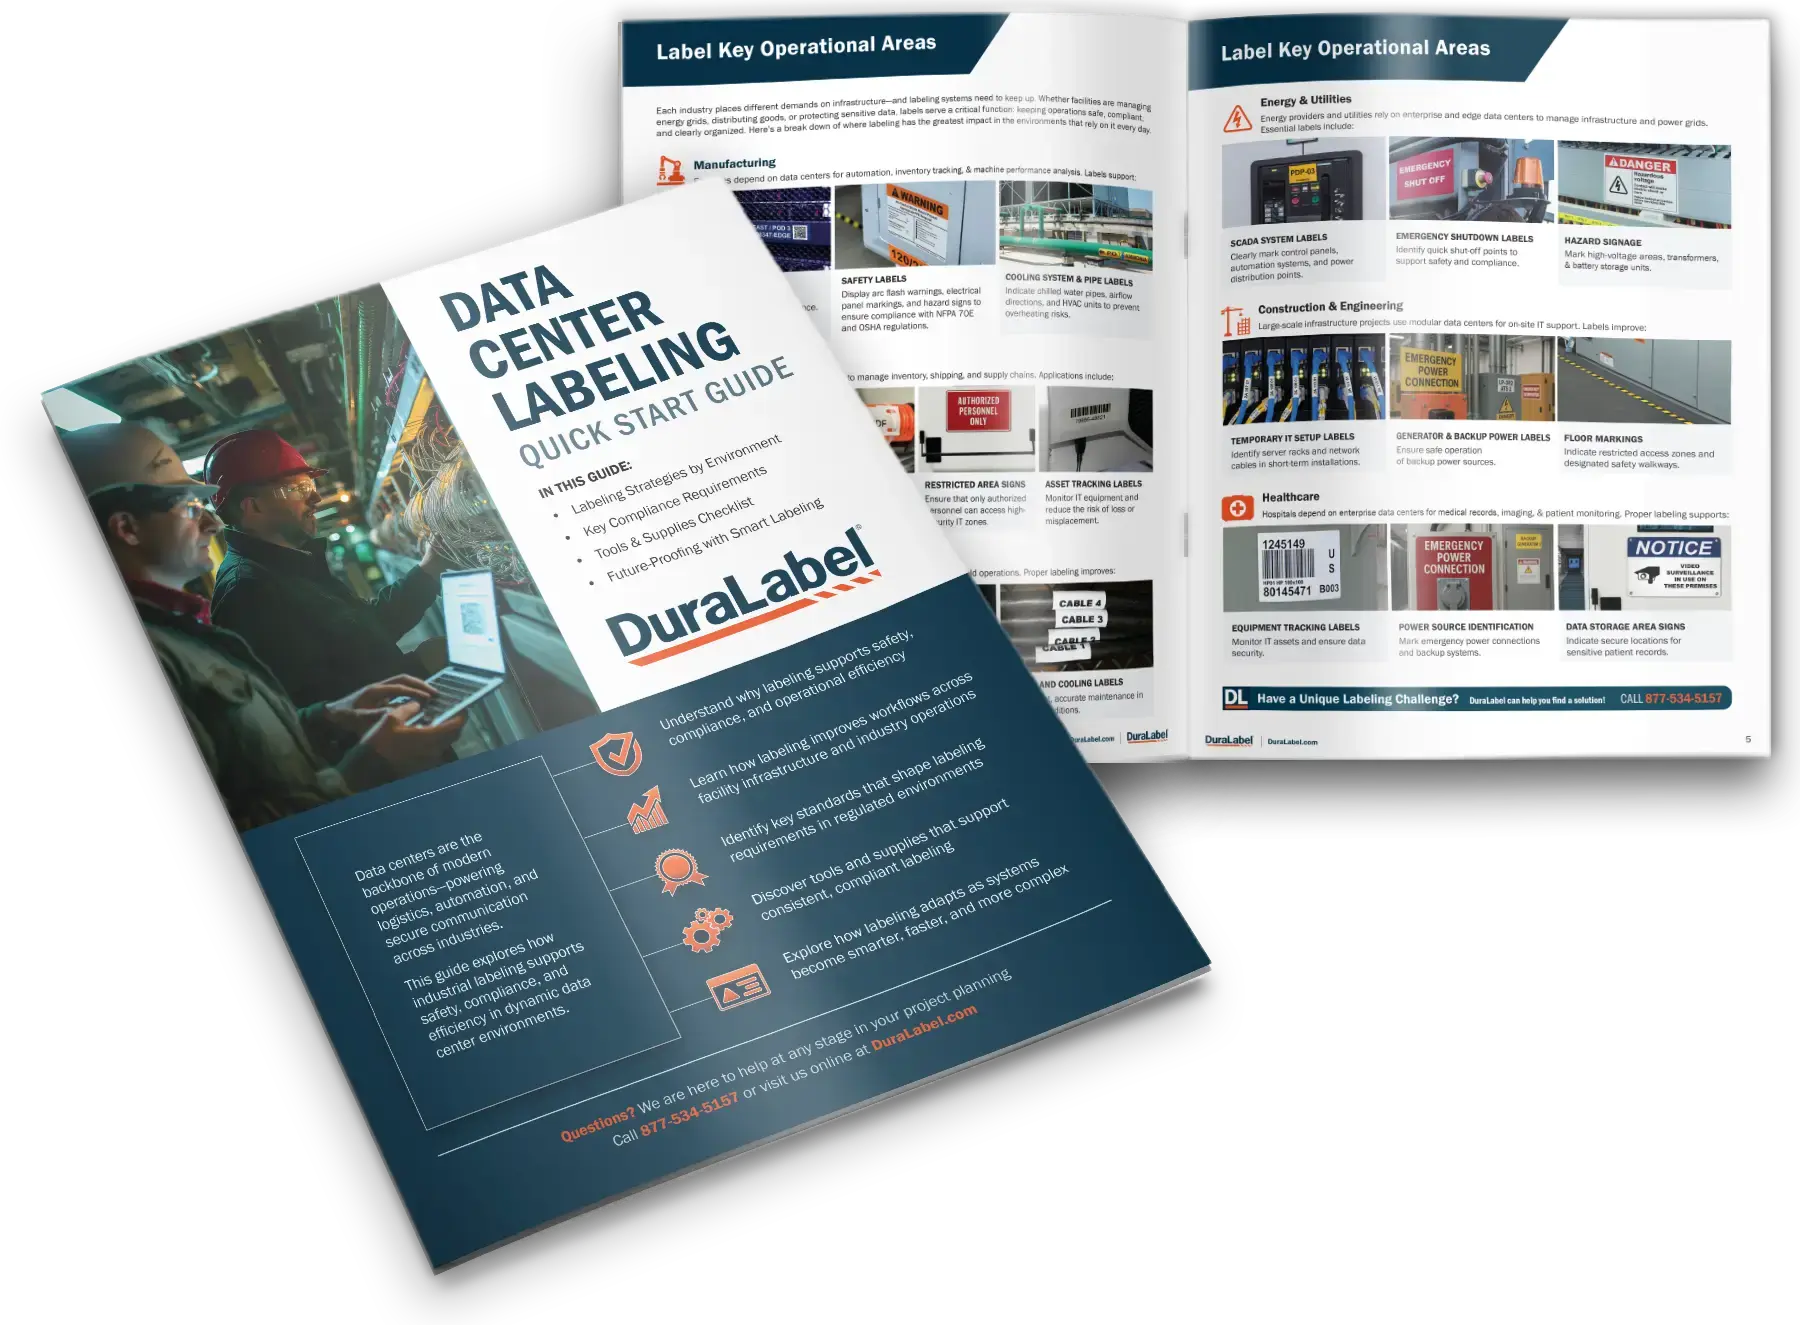
Labeling is critical in keeping today’s data-driven operations organized, secure, and compliant. From cable management to critical power systems, ...
Download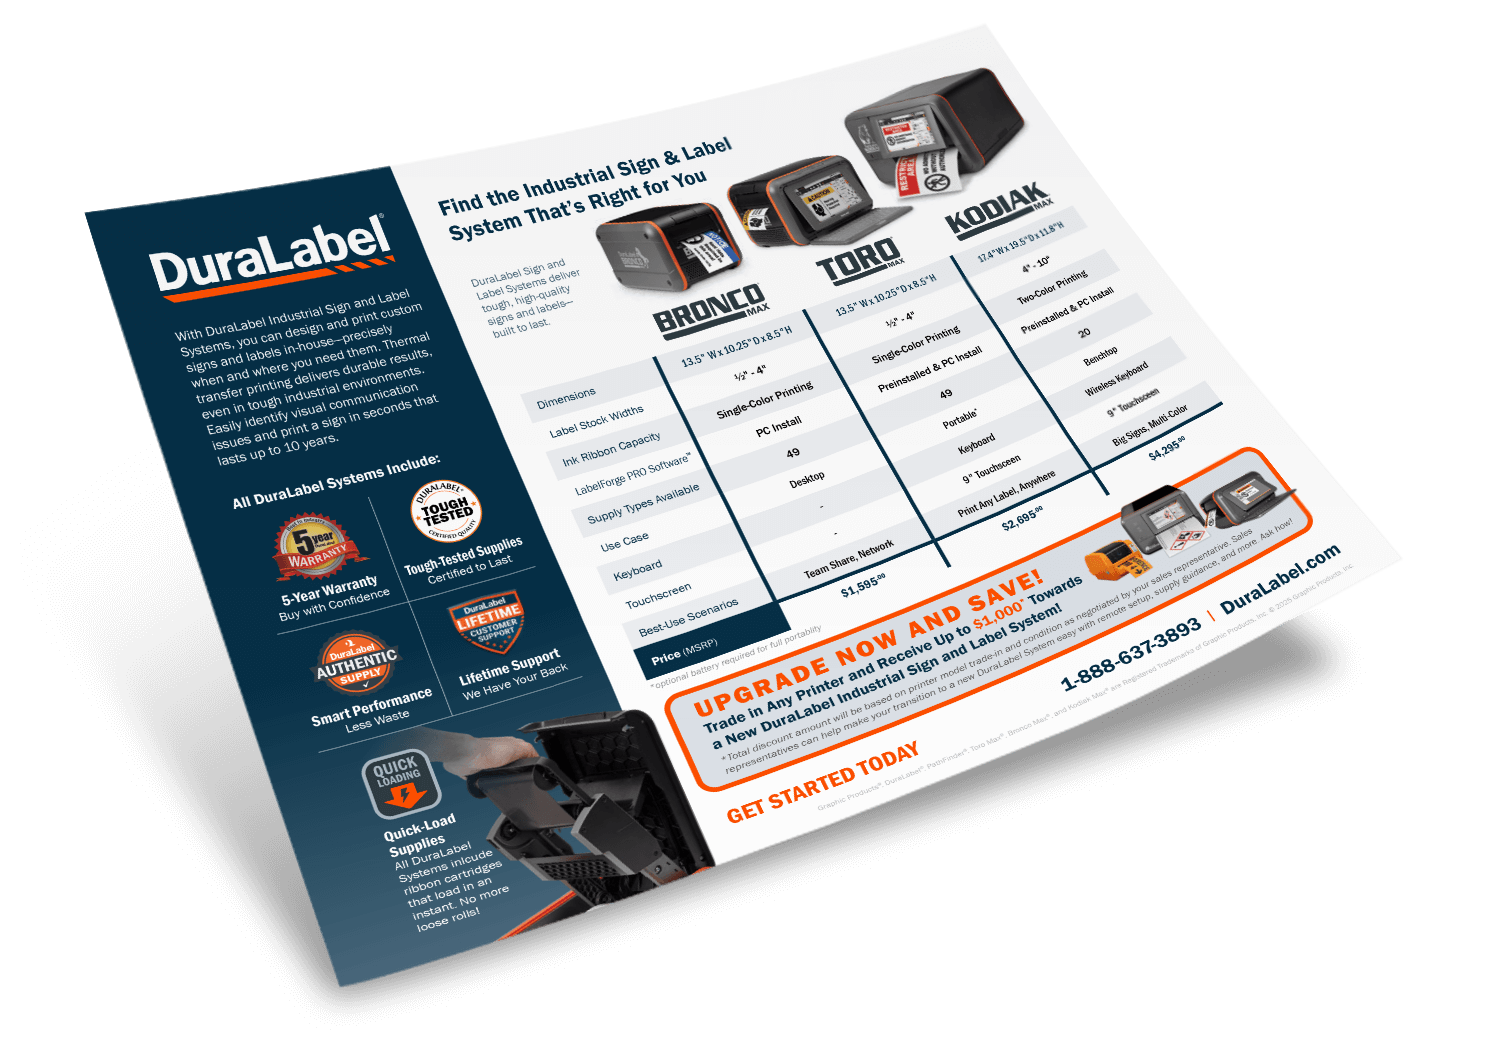
Not sure which DuraLabel Industrial Sign and Label System fits your needs? This flyer makes it easy to compare Bronco Max, Toro Max, and Kodiak ...
Download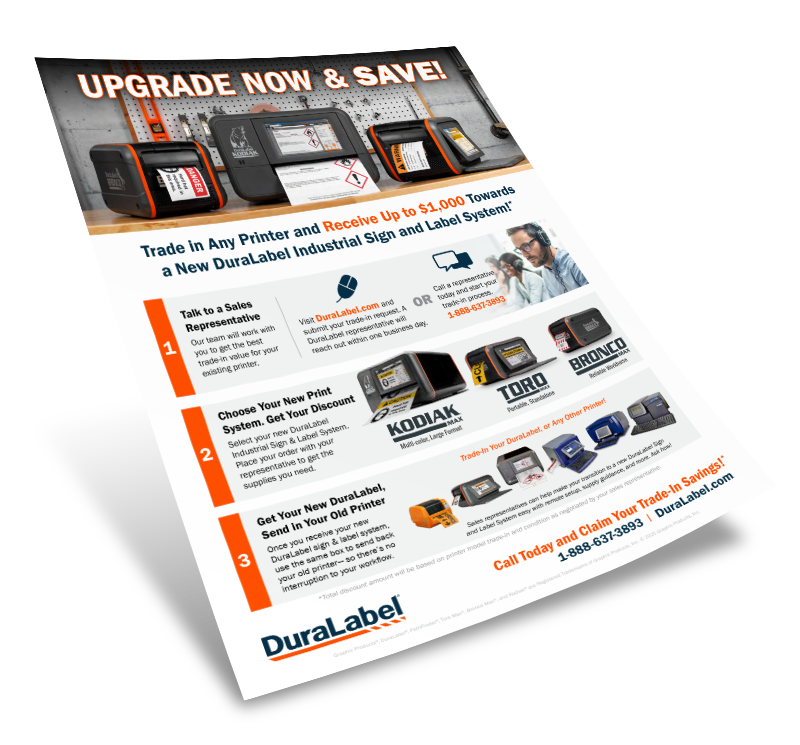
Ready to upgrade your sign and label printer? This flyer explains how to trade in any printer—DuraLabel or competitor—for up to $1,000 in credit ...
Download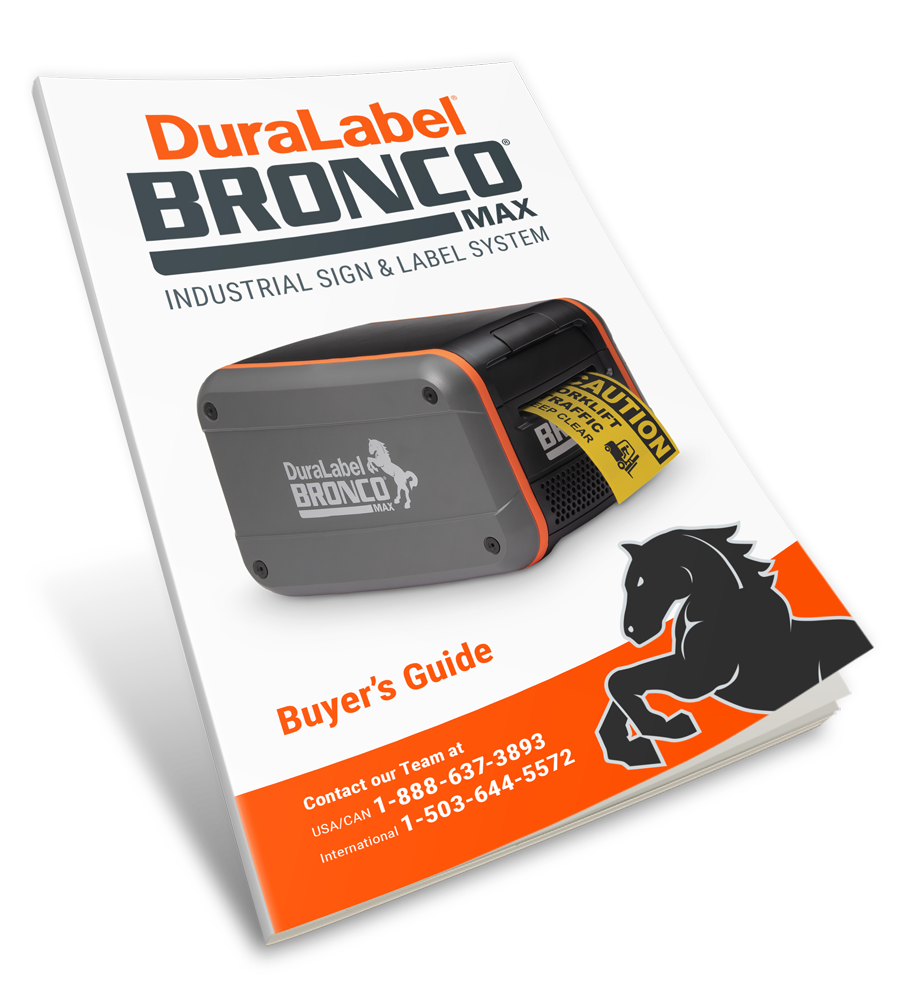
Discover the advantages of a reliable industrial sign and label system built for performance. The Bronco Max Buyer’s Guide covers key features, ...
Download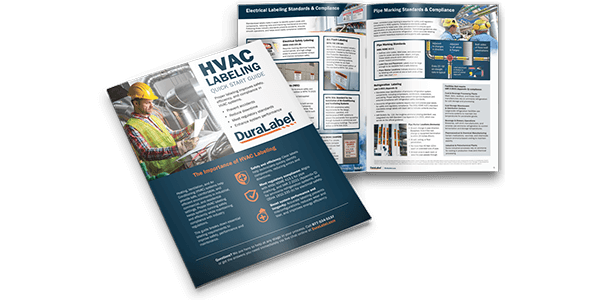
Boost safety, cut downtime, and meet HVAC labeling standards with confidence. This free guide shows you how to label ducts, pipes, and panels in line ...
Download
This resource covers industrial labeling solutions, compliance standards, and supply recommendations to help you choose the right DuraLabel supplies ...
Download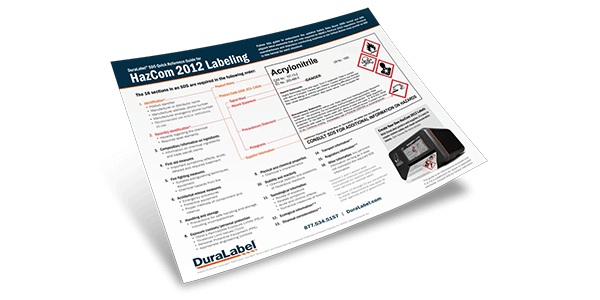
Stay compliant with OSHA’s HazCom 2012 regulations using this quick reference chart. This essential guide breaks down the 16 required sections of a ...
Download
Effectively manage your facility's assets with this guide. Learn how to streamline operations, reduce equipment loss, and ensure proper asset ...
Download
Enhance safety, efficiency, and organization in your facility with the Wayfinding Best Practice Guide. This comprehensive resource helps you ...
Download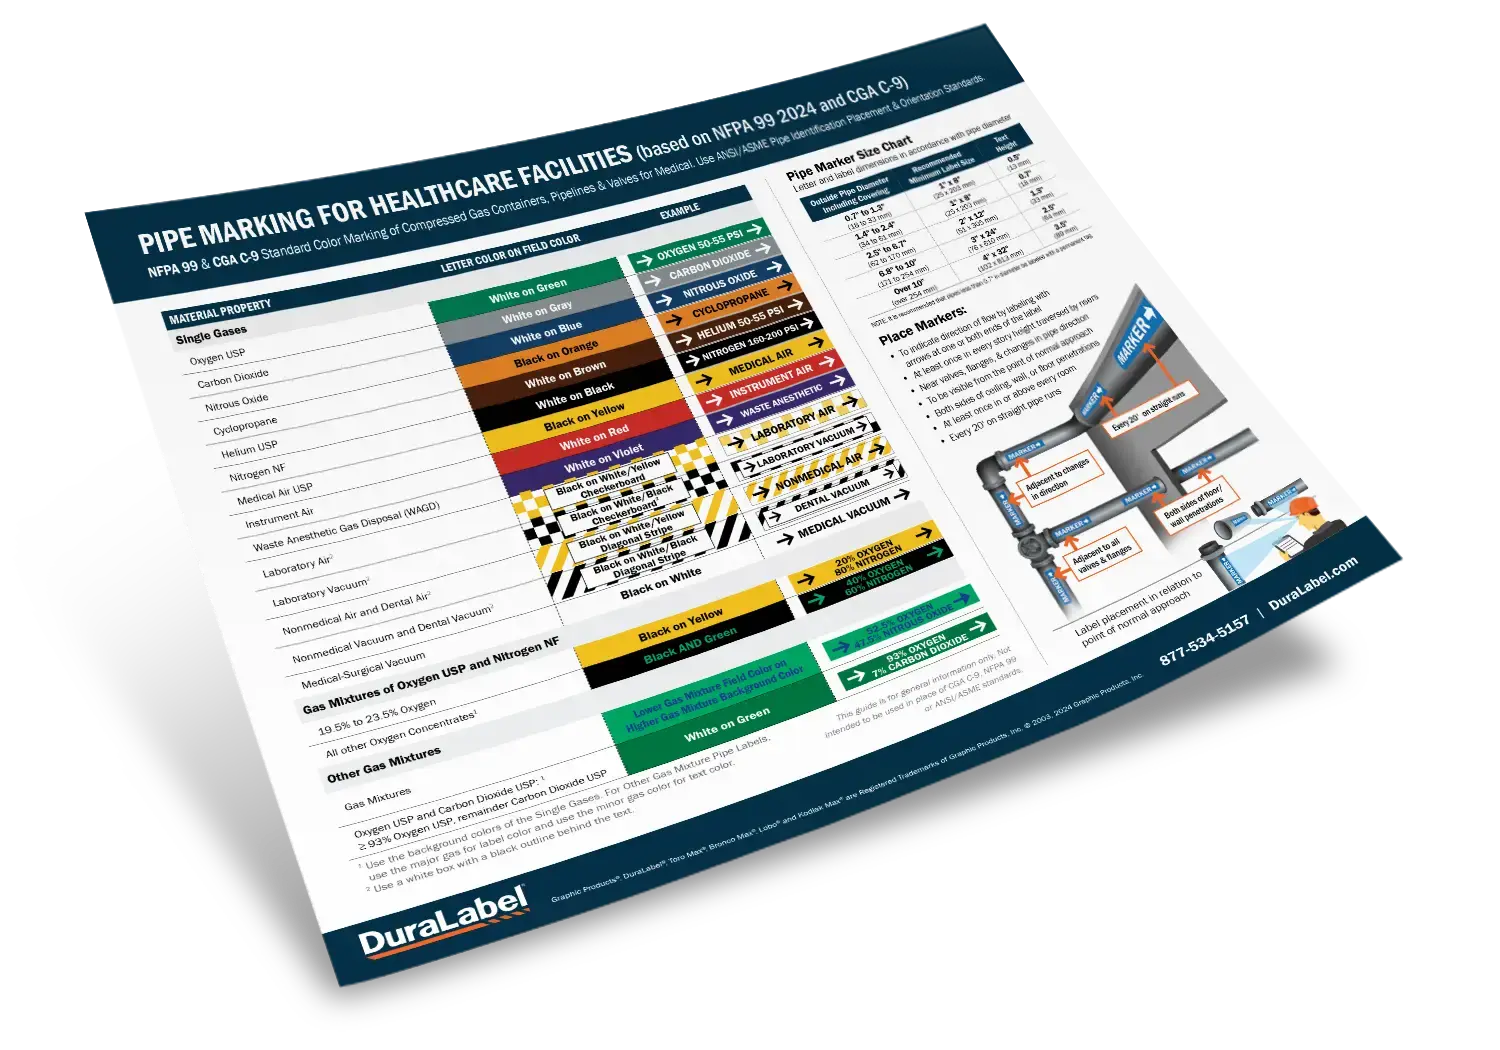
This guide is designed to help you easily understand which label colors and sizes to use, where to place them, and other crucial details, based on ...
Download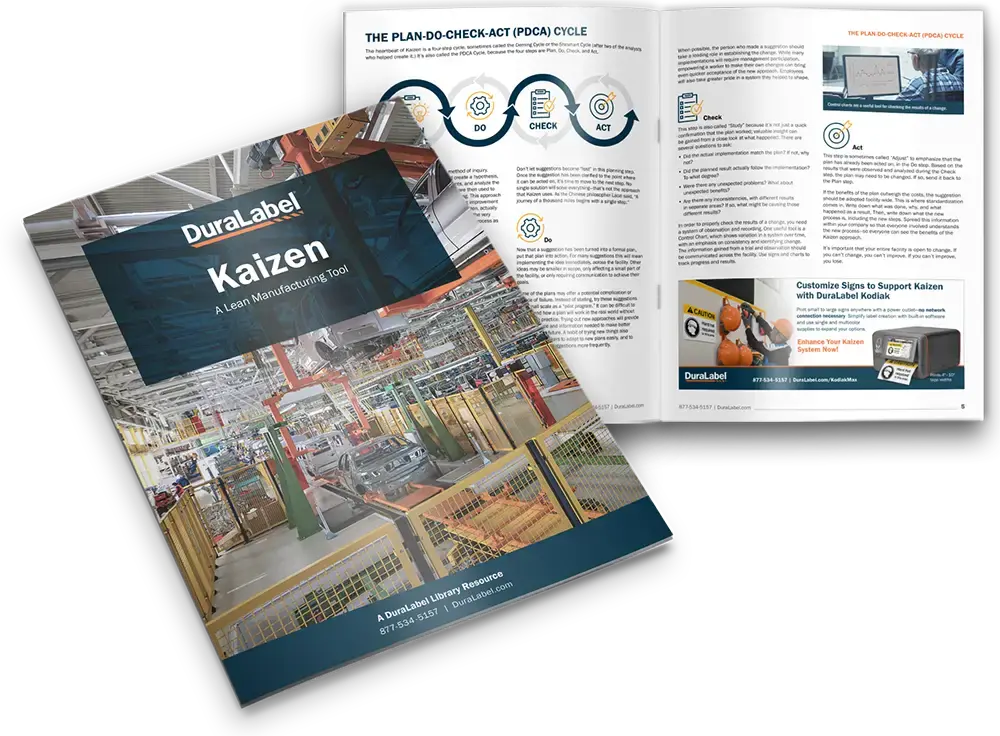
This guide offers actionable strategies for implementing Kaizen and the PDCA cycle in your facility. Learn how to enhance teamwork, foster worker ...
Download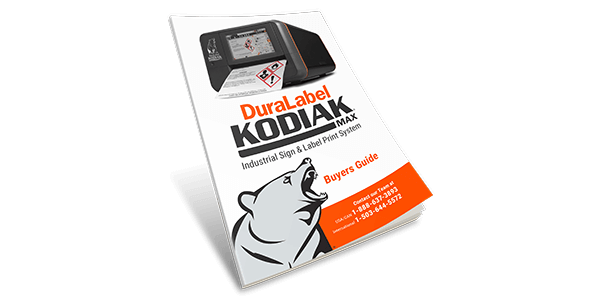
The DuraLabel Kodiak Max Print System delivers unmatched ease, precision, and durability for in-house sign and label creation. From safety signage to ...
Download
Enhance safety across your pharmaceutical facility with the Facility Safety Communication Quick Start Guide, designed to help you evaluate and ...
Download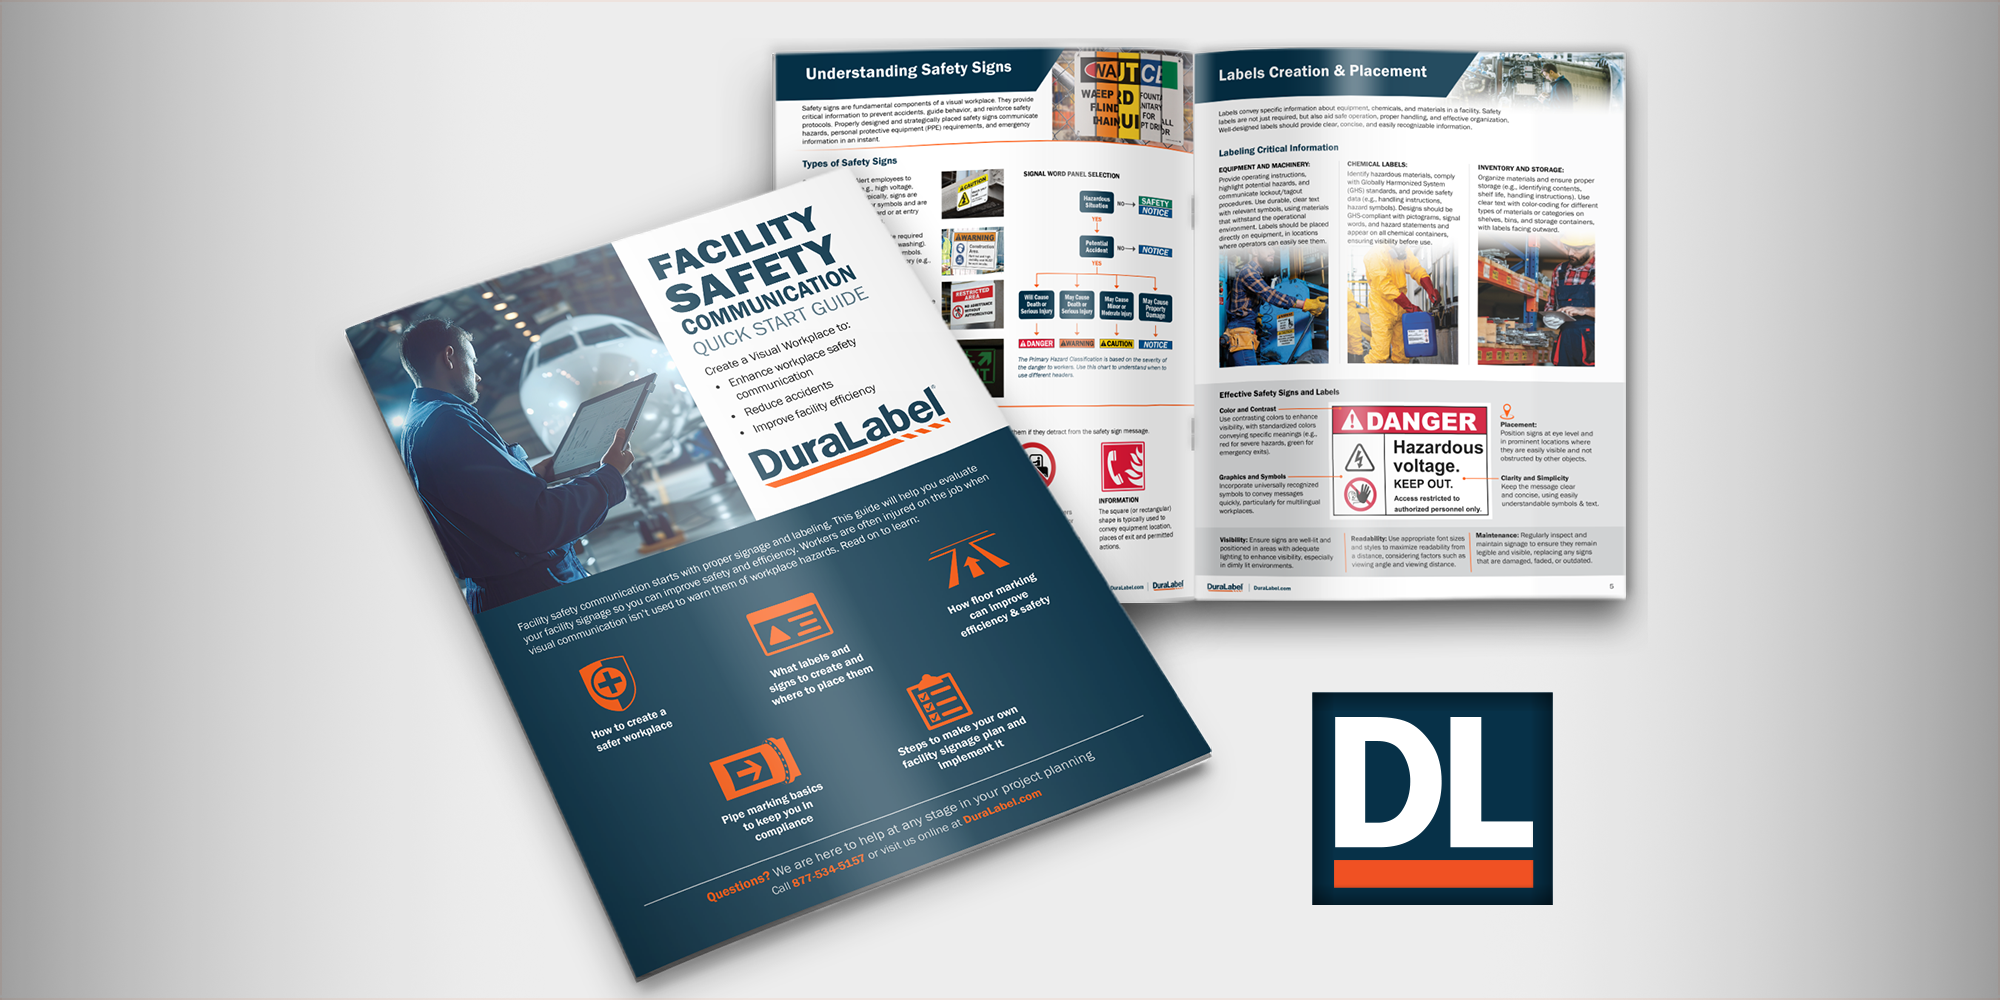
Elevate your aviation facility’s safety with the Facility Safety Communication Quick Start Guide, tailored to help you assess and optimize your ...
Download
Upgrade your facility's labeling process with the DuraLabel Toro Max Print System, designed for on-site efficiency and versatility. Whether you're ...
Download
Not sure where to start with facility signage? This free guide will help you determine what's required for your facility and identify the right ...
Download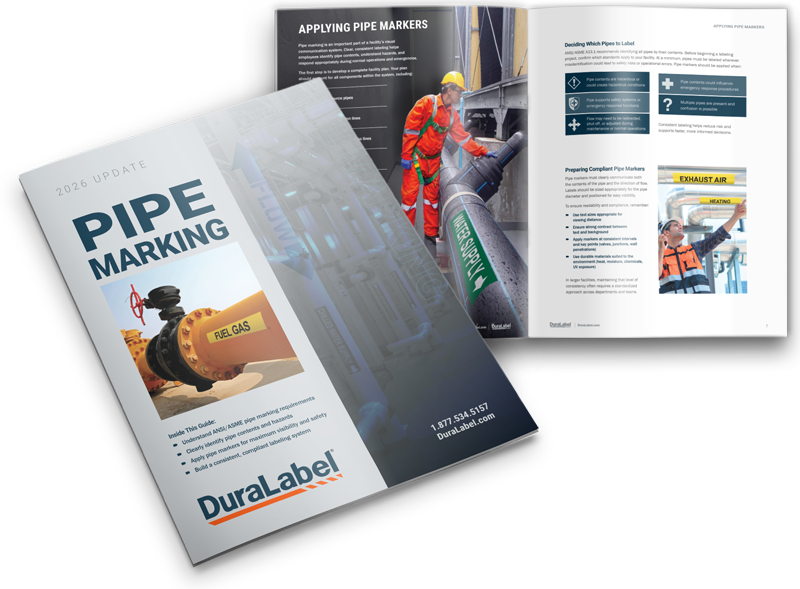
Pipes can carry a variety of substances, from hazardous chemicals to water or steam. Without proper labeling, identifying these contents can be ...
Download
This 8-page guide offers straightforward, best practices for labeling your facility according to OSHA and ANSI requirements. Learn how to create ...
Download.webp)
This guide highlights how electrical safety visual communication protects workers from electrical incidents and improves efficiency. By using clear ...
Download
Accurate arc flash labels play an important role in worker safety and regulatory compliance. This quick start guide provides practical instruction on ...
Download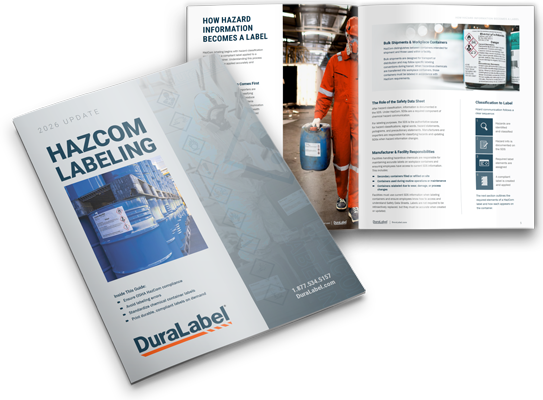
This quick start guide offers essential knowledge on hazard communication best practices to help you properly label hazardous materials in your ...
Download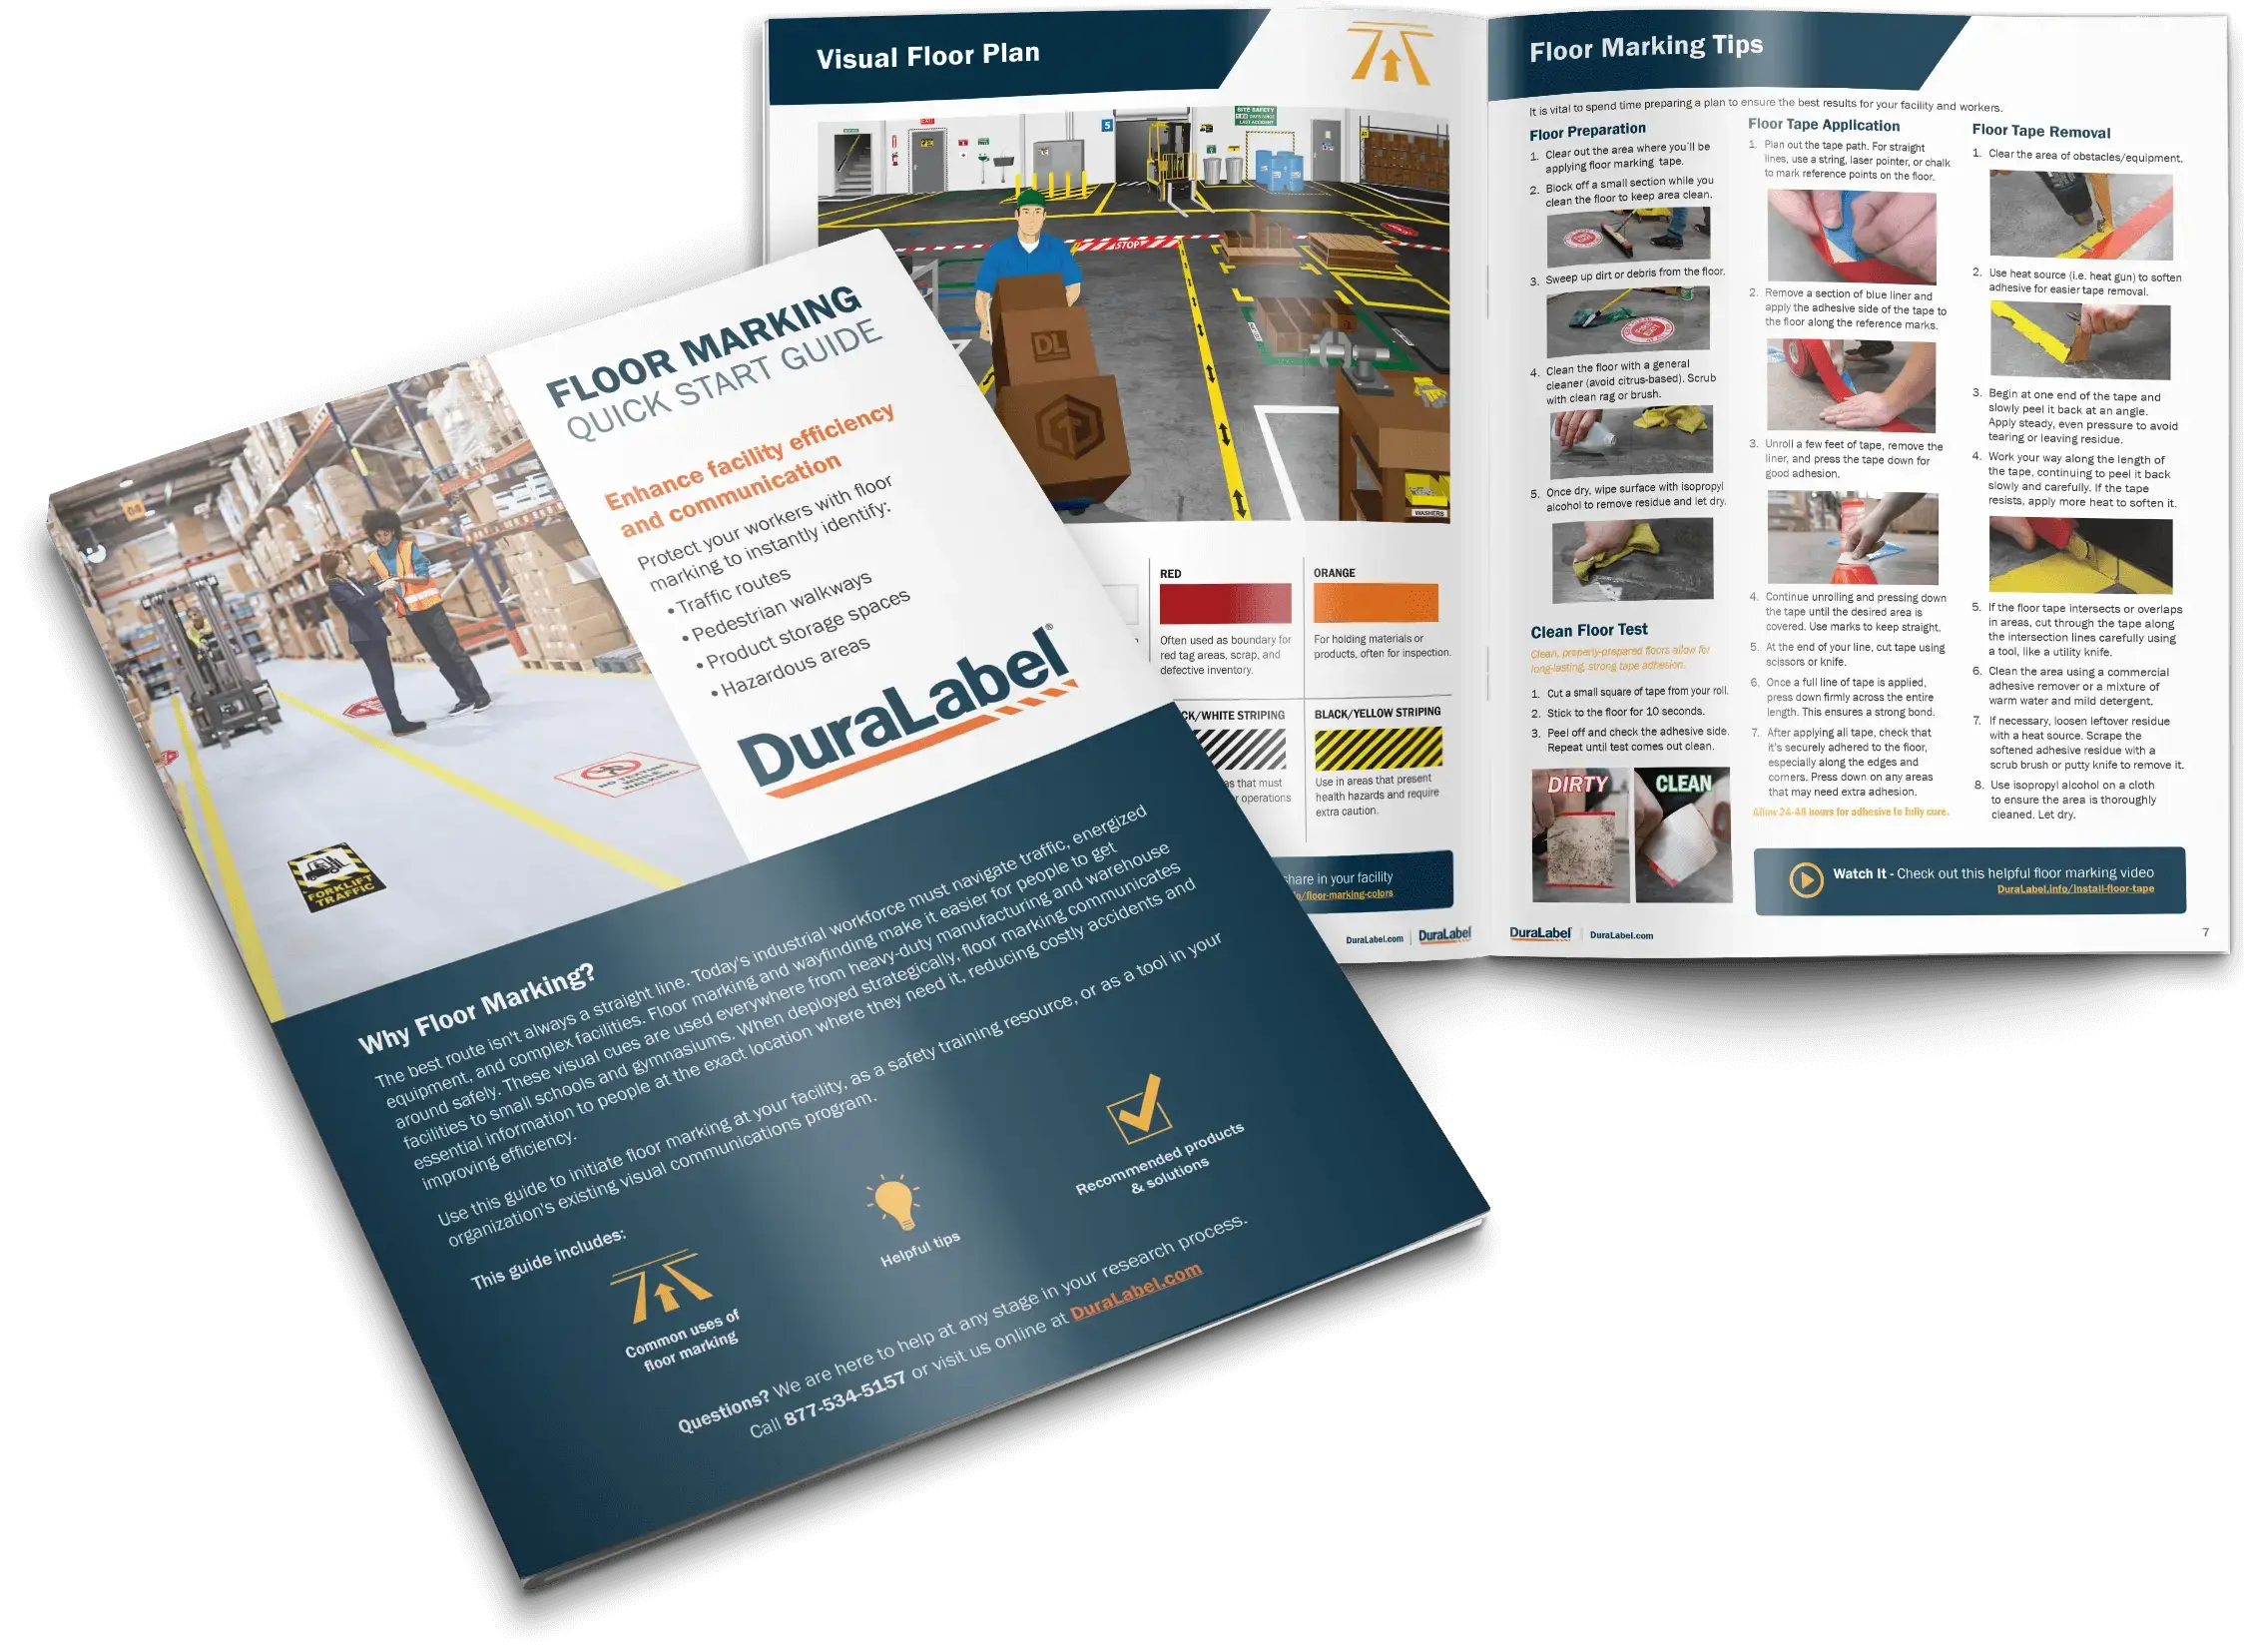
This guide provides the foundational steps to begin implementing effective floor marking in your facility. Whether you're starting fresh, using it as ...
Download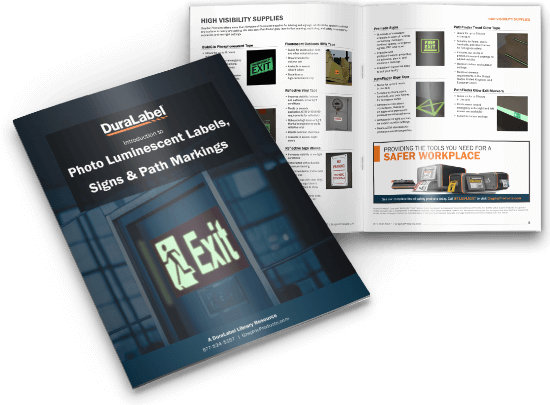
Glow-in-the-dark labels and signs play a vital role during power outages and low-visibility emergencies. This guide provides insights into key codes ...
Download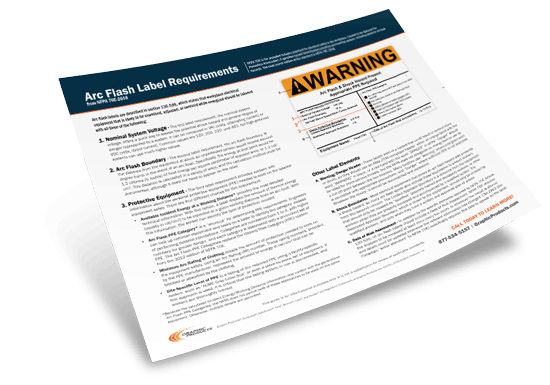
This one-page guide serves as a valuable quick reference that outlines the key information needed to meet arc flash labeling requirements. Whether ...
Download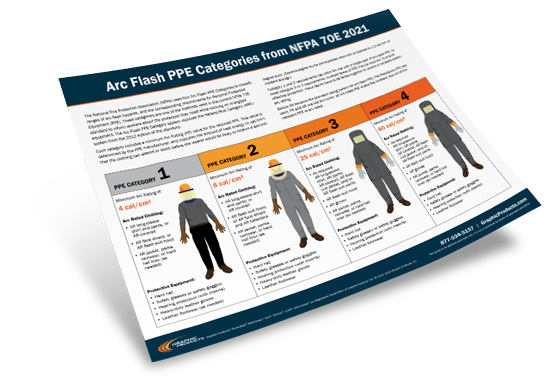
This illustrative quick reference guide simplifies the four arc flash PPE categories outlined in the NFPA 70E standard. Acting as an easy-to-follow ...
Download
This comprehensive guide outlines how to protect workers and maintain compliance in power generation facilities through proper labeling and visual ...
Download
EasyPower presents a clear guide to the Do's and Don'ts of arc flash equipment labeling, covering essential arc flash label requirements from the ...
Download
This resource provides essential information on arc flash labeling regulations, personal protective equipment (PPE) guidelines, and training ...
Download
This comprehensive guide walks you through the necessary steps for conducting an arc flash assessment, helping safety managers and electrical ...
Download
This quick reference chart is an essential resource for achieving optimal print contrast signals (PCS) for scanners. It provides valuable guidance on ...
Download
This full-color, 9-page guide serves as a vital resource for meeting wire and cable marking standards in your facility. It covers NEC standards, as ...
Download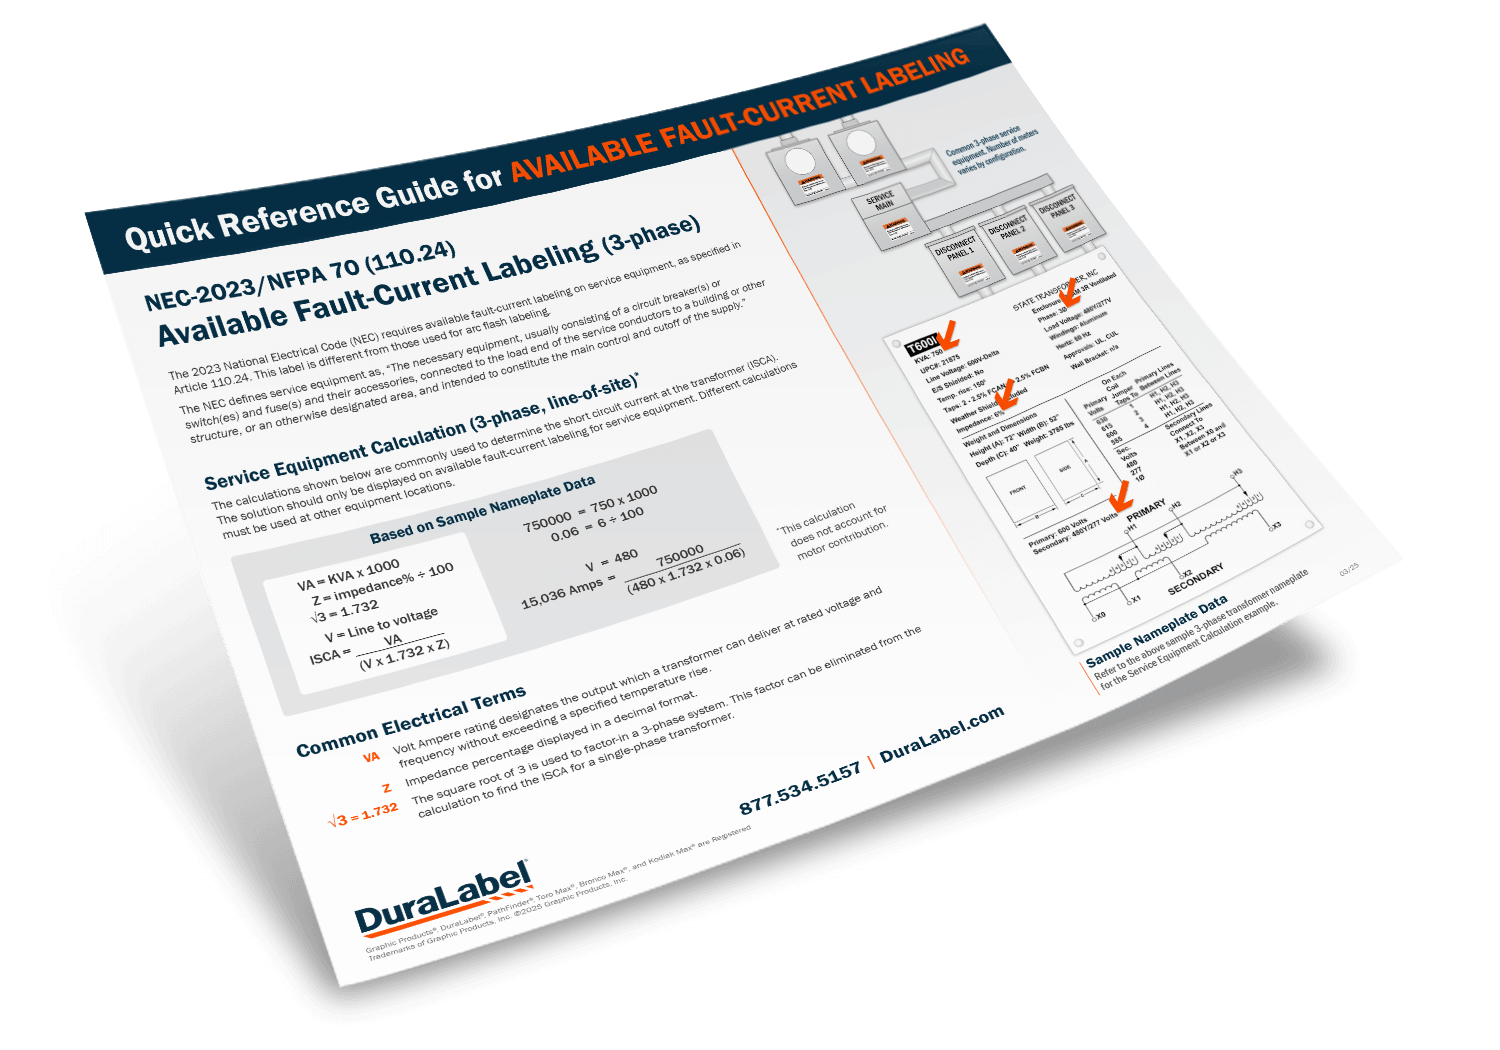
Stay ahead of NEC 110.24 requirements with this essential guide. Learn how to label available fault currents properly and perform accurate fault ...
Download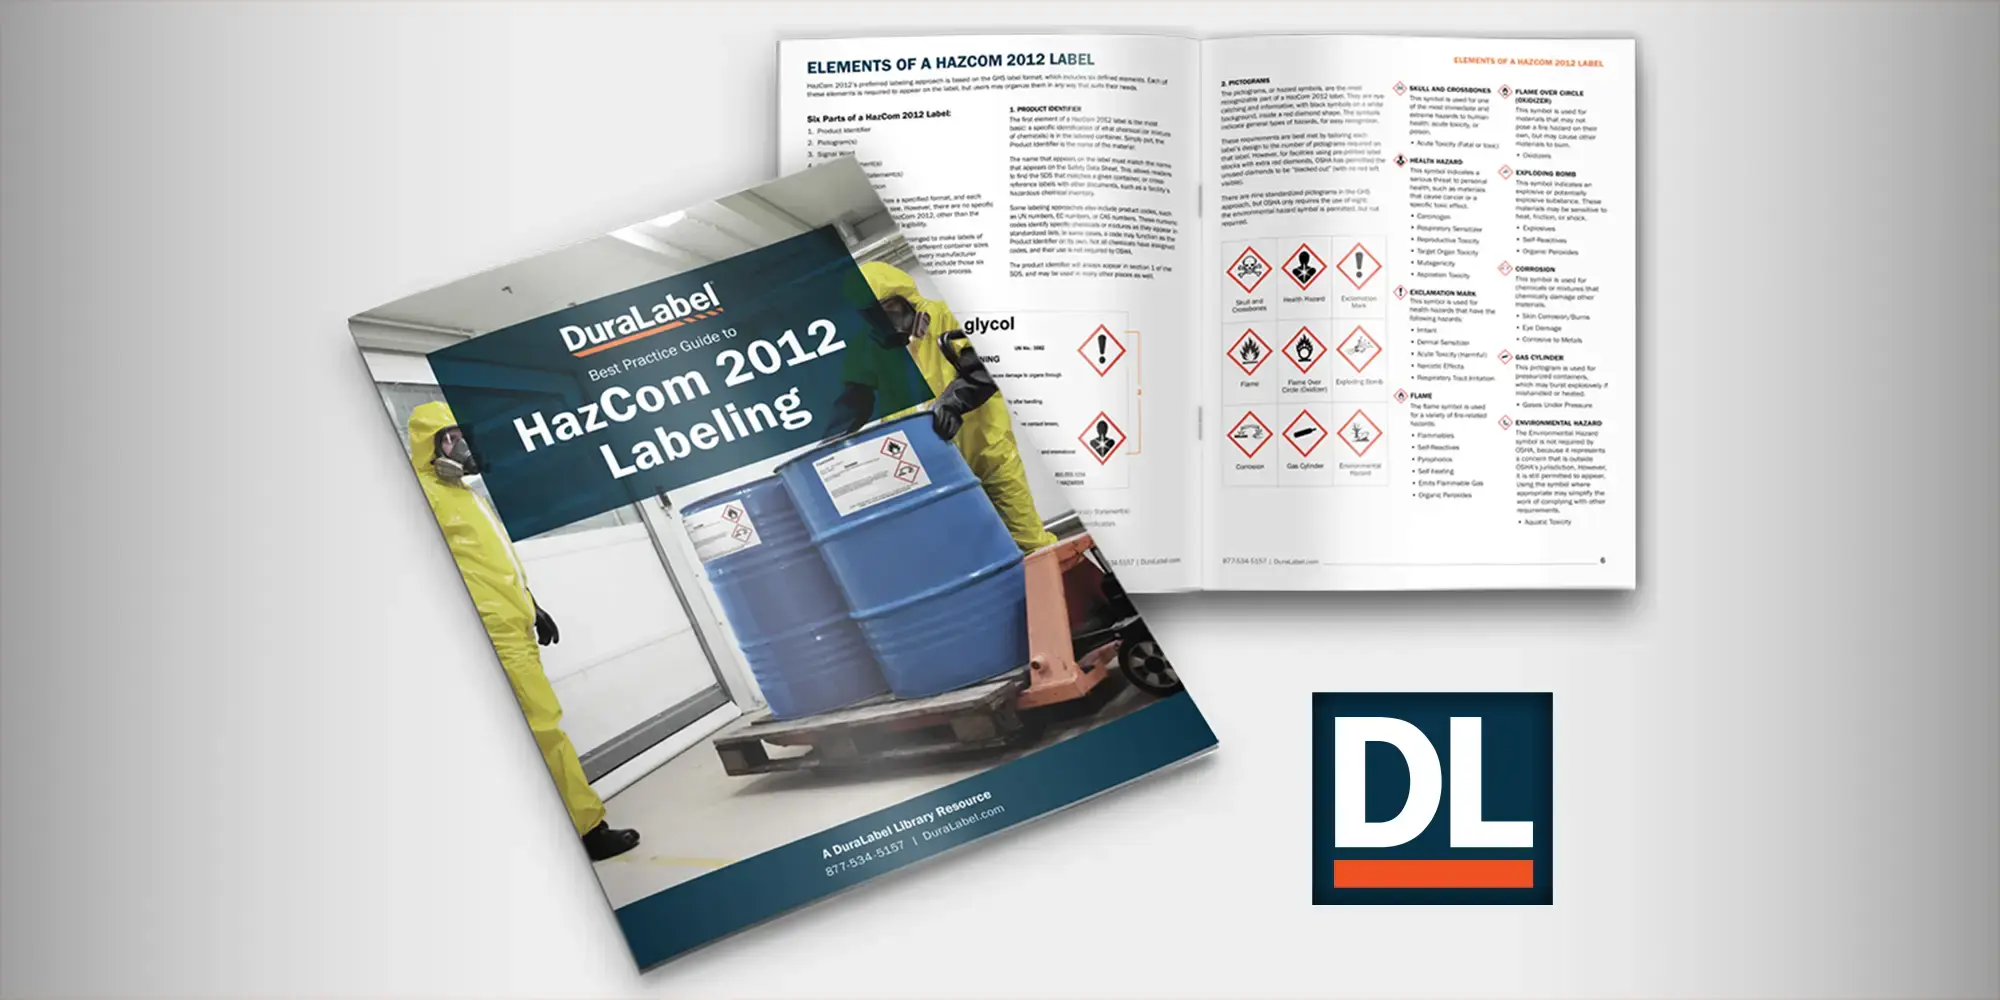
This 12-page guide is a critical resource for improving safety around hazardous chemicals while ensuring compliance with OSHA's HazCom 2012 ...
Download
This free guide serves as a critical resource for managers looking to reduce workplace incidents related to slips, trips, and falls. It covers the ...
Download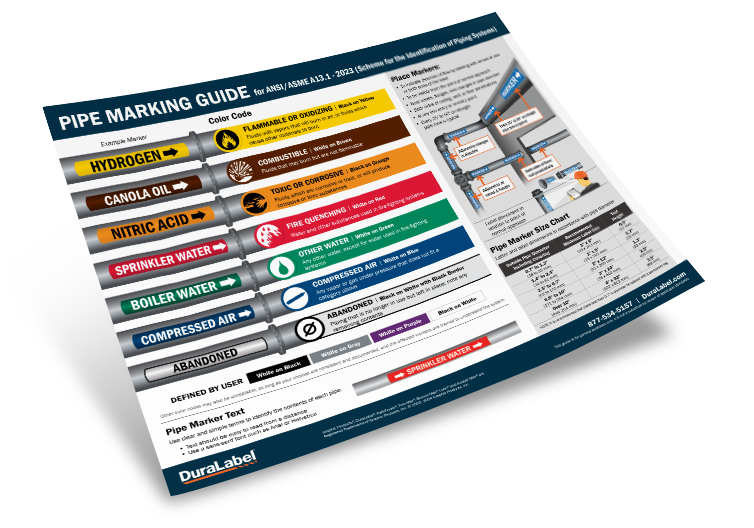
This full-color wall chart provides a quick reference for all your pipe labeling needs. Designed as a great training tool for safety managers, it ...
Download
Implementing or updating your pipe marking system is crucial for improving workplace safety and operational efficiency. This comprehensive guide ...
Download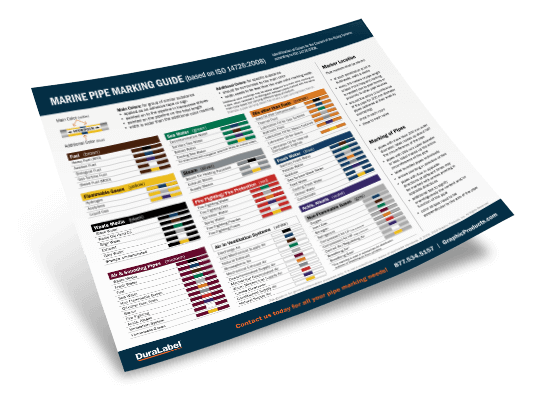
This helpful guide makes marine pipe marking easier by showing which label colors and sizes to use, where to place them, and more. No more searching ...
Download
This 36-page guide is a detailed resource designed to help you perform a thorough evaluation of your facility’s visual communication needs. Using ...
Download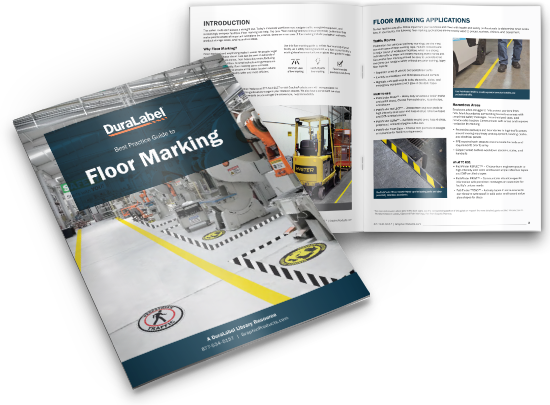
Create safer, more efficient pathways in your facility with this best practice guide. By implementing proper floor marking techniques, you can reduce ...
Download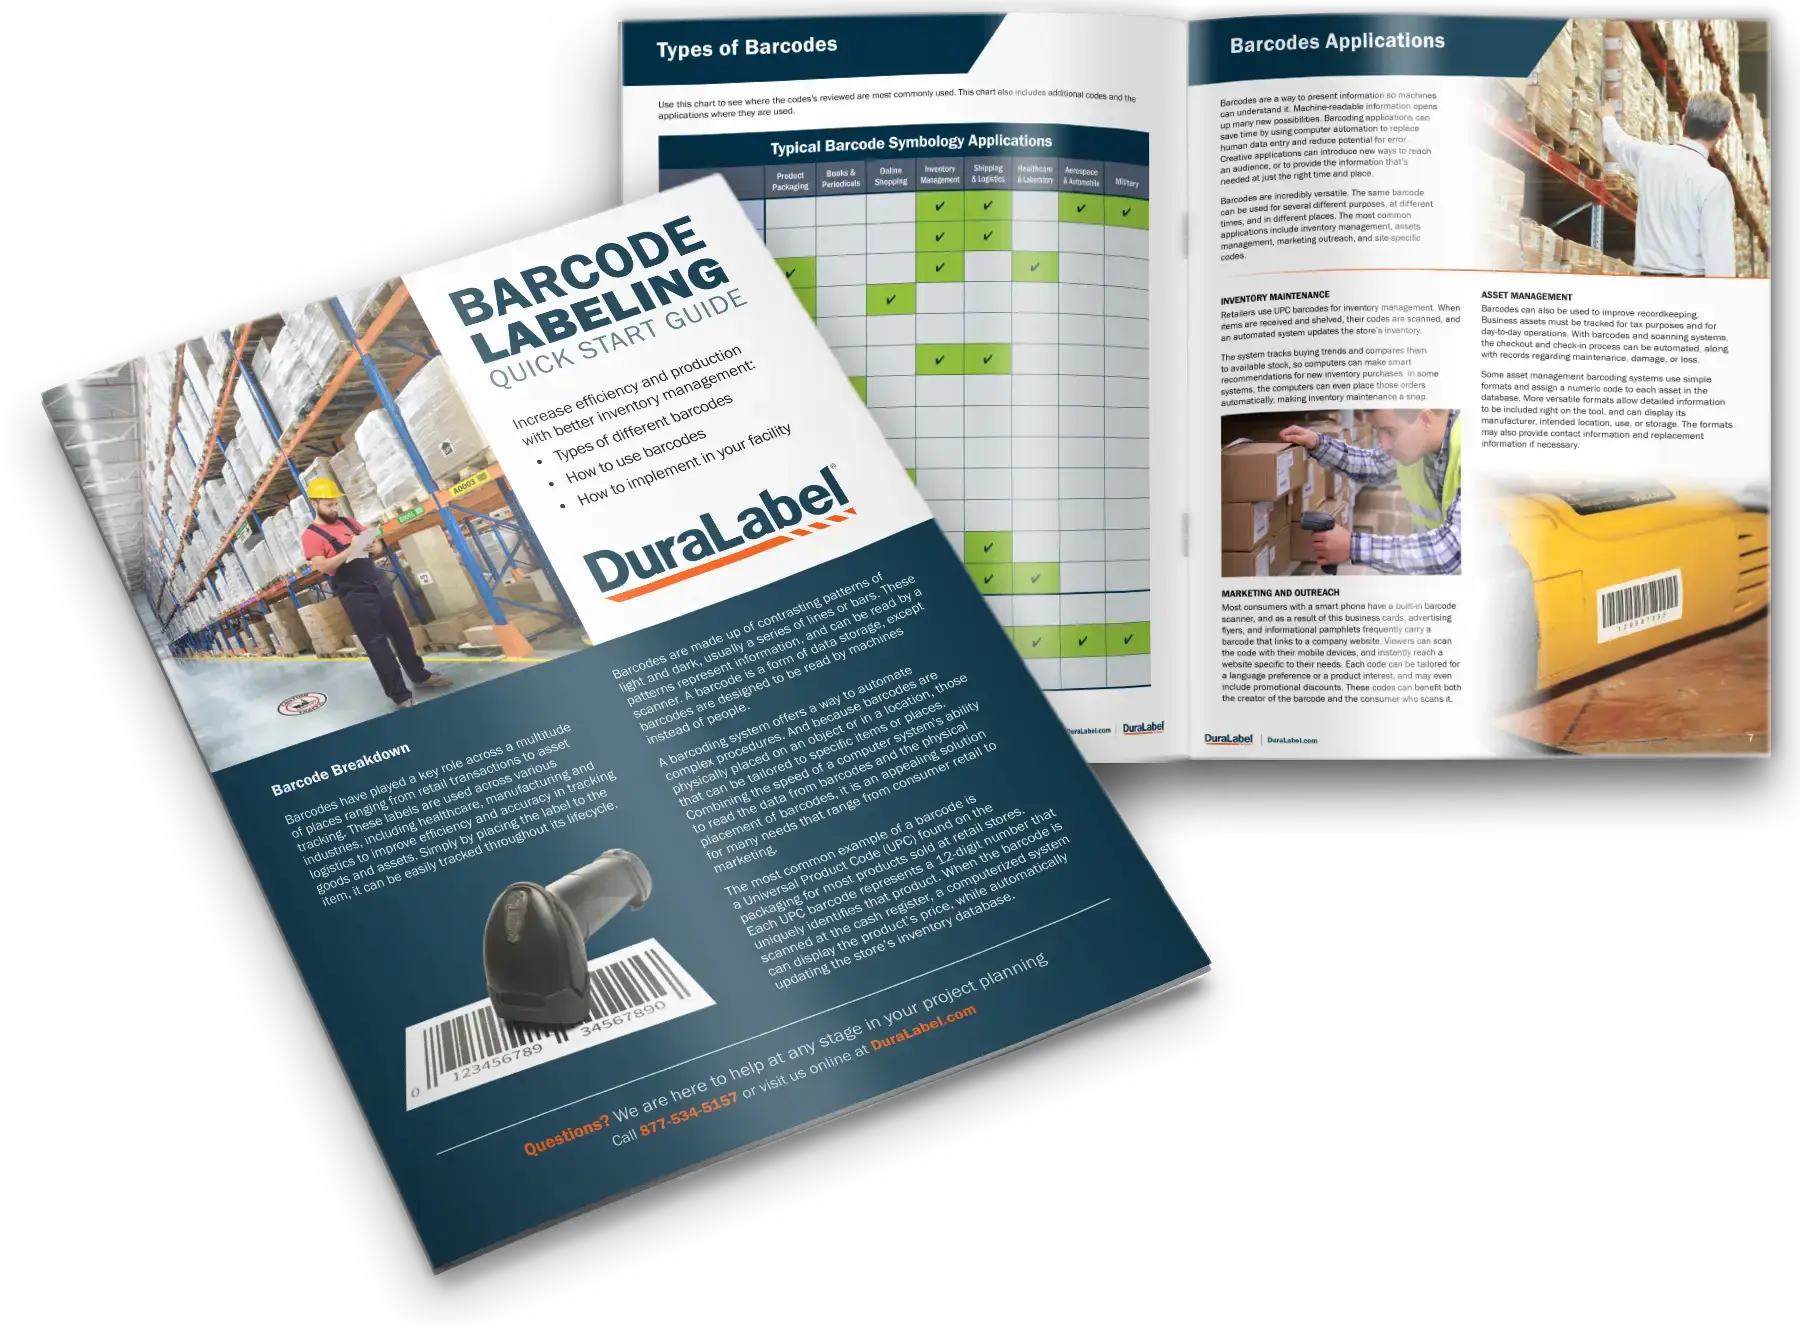
This 12-page guide simplifies barcode labeling with practical tips for creating efficient systems. Learn the differences between linear and 2D ...
Download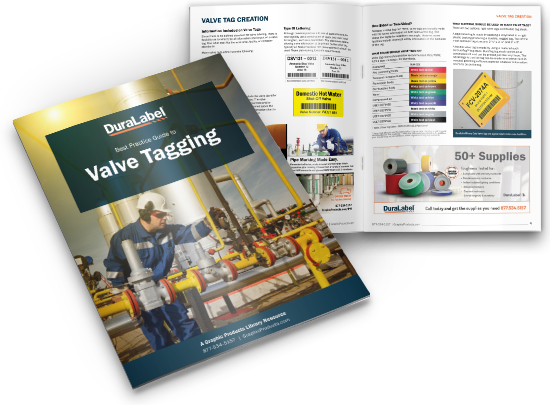
This comprehensive 12-page guide is the go-to resource for creating compliant valve tags in any facility. Designed for maintenance managers and ...
Download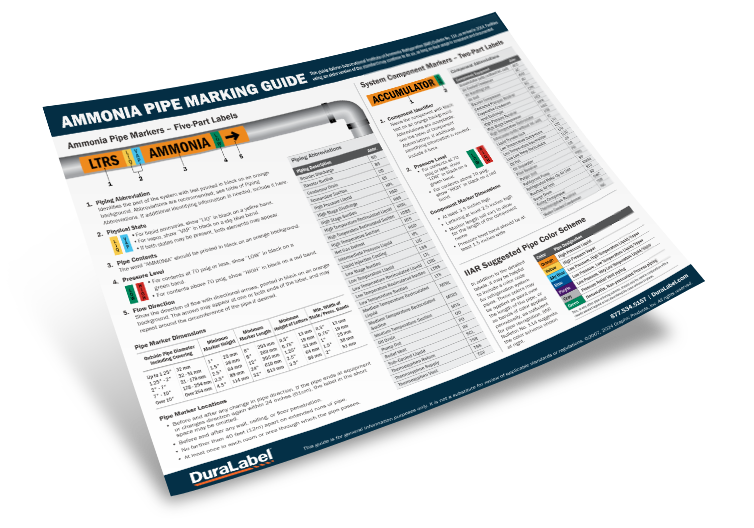
This reference chart outlines essential pipe and equipment labeling requirements for ammonia refrigeration systems. It provides a clear understanding ...
Download
This 20-page guide explores the common challenges faced by EHS management professionals in today’s workplace. It provides best practices for ...
Download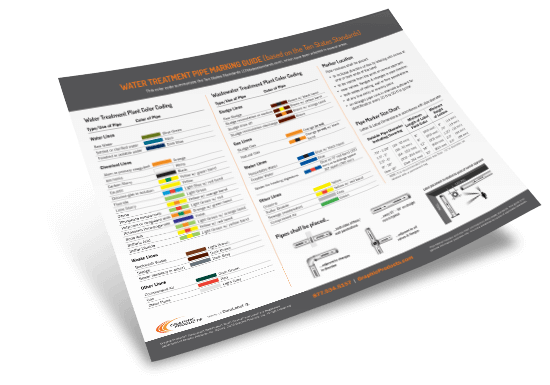
This reference chart is designed specifically for water and wastewater treatment plants, providing the necessary guidelines for effective pipe ...
Download
This essential resource is designed for construction site safety managers, general contractors, and subcontractors. It provides clear, step-by-step ...
Download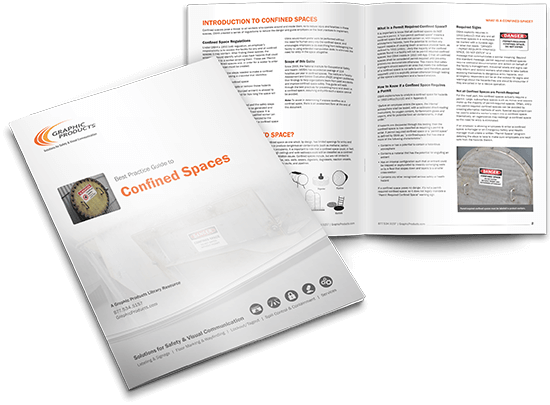
Get the confined spaces best practices guide to protect your workers from dangerous situations and ensure regulatory compliance. This comprehensive ...
Download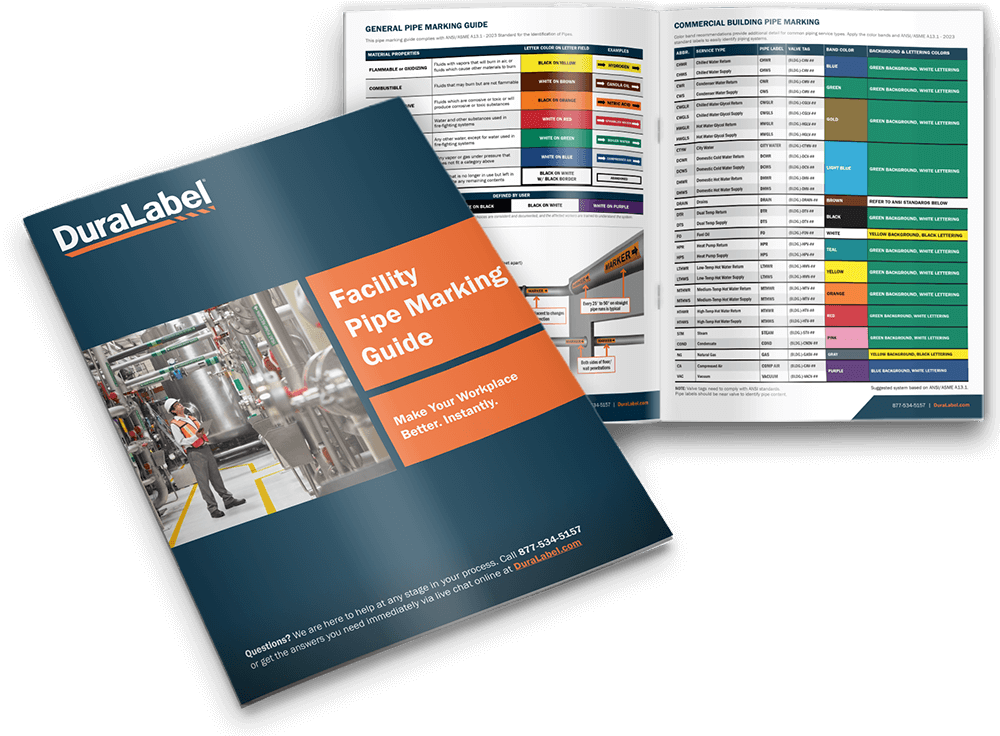
This guide provides everything you need to easily create and improve pipe marking systems in your facility. By streamlining processes, you’ll rapidly ...
Download
This guide will help you identify inefficiencies and implement visual solutions to improve workplace operations. It covers how the visual workplace ...
Download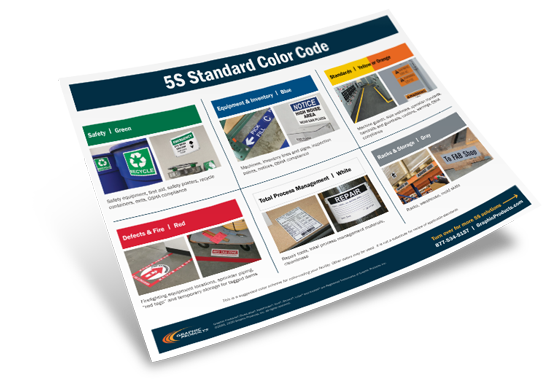
Enhance your 5S workplace organization with this quick-reference 5S color coding guide and chart. Designed for lean facilities and visual factories, ...
Download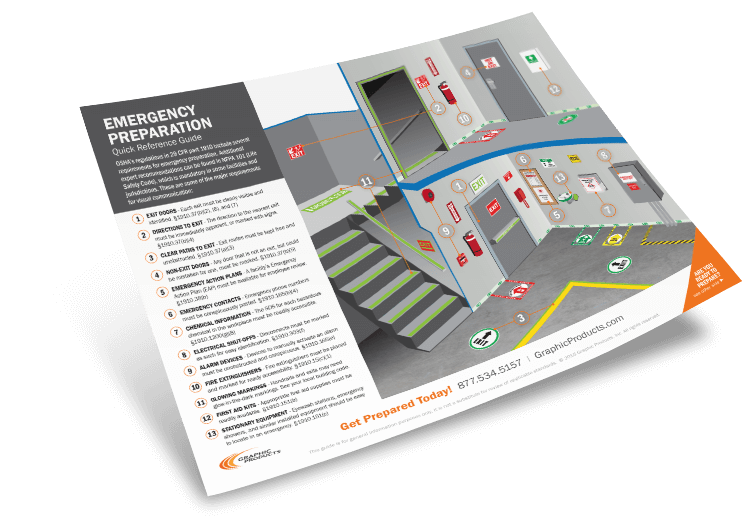
This essential reference will help you quickly check your facility's preparedness for emergencies. See examples of key emergency evacuation signage ...
Download
This essential guide provides a comprehensive look at applying continuous improvement (CI) strategies to mining operations. Learn how to improve ...
Download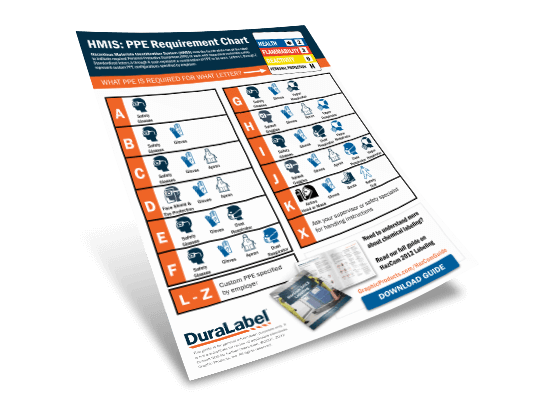
This handy reference chart provides a quick and clear guide to understanding the personal protective equipment (PPE) requirements for handling ...
Download
This informative, 12-page guide is an essential resource for developing and implementing a Lockout/Tagout (LO/TO) program in any facility. Learn how ...
Download
This guide is an essential resource for improving the safety of photovoltaic systems by ensuring compliance with the latest solar labeling ...
Download
This guide provides step-by-step instructions for implementing an effective Kanban system to improve workflow, reduce waste, and increase efficiency. ...
Download
This free 28-page guide is a must-have resource for anyone looking to improve workplace efficiency through the lean manufacturing processes. You'll ...
Download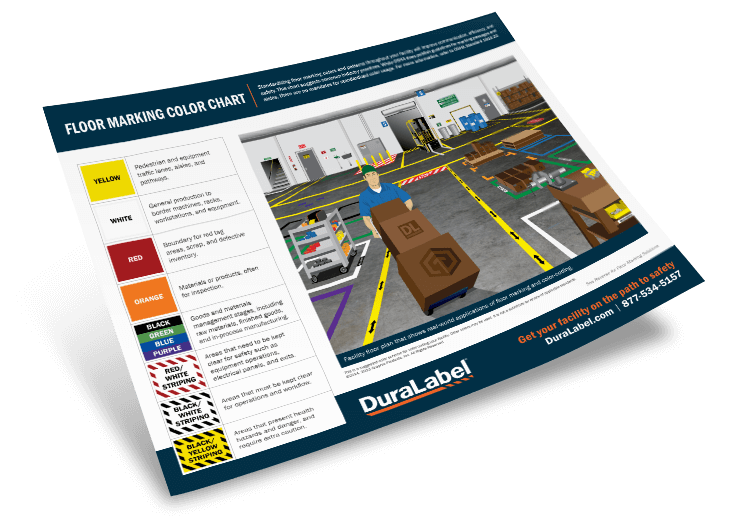
This full-color reference chart is an essential tool for optimizing safety and efficiency in your facility. With real-world examples of floor marking ...
Download
This guide explains essential safety labeling and signage requirements for the oil and gas industry. It breaks down the most relevant regulations and ...
Download
This 20-page guide provides essential industry best practices for creating safety signs that meet OSHA and ANSI standards. Learn how to assess your ...
Download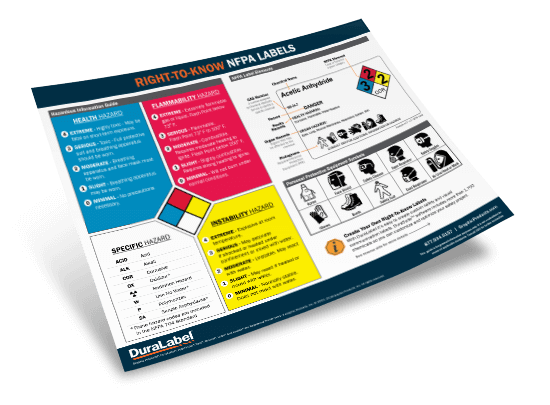
Quickly understand NFPA Diamond labels with this free, comprehensive reference chart. It explains the hazard information conveyed through each color ...
Download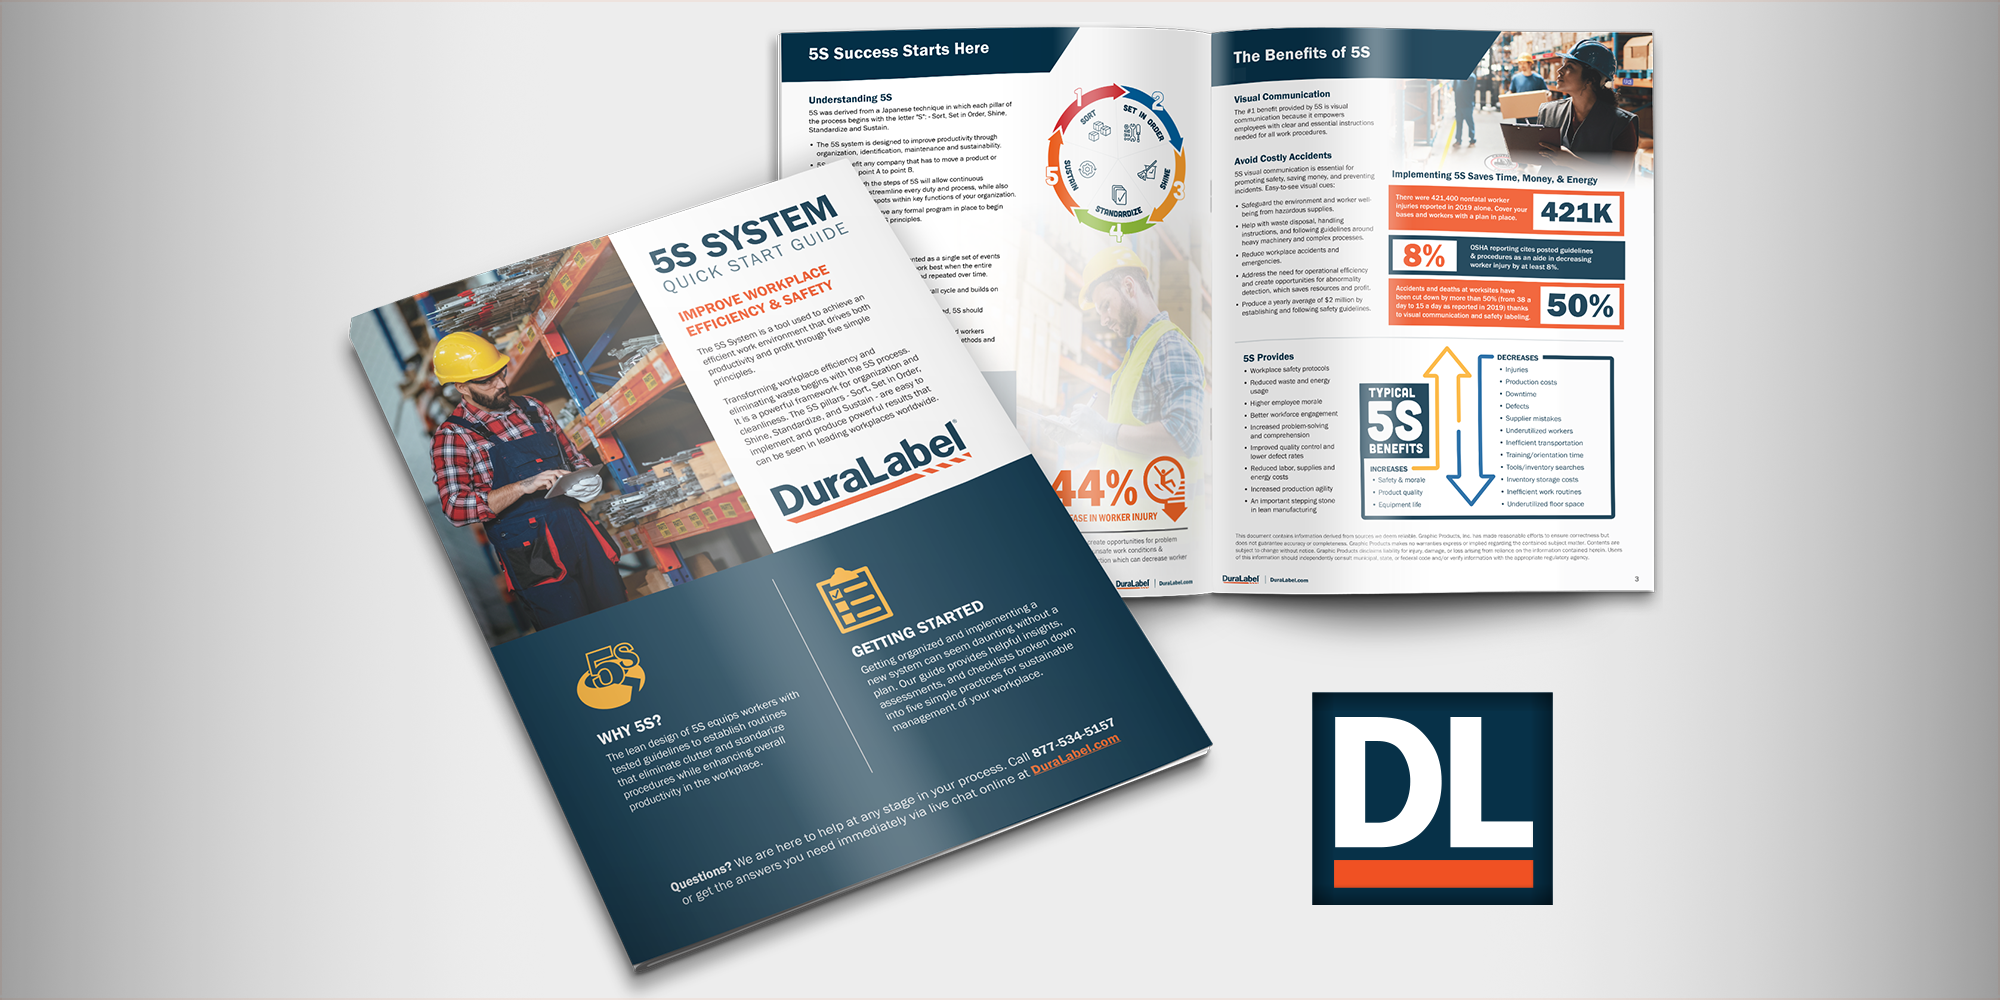
This quick guide helps you build an effective 5S system tailored to your environment. Whether you're new to 5S or looking to refine your approach, ...
Download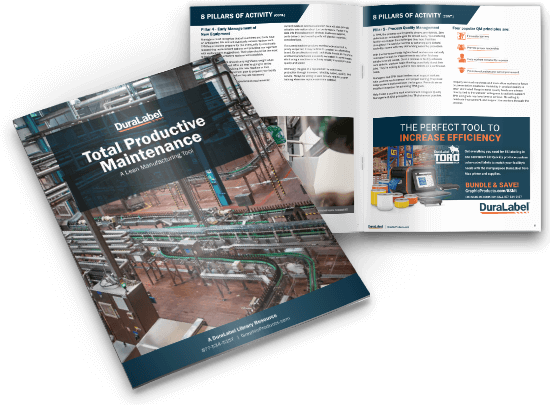
Proactively monitoring machines and tools is key to reducing downtime and enhancing productivity. This in-depth guide provides actionable strategies ...
Download
Cranes are vital to many industries, but they come with significant safety challenges. This guide delves into the two key approaches—administrative ...
Download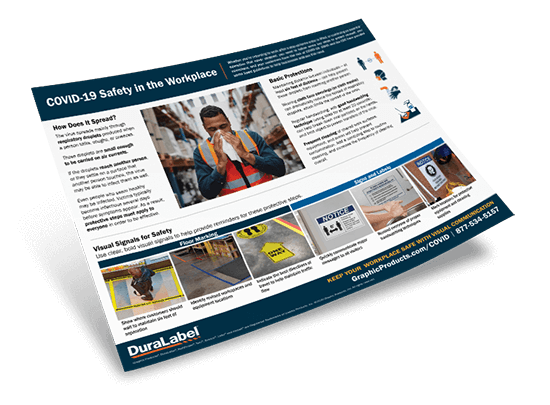
This colorful chart helps staff follow essential actions to prevent the spread of COVID-19 in the workplace. Learn how the virus spreads, understand ...
Download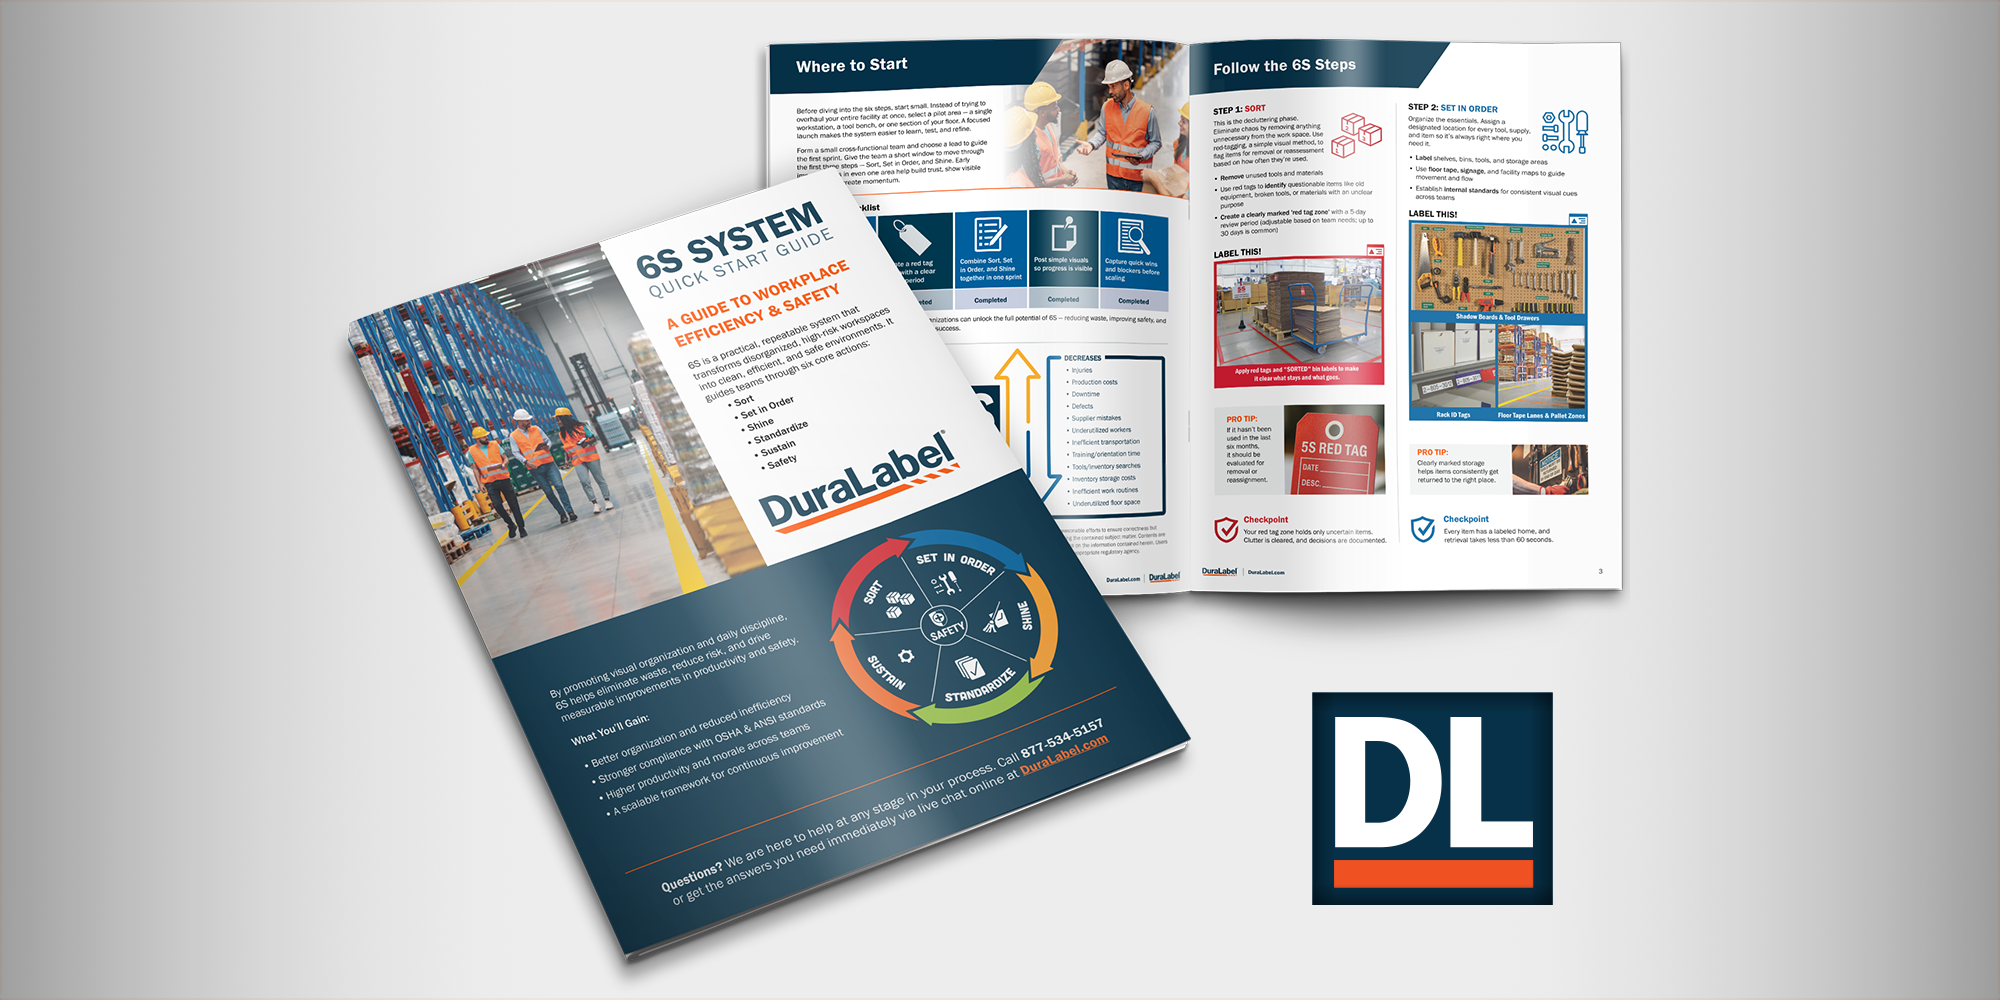
This guide walks you through the steps to implement a lean manufacturing 6S system, which integrates safety into the 5S process. You'll gain ...
Download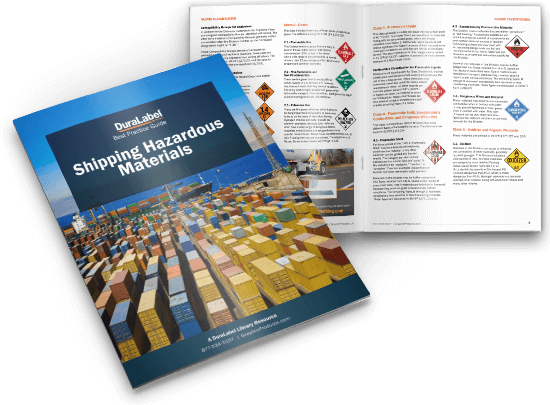
Download Now What does the DOT require for safe transportation of hazardous materials? This guide explains the basics of the Hazardous Materials ...
Download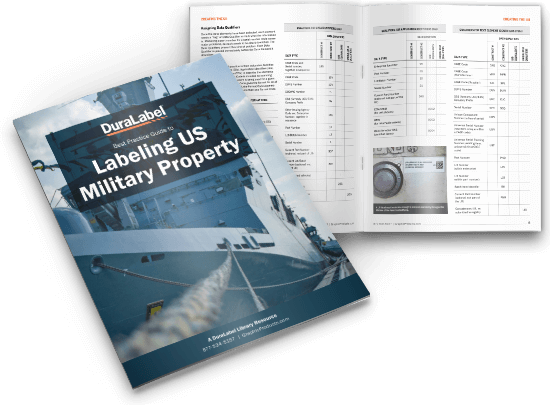
This in-depth guide is an essential reference for anyone tasked with labeling military property. It covers the criteria outlined in the MIL-STD-130N ...
Download
Not sure where to start with warehouse labeling? This free guide outlines the key steps for building a safe, efficient, and compliant labeling ...
Download
Not sure which DuraLabel Industrial Sign and Label System fits your needs? This flyer makes it easy to compare Bronco Max, Toro Max, and Kodiak ...
Download
Ready to upgrade your sign and label printer? This flyer explains how to trade in any printer—DuraLabel or competitor—for up to $1,000 in credit ...
Download
Discover the advantages of a reliable industrial sign and label system built for performance. The Bronco Max Buyer’s Guide covers key features, ...
Download
Effectively manage your facility's assets with this guide. Learn how to streamline operations, reduce equipment loss, and ensure proper asset ...
Download
Enhance safety, efficiency, and organization in your facility with the Wayfinding Best Practice Guide. This comprehensive resource helps you ...
Download
This guide offers actionable strategies for implementing Kaizen and the PDCA cycle in your facility. Learn how to enhance teamwork, foster worker ...
Download
The DuraLabel Kodiak Max Print System delivers unmatched ease, precision, and durability for in-house sign and label creation. From safety signage to ...
Download
Elevate your aviation facility’s safety with the Facility Safety Communication Quick Start Guide, tailored to help you assess and optimize your ...
Download
Upgrade your facility's labeling process with the DuraLabel Toro Max Print System, designed for on-site efficiency and versatility. Whether you're ...
Download
This quick reference chart is an essential resource for achieving optimal print contrast signals (PCS) for scanners. It provides valuable guidance on ...
Download
This 36-page guide is a detailed resource designed to help you perform a thorough evaluation of your facility’s visual communication needs. Using ...
Download
This 12-page guide simplifies barcode labeling with practical tips for creating efficient systems. Learn the differences between linear and 2D ...
Download
This guide will help you identify inefficiencies and implement visual solutions to improve workplace operations. It covers how the visual workplace ...
Download
Enhance your 5S workplace organization with this quick-reference 5S color coding guide and chart. Designed for lean facilities and visual factories, ...
Download
This guide provides step-by-step instructions for implementing an effective Kanban system to improve workflow, reduce waste, and increase efficiency. ...
Download
This free 28-page guide is a must-have resource for anyone looking to improve workplace efficiency through the lean manufacturing processes. You'll ...
Download
This quick guide helps you build an effective 5S system tailored to your environment. Whether you're new to 5S or looking to refine your approach, ...
Download
Proactively monitoring machines and tools is key to reducing downtime and enhancing productivity. This in-depth guide provides actionable strategies ...
Download
This guide walks you through the steps to implement a lean manufacturing 6S system, which integrates safety into the 5S process. You'll gain ...
Download
Not sure what’s changing with arc flash labeling under NEC 2026? This flyer breaks down the latest updates and what they mean for a facility—helping ...
Download
Labeling is critical in keeping today’s data-driven operations organized, secure, and compliant. From cable management to critical power systems, ...
Download
Not sure which DuraLabel Industrial Sign and Label System fits your needs? This flyer makes it easy to compare Bronco Max, Toro Max, and Kodiak ...
Download
Ready to upgrade your sign and label printer? This flyer explains how to trade in any printer—DuraLabel or competitor—for up to $1,000 in credit ...
Download
Discover the advantages of a reliable industrial sign and label system built for performance. The Bronco Max Buyer’s Guide covers key features, ...
Download
Boost safety, cut downtime, and meet HVAC labeling standards with confidence. This free guide shows you how to label ducts, pipes, and panels in line ...
Download
This resource covers industrial labeling solutions, compliance standards, and supply recommendations to help you choose the right DuraLabel supplies ...
Download
The DuraLabel Kodiak Max Print System delivers unmatched ease, precision, and durability for in-house sign and label creation. From safety signage to ...
Download
Elevate your aviation facility’s safety with the Facility Safety Communication Quick Start Guide, tailored to help you assess and optimize your ...
Download
Upgrade your facility's labeling process with the DuraLabel Toro Max Print System, designed for on-site efficiency and versatility. Whether you're ...
Download
This guide highlights how electrical safety visual communication protects workers from electrical incidents and improves efficiency. By using clear ...
Download
Accurate arc flash labels play an important role in worker safety and regulatory compliance. This quick start guide provides practical instruction on ...
Download
This one-page guide serves as a valuable quick reference that outlines the key information needed to meet arc flash labeling requirements. Whether ...
Download
This illustrative quick reference guide simplifies the four arc flash PPE categories outlined in the NFPA 70E standard. Acting as an easy-to-follow ...
Download
This comprehensive guide outlines how to protect workers and maintain compliance in power generation facilities through proper labeling and visual ...
Download
EasyPower presents a clear guide to the Do's and Don'ts of arc flash equipment labeling, covering essential arc flash label requirements from the ...
Download
This resource provides essential information on arc flash labeling regulations, personal protective equipment (PPE) guidelines, and training ...
Download
This comprehensive guide walks you through the necessary steps for conducting an arc flash assessment, helping safety managers and electrical ...
Download
Stay ahead of NEC 110.24 requirements with this essential guide. Learn how to label available fault currents properly and perform accurate fault ...
Download
This informative, 12-page guide is an essential resource for developing and implementing a Lockout/Tagout (LO/TO) program in any facility. Learn how ...
Download
This guide is an essential resource for improving the safety of photovoltaic systems by ensuring compliance with the latest solar labeling ...
Download
Not sure where to start with warehouse labeling? This free guide outlines the key steps for building a safe, efficient, and compliant labeling ...
Download
Enhance safety, efficiency, and organization in your facility with the Wayfinding Best Practice Guide. This comprehensive resource helps you ...
Download
This guide provides the foundational steps to begin implementing effective floor marking in your facility. Whether you're starting fresh, using it as ...
Download
Create safer, more efficient pathways in your facility with this best practice guide. By implementing proper floor marking techniques, you can reduce ...
Download
This full-color reference chart is an essential tool for optimizing safety and efficiency in your facility. With real-world examples of floor marking ...
Download
Not sure which DuraLabel Industrial Sign and Label System fits your needs? This flyer makes it easy to compare Bronco Max, Toro Max, and Kodiak ...
Download
Ready to upgrade your sign and label printer? This flyer explains how to trade in any printer—DuraLabel or competitor—for up to $1,000 in credit ...
Download
Discover the advantages of a reliable industrial sign and label system built for performance. The Bronco Max Buyer’s Guide covers key features, ...
Download
This resource covers industrial labeling solutions, compliance standards, and supply recommendations to help you choose the right DuraLabel supplies ...
Download
Stay compliant with OSHA’s HazCom 2012 regulations using this quick reference chart. This essential guide breaks down the 16 required sections of a ...
Download
The DuraLabel Kodiak Max Print System delivers unmatched ease, precision, and durability for in-house sign and label creation. From safety signage to ...
Download
Upgrade your facility's labeling process with the DuraLabel Toro Max Print System, designed for on-site efficiency and versatility. Whether you're ...
Download
This quick start guide offers essential knowledge on hazard communication best practices to help you properly label hazardous materials in your ...
Download
This 12-page guide is a critical resource for improving safety around hazardous chemicals while ensuring compliance with OSHA's HazCom 2012 ...
Download
This guide explains essential safety labeling and signage requirements for the oil and gas industry. It breaks down the most relevant regulations and ...
Download
Quickly understand NFPA Diamond labels with this free, comprehensive reference chart. It explains the hazard information conveyed through each color ...
Download
Download Now What does the DOT require for safe transportation of hazardous materials? This guide explains the basics of the Hazardous Materials ...
Download
Not sure what’s changing with arc flash labeling under NEC 2026? This flyer breaks down the latest updates and what they mean for a facility—helping ...
Download
Not sure where to start with warehouse labeling? This free guide outlines the key steps for building a safe, efficient, and compliant labeling ...
Download
Not sure which DuraLabel Industrial Sign and Label System fits your needs? This flyer makes it easy to compare Bronco Max, Toro Max, and Kodiak ...
Download
Ready to upgrade your sign and label printer? This flyer explains how to trade in any printer—DuraLabel or competitor—for up to $1,000 in credit ...
Download
Discover the advantages of a reliable industrial sign and label system built for performance. The Bronco Max Buyer’s Guide covers key features, ...
Download
Boost safety, cut downtime, and meet HVAC labeling standards with confidence. This free guide shows you how to label ducts, pipes, and panels in line ...
Download
This resource covers industrial labeling solutions, compliance standards, and supply recommendations to help you choose the right DuraLabel supplies ...
Download
This guide is designed to help you easily understand which label colors and sizes to use, where to place them, and other crucial details, based on ...
Download
The DuraLabel Kodiak Max Print System delivers unmatched ease, precision, and durability for in-house sign and label creation. From safety signage to ...
Download
Enhance safety across your pharmaceutical facility with the Facility Safety Communication Quick Start Guide, designed to help you evaluate and ...
Download
Upgrade your facility's labeling process with the DuraLabel Toro Max Print System, designed for on-site efficiency and versatility. Whether you're ...
Download
This 8-page guide offers straightforward, best practices for labeling your facility according to OSHA and ANSI requirements. Learn how to create ...
Download
Glow-in-the-dark labels and signs play a vital role during power outages and low-visibility emergencies. This guide provides insights into key codes ...
Download
This free guide serves as a critical resource for managers looking to reduce workplace incidents related to slips, trips, and falls. It covers the ...
Download
This 12-page guide simplifies barcode labeling with practical tips for creating efficient systems. Learn the differences between linear and 2D ...
Download
This essential resource is designed for construction site safety managers, general contractors, and subcontractors. It provides clear, step-by-step ...
Download
Get the confined spaces best practices guide to protect your workers from dangerous situations and ensure regulatory compliance. This comprehensive ...
Download
This essential guide provides a comprehensive look at applying continuous improvement (CI) strategies to mining operations. Learn how to improve ...
Download
This handy reference chart provides a quick and clear guide to understanding the personal protective equipment (PPE) requirements for handling ...
Download
This 20-page guide provides essential industry best practices for creating safety signs that meet OSHA and ANSI standards. Learn how to assess your ...
Download
Cranes are vital to many industries, but they come with significant safety challenges. This guide delves into the two key approaches—administrative ...
Download
Discover the advantages of a reliable industrial sign and label system built for performance. The Bronco Max Buyer’s Guide covers key features, ...
Download
Boost safety, cut downtime, and meet HVAC labeling standards with confidence. This free guide shows you how to label ducts, pipes, and panels in line ...
Download
This resource covers industrial labeling solutions, compliance standards, and supply recommendations to help you choose the right DuraLabel supplies ...
Download
This guide is designed to help you easily understand which label colors and sizes to use, where to place them, and other crucial details, based on ...
Download
The DuraLabel Kodiak Max Print System delivers unmatched ease, precision, and durability for in-house sign and label creation. From safety signage to ...
Download
Elevate your aviation facility’s safety with the Facility Safety Communication Quick Start Guide, tailored to help you assess and optimize your ...
Download
Upgrade your facility's labeling process with the DuraLabel Toro Max Print System, designed for on-site efficiency and versatility. Whether you're ...
Download
Pipes can carry a variety of substances, from hazardous chemicals to water or steam. Without proper labeling, identifying these contents can be ...
Download
This full-color wall chart provides a quick reference for all your pipe labeling needs. Designed as a great training tool for safety managers, it ...
Download
Implementing or updating your pipe marking system is crucial for improving workplace safety and operational efficiency. This comprehensive guide ...
Download
This helpful guide makes marine pipe marking easier by showing which label colors and sizes to use, where to place them, and more. No more searching ...
Download
This comprehensive 12-page guide is the go-to resource for creating compliant valve tags in any facility. Designed for maintenance managers and ...
Download
This reference chart outlines essential pipe and equipment labeling requirements for ammonia refrigeration systems. It provides a clear understanding ...
Download
This reference chart is designed specifically for water and wastewater treatment plants, providing the necessary guidelines for effective pipe ...
Download
This guide provides everything you need to easily create and improve pipe marking systems in your facility. By streamlining processes, you’ll rapidly ...
Download

Are you ready to create your own signs and labels on-site and on-demand? Shop DuraLabel printers and supplies here!
.webp)
LabelForge PRO Software allows you to create custom labels from scratch or utilize templates and modules to be compliant

See the quality of tough-tested DuraLabel supplies for your self with free label samples.

Free monthly newsletter from DuraLabel provides industry insights and compliance news that keeps you up-to-date in labeling.