Data Source Merge
Video Transcription
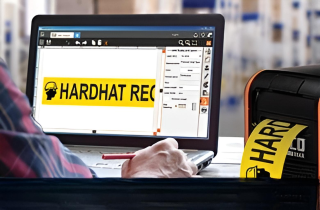
LabelForge PRO has the option to merge spreadsheets into the software to print multiple labels at once. If you would like to print multiple labels without manually adjusting each line every time, data source merging is for you.
In label designer, click on the third icon from the bottom with the four coins to open the data sources tab.
Click on open data source connector to get your spreadsheet connected.
From here, click on the orange plus sign on the top left.
If you are using a spreadsheet, this is considered a data source or DSN for short.
Drop down the option to DSN and click choose file to locate your file.
Once you've selected your file, click next.
If your spreadsheet has headers like what we have here on the left, we can toggle the first row contains column headers option in order to display that in the options for merging.
This will allow us to more easily locate the appropriate columns, Then click done.
Once you've pulled in the spreadsheet, you'll see new listings on the left.
From here, you can drag and drop to apply the correct information to the text boxes available.
Once you're happy with your selection, click okay to go back to the main label designer screen.
You'll see on the right under navigation that it shows how many records are available and a couple arrows.
Clicking on the arrows will allow you to preview each label before you're ready to print.
If you have a situation where there are multiple boxes close together, you can zoom in with the middle mouse wheel in order to better see where the text boxes are and move the view around by dragging with the left mouse button.
For this example, we have our R clash module database here. You can access this by clicking plus and adding an existing database.
From here, you can drag any information you would like to apply. For instance, R clash boundary can be put by the arc flash boundary area.
Limited approach boundary can be dragged over to limited approach. And you can move in and out as far as you need.
Once you're done, you can click okay, and it will apply the appropriate information.
Once you're ready to print, click on the printer option on the bottom.
Here you have a couple options.
If you would like to print the record that is currently on your screen, click current record.
If you would like to print all records from your spreadsheet, click all records.
If you need a range or specific labels printed, click range or list of records.
Here, you can identify what labels you would like to print in a grouping with a dash, such as labels one through four. Or if you need individual labels, you can put a comma between each, such as label two and label thirteen.
Thank you for tuning in to our merging in LabelForge PRO video.
We hope you found the solutions you needed. But if you have any further questions or need assistance, please don't hesitate call our support team at 1-800-788-5572 for further details.