23
February,
2024
3 MINUTE READ
The Arc Flash module uses a searchable, editable database to keep track of your equipment details, and simplify the task of creating arc flash warning labels that match the NFPA 70E and CSA Z462 standards.
Prefer video instructions? You can watch the tutorial here: How to Create Arc Flash Labels with LabelForge PRO
- Arc Flash Toolbar
- Navigating Records in the Database
- Creating and Editing Arc Flash Records
- Templates, Sizes, and Settings
- Printing a Label
- More Support Options
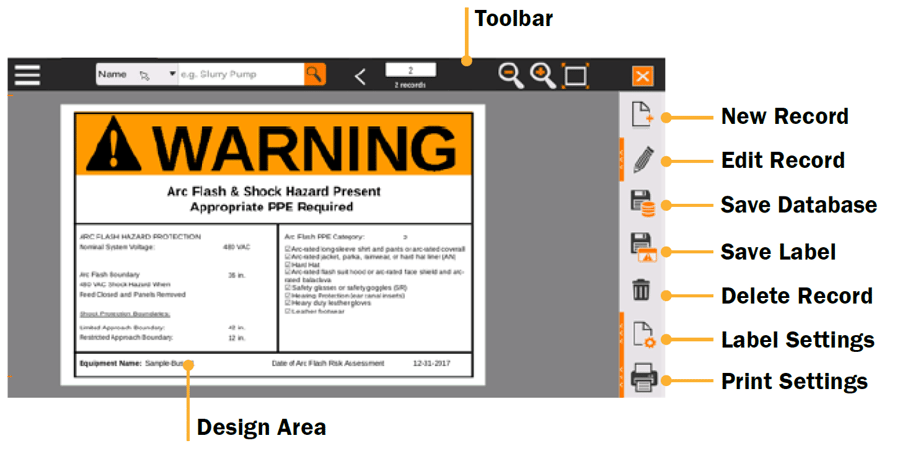
Arc Flash Toolbar
The toolbar across the top of the screen shows some common controls and options for the Arc Flash labeling module.

- Hamburger Menu: Access common file options, such as creating a new record, saving records, and exporting label designs.
- Search Records: Search the arc flash database by equipment name, date, or project name.
- Record Number: Identify the current record, out of the current database or search results.
- Zoom Out/In/Fit: Adjust your view of the design to allow fine-tuning.
- Close: Close the Arc Flash labeling module.
Navigating Records in the Database
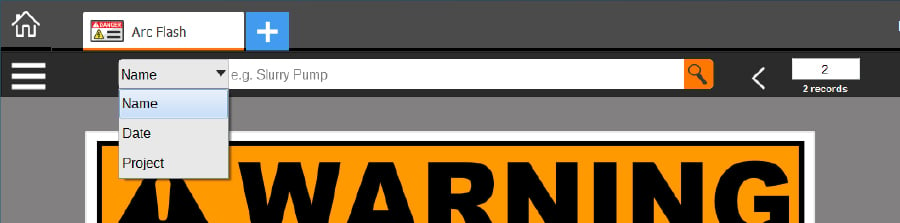
The fastest way to find a specific record in the Arc Flash database is with the toolbar?s search function.
- Choose whether to search by Name (of the equipment), Date (of the arc flash risk assessment), or Project. The default search is by equipment name; to change this selection, click the current search type (such as ?Name?) in the toolbar, and make a new selection.
- Type your search terms in the search box, and click the magnifying glass button or press Enter on your keyboard.
- The first match (in alphabetical order, by equipment name) will be shown in the design area. Use the right or left arrows in the toolbar to browse through the search results.
The number in the white box on the toolbar shows which search result you are currently seeing; the number below the box shows the total number of search results. If you do not enter any search terms, you can browse through the entire current database.
Creating and Editing Arc Flash Records
 To create a new entry in your current Arc Flash database, click the New Record button in the menu on the right. This creates a new, blank record. The Edit menu will slide out to let you add the details for this new entry. (To edit an existing entry, simply find that entry in the database and click the Edit Record button in the menu.)
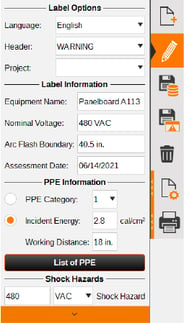
- Label Options: Choose your preferred label language; select the desired header (Danger, Warning, or Caution); and choose a project (or type a new project name) to keep related labels together.
- Label Information: Enter the basic information for this label (equipment name, nominal voltage, arc flash boundary, and assessment date).
- PPE Information: Choose whether the label will show an Arc Flash PPE Category or a calculated Incident Energy and Working Distance, and enter the appropriate information.
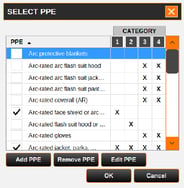
- Also in the PPE section is the button for ?List of PPE.? This will open a window where you can select the complete list of required PPE items by checking the box for each required item. By default, the list of PPE is alphabetical, but you can also sort the list by PPE categories: click the number for the category you want listed first. If desired, you can add, remove, or edit PPE items in this list as well.
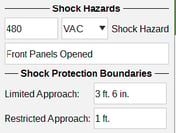
- Shock Hazards: Enter the voltage and conditions of a shock hazard, as well as the shock protection boundaries (Limited and Restricted Approach).
When the details have been entered, click the Save to Database button to add your new entry to the Arc Flash module's current database. The Save Label button will export your current label design to its own file, so you can adjust the design in the Label Designer module. If you want to remove the current record from the database, click the Delete Record button.
Templates, Sizes, and Settings
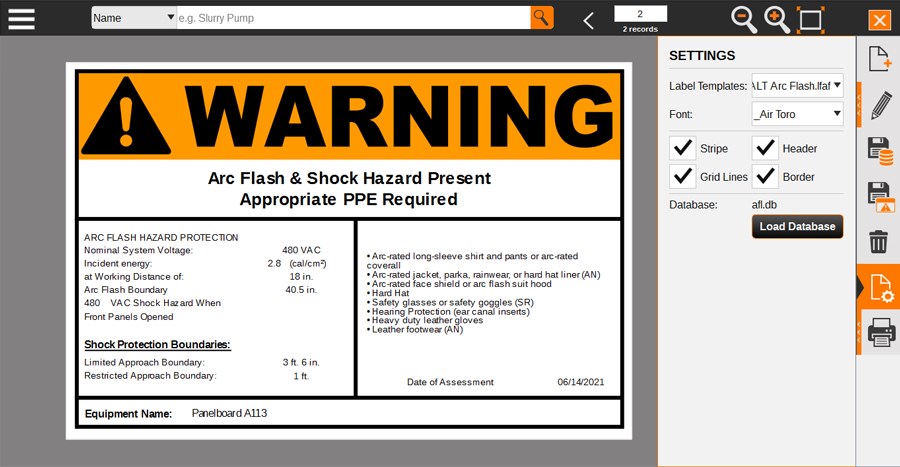
To print Arc Flash labels in different sizes, or to use custom templates, open the Label Settings menu and select the appropriate template with the drop-down Label Templates menu. The default templates are named so that the size of the label is shown first (with dimensions in inches).
In the same menu, you can also choose a font for the text of your label, and you can toggle optional label elements (such as grid lines or a border). You can also choose whether to print the colored stripe at the top of the label, or the header text and alert symbol; disable these options if you are using pre-printed label stock with those elements already in place.
This menu also lets you select which arc flash database you are using, if more than one database is available.
Printing a Label
When you are ready to print, click the Print Settings button. Here, choose which labels you want to print, and how many copies of each. You can also check a Print Preview here.
Click the Print button to start the new print job.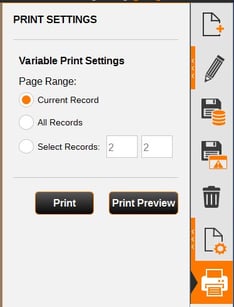
More Support Options
If you have any questions about using LabelForge PRO label design software, get help from Duralabel's world-class support team by calling 800-788-5572 or visiting Duralabel.com.


