23
February,
2024
7 MINUTE READ
The Label Designer module is meant for creating or editing completely custom designs, using text, images, or barcodes. These items can be placed and modified with the menus, and can be moved around your label by dragging them on the design area.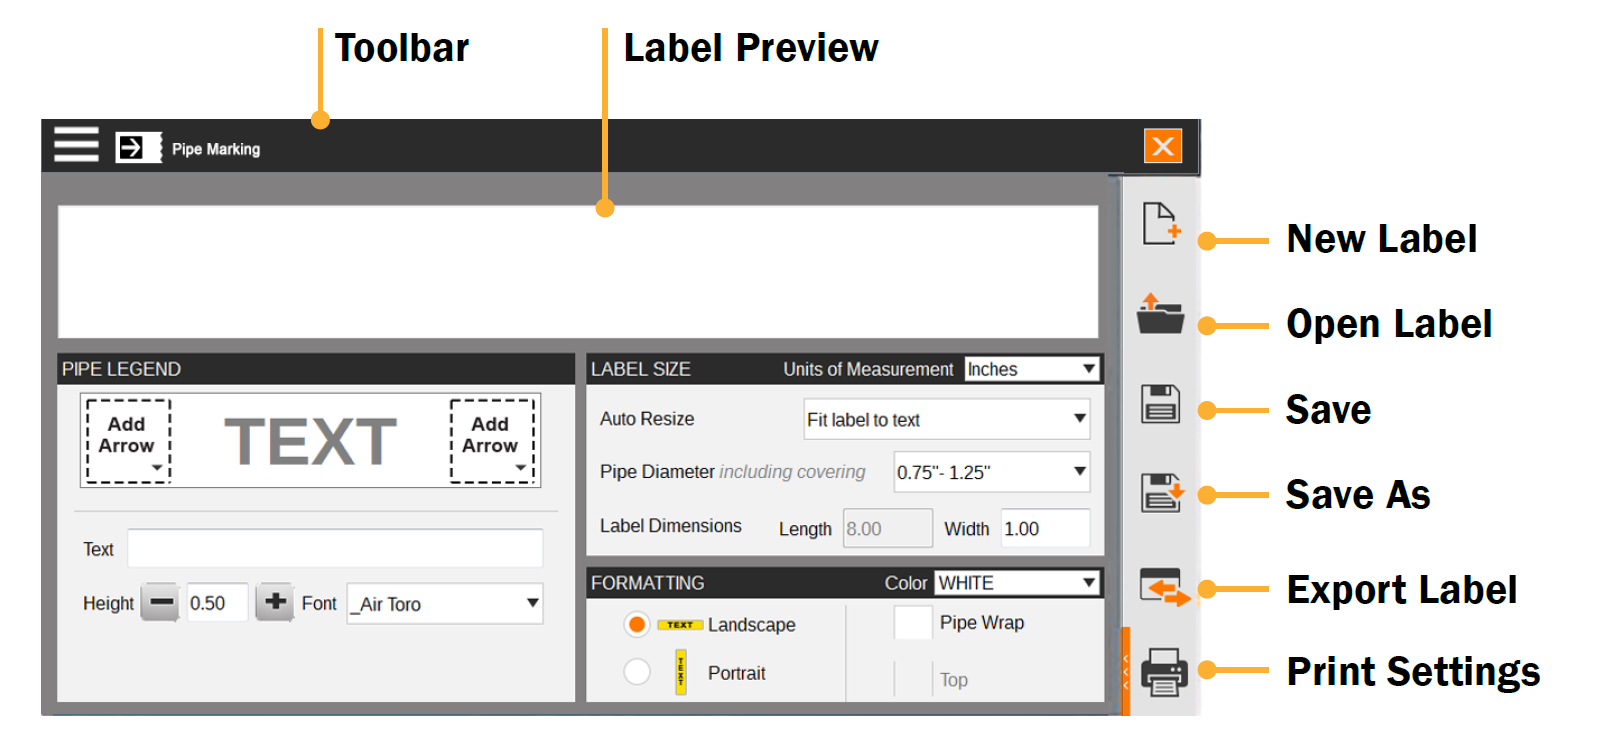
- Label Designer Toolbar
- Creating a Label Design
- Insert Menu and Design Objects
- Dimensions Menu
- Order Menu
- Details Menu
- Color Menu
- Data Source Menu
- Label Settings Menu
- Print Settings Menu
- More Support Options
Label Designer Toolbar
The toolbar across the top of the screen shows some common controls and options for the Label Designer.
![]()

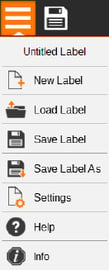
- Hamburger Menu: Access common file options, such as creating a new design, saving and loading designs, and choosing program settings.
- Quick Save: Save the current label design with its current file name. If you haven?t saved the file yet, you will be prompted to choose a file name and location.
-
Lock/Unlock: Lock any element (image, textbox, barcode, etc.) of the label/sign, relating to the size and location of the element.
- Group/Ungroup: Set a group of selected objects to act as a single large object, or reverse this choice. Grouped objects will be moved and resized together.
- Undo/Redo: Cancel a recent action, or repeat a canceled action.
- Copy/Paste/Delete: Duplicate or remove the selected object.
- Zoom Out/In/Fit: Adjust your view of the design area to allow fine-tuning.
- Close: Close the Label Designer.
Creating a Label Design
When you open Label Designer, or choose the New Label option in the Hamburger Menu, the New Label window will open.
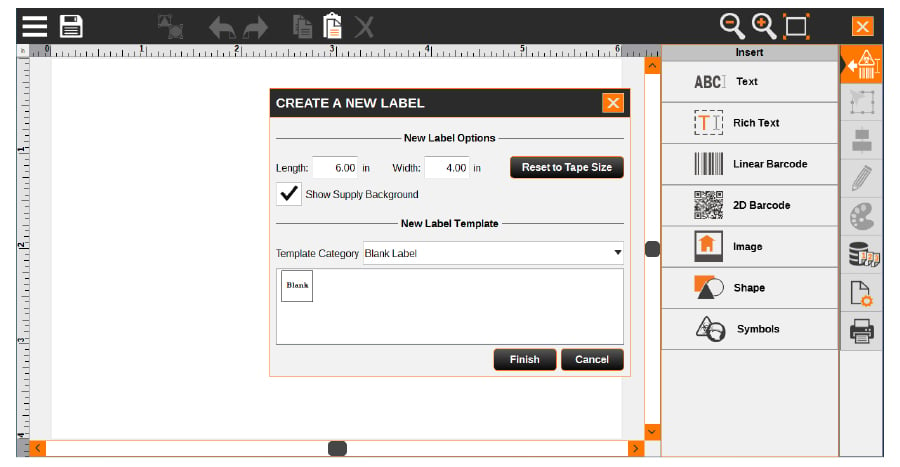
The New Label Options include the length and width of your design. On the Kodiak or Toro Max systems, you can also choose ?Reset to Tape Size? to set your label dimensions to the default size for your loaded label stock. If your label stock uses pre-printed elements, check the Show Supply Background checkbox to show those preprinted elements on the screen.
The New Label Template section of the window lets you choose a premade template to apply to your new design, such as an ANSI-style warning template or a basic barcode template. By default, you will start with a blank label. To use a prepared template instead, choose a Template Category from the drop-down menu and choose a template from the previews that appear. LabelForge PRO will automatically adjust the template to fit your label?s dimensions.
Once you have made your selections, click Finish to start designing your label.
Insert Menu and Design Objects
Each object on your label, such as a text box or an image, is added to your label through the Insert Menu.
Click on the desired item type to add it to the center of your label; when an object has been added to the design, the new object will automatically be selected for editing. To select a different object, simply click on it in the design area; to select multiple objects, hold the Control key and click on each item.
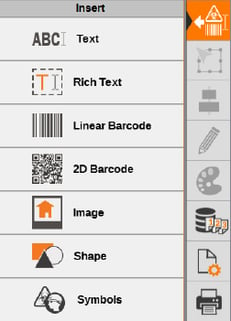 Text: Add simple text items to your label, useful for headers or static information. Basic text can be set to a fixed size or locked in place.
- Rich Text: Add rich text items, useful for descriptive or dynamic content. Rich text can wrap within a box, and different parts of the same item can use different font styles.
- Linear Barcode: Add a line-style barcode in a variety of formats. Supported formats are Codabar, Code 128, Code 128B, Code 2 of 5 (Interleaved 2 of 5), Code 39, EAN13 (ISBN), EAN8 (8-2, 8-5), UPC-A (A2, A5), and UPC-E (A2, A5).
- 2D Barcode: Add a grid-style barcode in a variety of formats. Supported formats are Data Matrix, PDF417, and QR Code.
- Image: Import a custom image, such as a company logo. Selecting this option will prompt you for the file that you want to use; supported file types are .bmp, .gif, .jpg/.jpeg, .png, .ppm, .svg, .tif, mng, .pbm, .pgm, .ico, .tiff, .xbm, and .xpm.
- Shape: Add geometric shapes such as lines, rectangles, and circles to your design. You can change the style of a selected Shape object by clicking on a different shape in the menu.
- Symbols: Add standardized symbols from a massive library, sorted by categories such as “Arrows,” “Injury,” and “Prohibited.” Choose a category on the left side of the Symbols window, select the desired symbol on the right side, and click the Insert button to add that symbol to your design. Importing symbols from any graphics is also available.
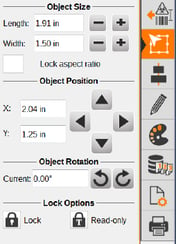 Dimensions Menu
When an object is selected, use this menu to precisely control an object’s size, position, or rotation. You can also quickly move the object by dragging it across the design area, or resize it by selecting it and dragging the control boxes at its corners. Note that the “aspect ratio” check box only applies to the width and height changed through this menu, not to the size change done using grips. (For grips, maintaining aspect ratio is done by holding the shift key.)
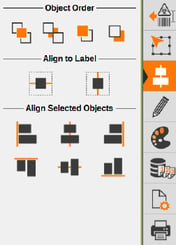 Order Menu
When an object is selected, use this menu to adjust the object’s arrangement relative to other objects or the label as a whole. You can center objects on the label, or align multiple selected objects to each other. You can also control whether an object covers up another, or is covered instead.
 Details Menu
When an object is selected, use this menu to adjust the unique options available for that type of object. For example, for text objects, you can change the font and size, while for barcode objects, you can choose the barcode format and options for human-readable text (HRT).
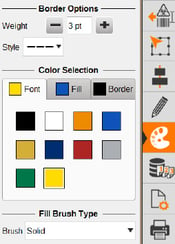 Color Menu
When an object is selected, use this menu to choose the colors for that object. You can select a wide variety of colors, even if the appropriate supplies are not currently loaded, but only colors that match your loaded supplies can be printed accurately. Fill options include patterns and gradients.
 Data Source Menu
Connect your label design to a spreadsheet or database, and automatically generate a series of matching labels, or add automatically generated content to your existing label design.
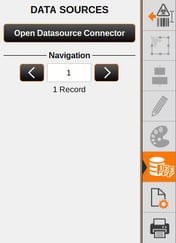
To use this function, start by pressing the “Open Datasource Connector” button from the Data Source menu. You must have some content on your label before being able to connect the label to a “source of data”.
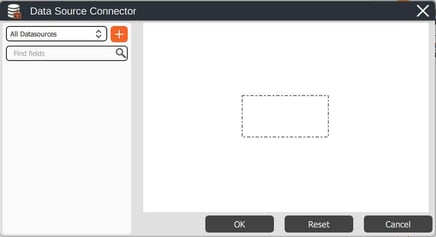
The Data Source Connector has two panes: the left pane allows interaction with data sources, while the right pane shows a simplified view of the design area, and allows interaction with data-aware items (the modifiable items, that can be connected to data sources).
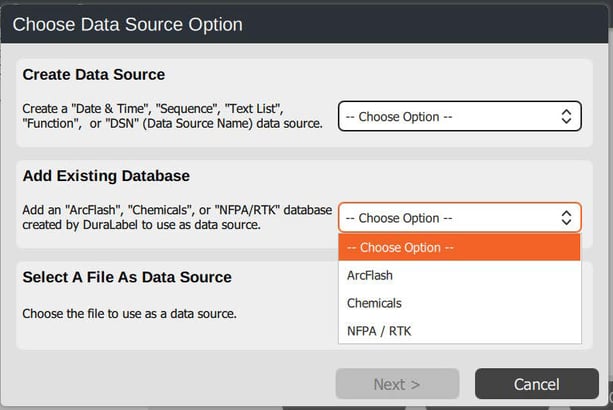
The first step in adding a data source is to press the “+” orange button. It will open the first page of a data source adding wizard.
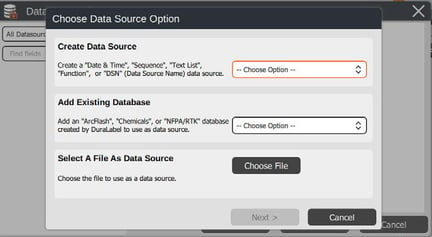
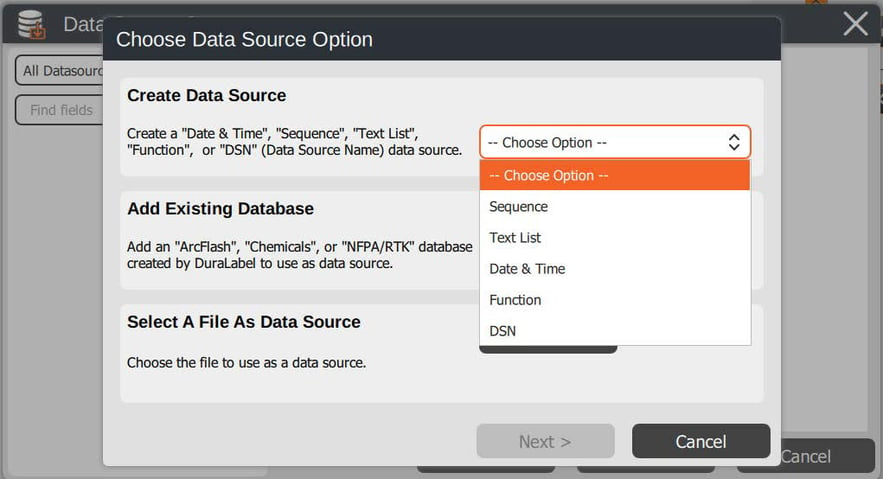
The data sources available are:
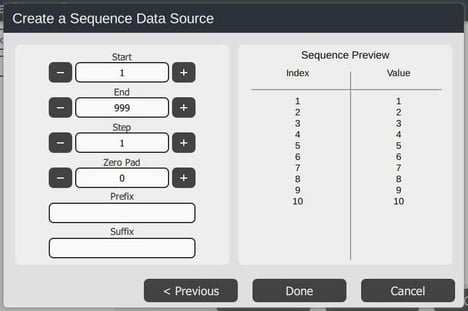
- Sequence: Set up a sequence of numbers, automatically counting from a given start value to a given end value. You can also add a prefix, suffix, or zero padding. No separate file is needed.
- TextList: Set up a sequence of text phrases, with each phrase appearing on its own label. While creating or editing the text list, use the “+” orange button to add a new entry, the pencil to edit an existing entry, the “X” to remove an entry and the dragging symbol to reorder the entries in list.

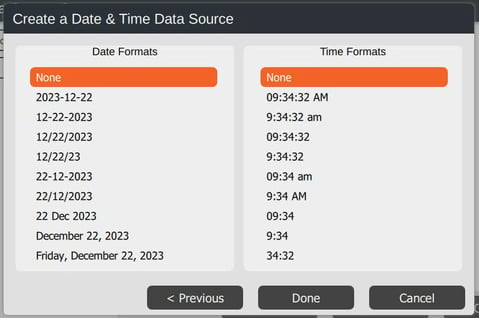
- Date & Time: Add the current date and/or time (as set on your system) to each label as it is printed. The wizard page will allow some choice of formats.
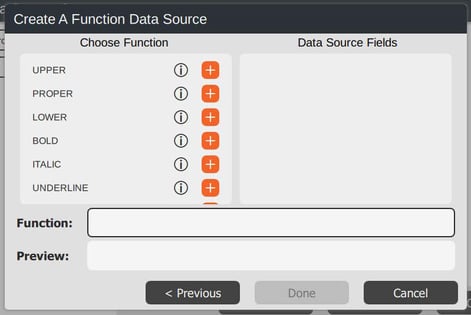
- Function: When using other Data Sources, the Function option lets you apply additional formatting to the information from those sources. It also provides a way to use more than one Data Source in a single design object, such as a product name immediately followed by its part number and description.
- ImageFolder: Select a folder of images to print, with each image appearing on its own label. Currently not supported.
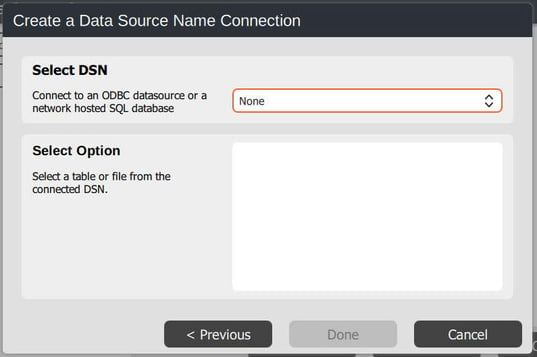
- DSN: Use a Data Source Name to get information from a database, following ODBC protocols. Network connections are possible; check with your IT team for help.
- Add Existing Database: Pull information from an existing database provided with the LabelForge Pro installation, such as:
- An Arc Flash database, like the one used by LabelForge PRO’s Arc Flash labeling module.
- A GHS-style chemical database, like the one used by LabelForge PRO’s Chemical Labeling module.
- An NFPA-style chemical database, like the one used by LabelForge PRO’s NFPA/RTK labeling module.
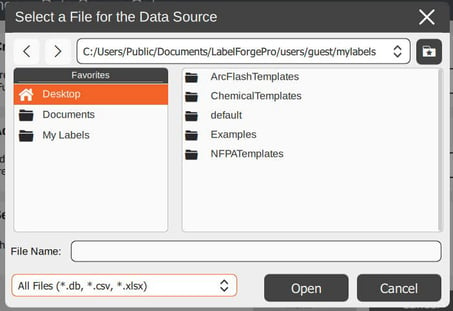
- CSV: Use a spreadsheet that has been saved in the widely-used Comma-Separated Value (CSV) format. Depending on your file content, you are able to set the first row to become the list of column names, to identify your columns with ease.
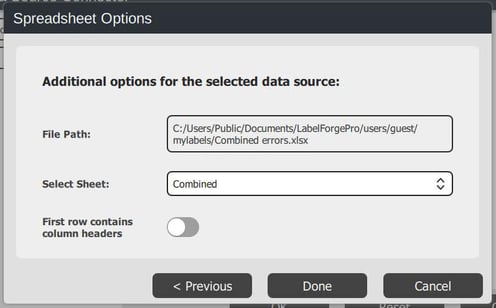
- XLSX: Use a spreadsheet that has been saved in the Microsoft Excel workbook format (Excel 2007 or newer). If multiple sheets exist, you will be prompted to select the sheet to use. The first row can also be set to be used for column names.
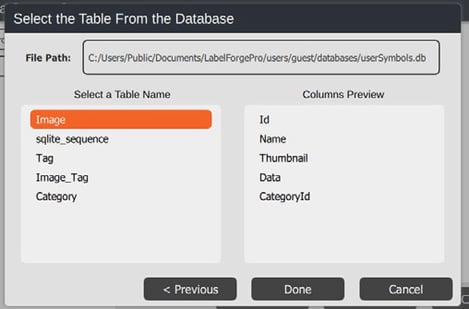
- SQLite: Use the SQLite database management system to get information from a database. Network connections are possible; check with your IT team for help. If multiple tables are available in the database, you will be prompted to select the table used as data source.
For the ArcFlash, CSV, GHS, ImageFolder, NFPA, or XLSX Data Source types, the necessary file or files will need to be available on the system where you are using LabelForge PRO, which includes any USB drives. If at a later date, either the label or the sources are moved, you will need to edit the data sources and update their paths.
To edit the path of a data source, press the down-arrow on the data sources drop-down, and select the preferences icon.
To change the name of a data source, press the down-arrow on the data sources drop-down, and select the pencil icon.
After adding the data source(s) you want to use, the left pane will contain a list of fields that are available to be connect to the data-aware objects, from the right pane. To create a connection, use the dragging icon from the fields to pull desired field item onto the desired object. The drop area will highlight in orange, for each canvas item that can be connected.
The canvas items that are either read-only, “user-background”, or the items that do not support connections, will be filled in with orange and a solid black boarder on the background of the object on the right pane, and will not highlight when a data item is dragged onto them.
Each object can only accept one connection. However, it is possible to have multiple objects assigned to different data items within a single design area. If a data item is used more than once, within the design area, it can be easily identified by their color swatch.
The following is a GHS template, with connections: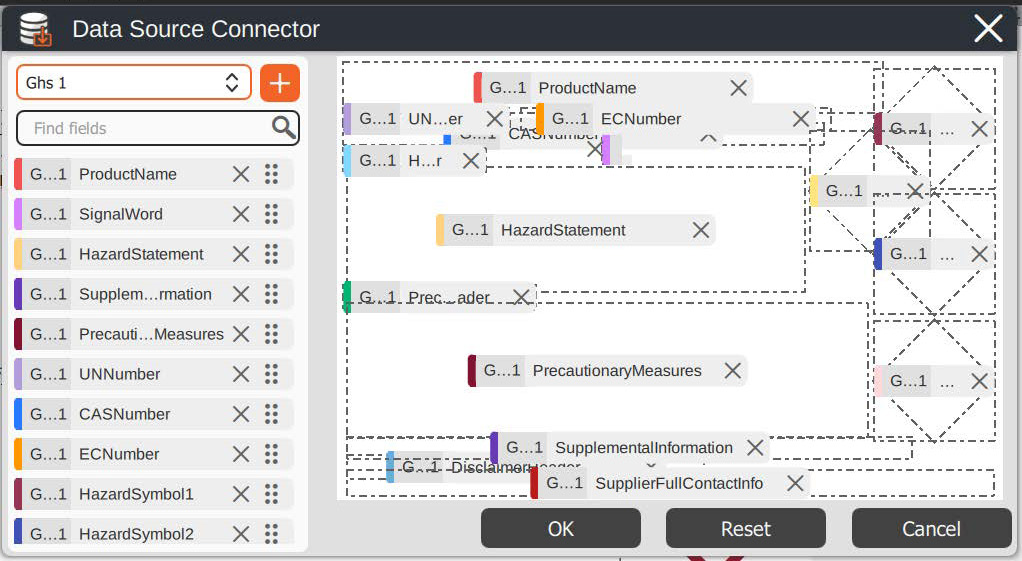
Pressing the X on either a data or a object will disconnect them. Selecting one data source in the drop-down will filter the list on the left for the items pertaining to only that data source (while still showing all connections on the canvas). Searching for keywords, in fields or data source names, is also available.
It is recommended to use symbol or svg (image) item types for fields containing svg content.
Once all desired connections have been created, press OK. All the objects on the canvas will be automatically updated to reflect the contents of the connected fields for the current record in the Data Sources.
The Navigation section at the bottom of the Data Source menu shows the current record and the total number of records in the current Data Source. You can also cycle through the records or jump to a specific record.
Label Settings Menu
Choose basic label design options, such as the size of the label you are creating (or a dynamic size, which extends or shrinks to match your content) and the supplies you plan to use when printing your label.
Selecting the “multiple labels per page” option will allow you to design one label on a portion of the page width; the design will be replicated during print.
Print Settings Menu
Adjust printing options, such as the common printing preferences. You can also choose which labels to print from an automatically generated set of labels, if you are using a Data Source.
The supply information will be populated automatically. Printing on a network printer, supply information is not available, so you will need to select the loaded supply.

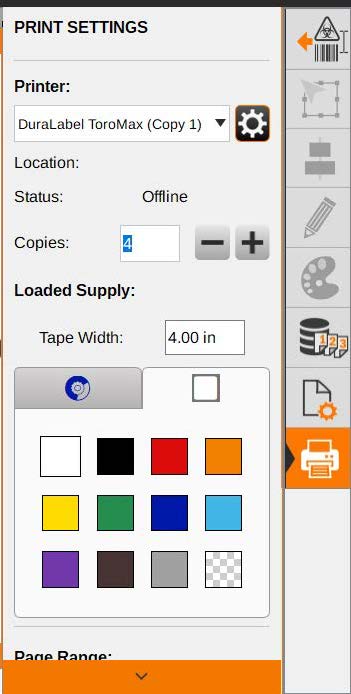
When you are ready to print your label, click the Print button in the Print Settings menu.
More Support Options
If you have any questions about using LabelForge PRO label design software, get help from Duralabel? world-class support team by calling 800-788-5572 or visiting Duralabel.com. We?re here to help with all your labeling needs!


