23
February,
2024
4 MINUTE READ
The Pipe Marking module uses the recommendations of the ANSI/ASME A13.1 standard to create simple and effective pipe labels. It also includes a specialized module for labeling the parts of ammonia-based refrigeration systems, following the IIAR Bulletin No. 114 approach. Finally, it includes a simple option for creating arrow wraps, which can be applied around the circumference of a pipe to show the direction of flow.
- Pipe Marking Toolbar
- Creating a Basic Pipe Marker
- Creating an Ammonia Pipe Marker
- Creating an Arrow Wrap
- Saving or Exporting Label Designs
- Printing a Label
- More Support Options
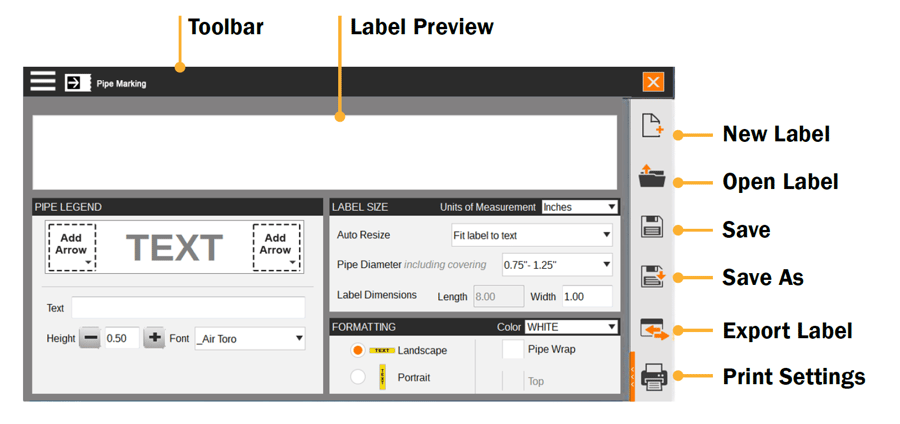
Pipe Marking Toolbar
The toolbar across the top of the screen shows some of the options for the Pipe Marking module.

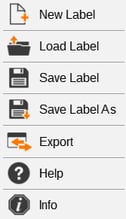
- Hamburger Menu: Access common file options, such as creating a new label, saving labels, and exporting label designs. The most common choices here are also available in the menu on the right side of the screen.
- Module Menu: Choose the type of pipe marker you are creating: basic ANSI/ASME labels, ammonia refrigeration pipe labels, or arrow wraps.
- Close: Close the Pipe Marking module.
Creating a Basic Pipe Marker
To create a new pipe label in the default ANSI/ASME A13.1 style, follow these steps:
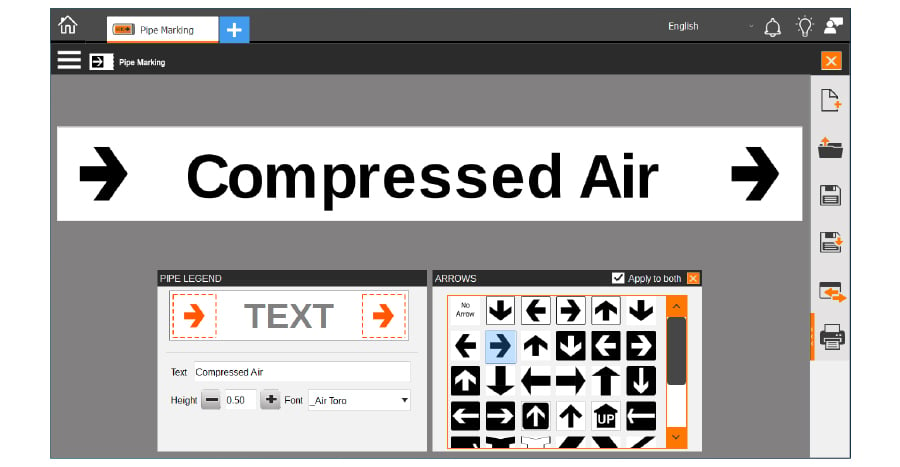
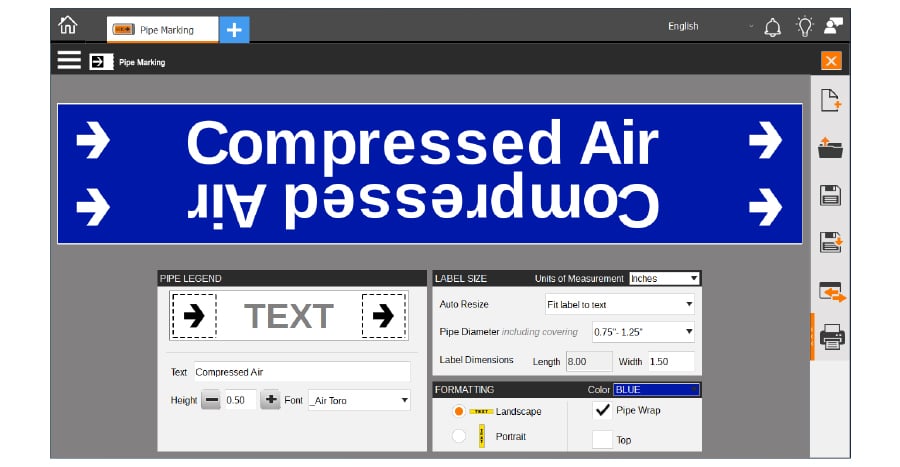
First, decide on the printed content of your pipe marker, using the Pipe Legend box on the left side of the screen:
- Click in the Text field and type the text that your label should include.
- To add an arrow to either end of your label, click one of the dashed-line squares in the Pipe Legend box, and choose an arrow style from the slide-out menu that appears. Repeat the process for the other end of the label; if the same arrow should appear on both ends of the label, check the box for Apply to Both. To close the slideout menu, click the dashed-line square again.
- If you prefer, you can adjust the text size or font with the options at the bottom of this window. The default selections are designed to be clearly readable.
Then, set the dimensions of your pipe marking with the Label Size box on the right side of the screen:
- Choose your Auto Resize preference:
- Fit label to text: automatically set your label?s length to fit the text that you have entered
- Fit text to label: automatically resize your text to fit the specified label dimensions
- None: no automatic adjustments
- Select the pipe diameter to use the recommended dimensions for a pipe of that size, or manually enter your preferred label dimensions in the Length and Width boxes. (When using the “Fit Label to Text” resize option, the length of the label will be automatically determined.)
Finally, set special formatting options in the Formatting box on the right side of the screen:
- Choose your label’s background color in the dropdown menu. (The color of text and other printed details, either black or white, will be chosen automatically for standard compliance and readability. Note that the printed label colors will depend on the supplies loaded in your printer.)
- Choose Landscape (default) or Portrait orientation for your label.
- If you need your label to be visible from multiple directions, select Pipe Wrap. By default, this makes a label that will be placed along the bottom of a pipe, to be read from either the left or right side; for a label that will be placed along the top of the pipe, check the box for Top.
Creating an Ammonia Pipe Marker
To create a new pipe or component label for ammonia-based refrigeration systems, using the IIAR Bulletin No. 114 styles, follow these steps: 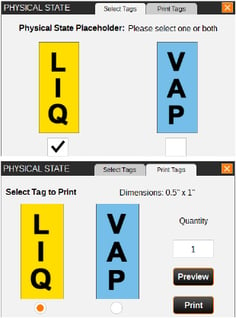
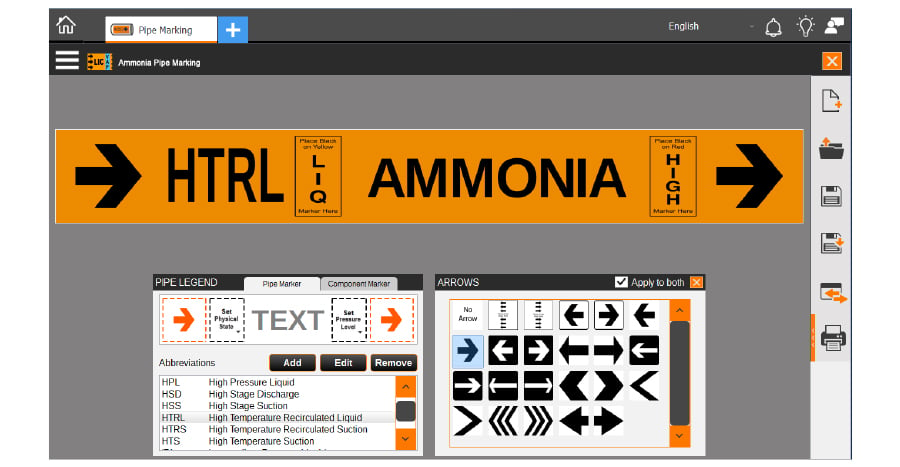
- Choose Ammonia Pipe Marking from the module menu in the toolbar.
- Using the tabs at the top of the Pipe Legend box, on the left side of the screen, select whether you are making a pipe marker or a component marker. Then, set the printed content for the label:
- Select the equipment or component name from the list at the bottom of the Pipe Legend box. You can add custom items to the list with the Add button, or edit or remove selected items from the list with the Edit or Remove buttons.
- If the default selections for physical state or pressure level are not correct, click the dashed-line boxes for those elements at the top of the Pipe Legend box. Then, make your selection from the slide-out menu that appears. Each slide-out menu also has a tab for printing these smaller labels separately. To close the slide-out menu, click the dashed-line square again.
- To add an arrow to either end of an ammonia pipe marker, click one of the dashed-line squares in the Pipe Legend box, and choose an arrow style from the slide-out menu that appears. Repeat the process for the other end of the label; if the same arrow should appear on both ends of the label, check the box for Apply to Both. To close the slide-out menu, click the dashed-line square again.
- In the Label Size box on the right side of the screen, select the pipe diameter to use the recommended dimensions for a pipe of that size, or manually enter your preferred label dimensions in the Length and Width boxes.
- The detailed size options in the Settings box will update automatically if you choose a pipe diameter; if you manually enter a custom size, you may need to adjust these options.
You can also choose whether to print with an orange background or with a yellow background (to match existing labels in the older format). Note that the printed label colors will depend on the supplies loaded in your printer.
Creating an Arrow Wrap
To create a band of printed arrows that can be applied around a pipe to show the direction of flow, follow these steps:
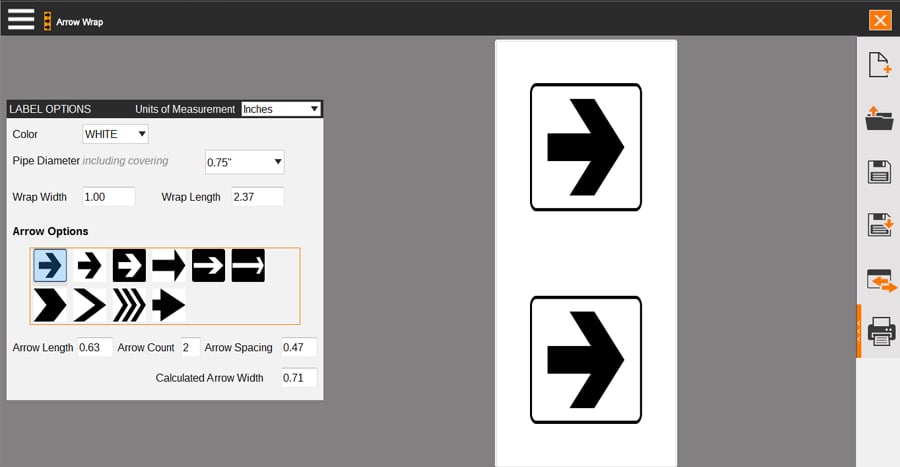
- Choose Arrow Wrap from the module menu in the toolbar.
- Choose the color of the band background. The arrow color, either black or white, will be automatically selected for standard compliance and visibility. (Note that the printed label colors will depend on the supplies loaded in your printer.)
- Select the diameter of the pipe you will be labeling; the program will automatically calculate recommended sizes and spacing. You can also manually set the wrap width, wrap length, arrow length, number of arrows, or spacing between arrows.
- Set the arrow style by clicking on your choice in the Arrow Options box.
Saving or Exporting Label Designs
To save a label, click the Save button in the menu along the right side of the screen (or choose Save Label from the Hamburger Menu). If the label has already been saved, the existing file will be updated; if not, you will be prompted to choose a file name and location.
To save the label as a new file, leaving the old version intact, click the Save As button in the menu along the right side of the screen (or choose Save Label As from the Hamburger Menu). You will be prompted to choose a file name and location.
To export a label for fine-tuning or other adjustments in the Label Designer module, click the Export button in the menu along the right side of the screen (or choose Export Label from the Hamburger Menu). You will be prompted to choose a file name and location, and you will be able to open the new file in the Label Designer.
Printing a Label
When you are ready to print, click the Print Settings button. Here, choose which labels you want to print, and how many copies of each. You can also check a Print Preview here.
Click the Print button to start the new print job.
More Support Options
If you have any questions about using LabelForge PRO label design software, get help from Duralabel? world-class support team by calling 800-788-5572 or visiting Duralabel.com. We?re here to help with all your labeling needs!


