27
June,
2023
5 MINUTE READ
Overview
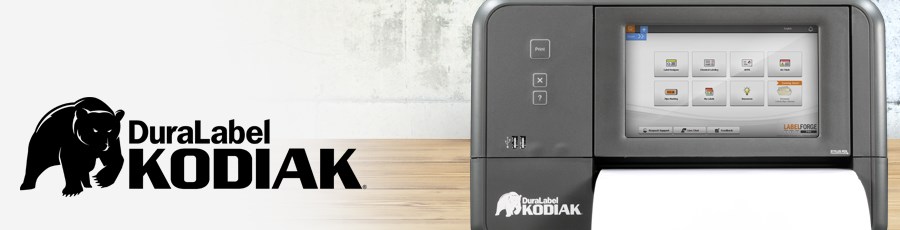
In addition to label design and printing, Kodiak's built-in interface offers several other functions.
Supply Status Utility
This utility shows the currently loaded supplies, and how much of each is remaining. Click the supply rolls on Kodiak's main toolbar to open this utility.
To print, Kodiak requires a label stock and two printing ribbons. This utility shows which supplies are present and how much of each is remaining. The catalog number for each loaded supply is also shown.
If you need to trim the edge of your label stock (after clearing a jam, for example) this utility also offers a Trim function, which will "print" a short, blank label, and cut it cleanly. The window also includes an option to cancel any current print jobs or check your printing preferences.
Printing Preferences
These are the detailed controls for how your Kodiak will handle print jobs. When you load supplies, Kodiak will automatically adjust many of its settings to match those supplies, so you may only need to change these settings for unusual tasks.
The same overall settings are available whether they are accessed from Kodiak's built-in interface, or from the driver software on a PC.
PREFERENCES THROUGH KODIAK'S BUILT-IN INTERFACE
Click the printer icon on Kodiak's main toolbar to open these settings. You can also reach these settings through the label design modules.
This window has six tabs, with different options:
- Basic Setup: Choose the most common options, like landscape/portrait print orientation, cut options, or special effects like mirroring (flipping the design backward) or negative printing (switching the colors of the design). You can also choose a "preset" for all settings.
- Speed/Heat: If needed for troubleshooting, adjust the overall printing speed, and the individual heat adjustment for each print head.
- Color: If needed for troubleshooting or print quality, adjust the way Kodiak handles multi-color printing, shades of color, and overprinting (black/color) or base printing (white/color).
- Alignment: If needed for troubleshooting, adjust the printing offsets (horizontal and vertical) for each print head.
- Cut/Media: If needed for troubleshooting, manually select the supply type and the feed or cut offsets.
- Manage Presets: Edit or create custom presets to quickly adjust all print settings.
If you access these controls from the main Kodiak toolbar (by clicking the printer icon) or through the Supply Status Utility, the window title will be shown as System Preferences. These will be the default controls used for all programs, but any changes you make here will not affect programs that are currently running.
If you access these controls through a program's individual options, the window title will be shown as Printing Preferences, and any changes will only affect print jobs for that session of labeling. The Manage Presets tab will not be present.
Negative printing, an effect available on the Basic Setup tab of this window, only uses the label stock and the ribbon loaded in position 1. Multi-color designs will be reduced to single-color with this effect.
The printing offsets, available on the Alignment tab of this window, should only be used when there is a serious misalignment. Ordinary printing will have a tolerance of up to 1/32 inch (under 1 mm) horizontally, and up to 1/16 inch (under 2 mm) vertically. If your Kodiak seems to be farther out of alignment, please contact Graphic Products for support by calling 800-788-5572 or visiting DuraLabel.com.
PRINTING PREFERENCES ON PC
When accessing the Printing Preferences for your Kodiak from a PC, the orientation setting (landscape/portrait) will be the only option immediately available. Additional options for unusual needs, or for troubleshooting, can be reached by clicking the "Advanced?" button:
- Cutter: cut after each label printed, after a complete job, or not at all
- Speed: choose either 2 or 3 inches per second. (For best quality, use the default
- of 2.)
- Inverse: switch the colors of the design. This effect only uses the label stock and the ribbon loaded in position 1. Multi-color designs will be reduced to single-color with this effect.
- Mirror: flip the design backward.
- Ribbons Used: for troubleshooting, manually control which ribbon and print head will be used.
- Ribbon and Supply Colors: when printing from third-party software, such as common word processors, manually select the loaded supplies to ensure the best print results.
- Overprint and White Base Print: when using black ribbon and another color, or white ribbon and another color, these options may be helpful for troubleshooting poor print quality.
- Color Matching: choose whether to use Best color matching (Kodiak uses the closest available match for any unavailable colors in your design) or Strict color matching (Kodiak will only print the colors that it can match exactly).
- Dithering: choose how Kodiak uses patterns of dots to approximate shades of color.
- Heat Intensity Offsets: for troubleshooting, adjust the heat used in the printing process.
- Label Stock Format and following options: for troubleshooting, adjust Kodiak's supply settings.
- Stop Position and Horizontal/Vertical Offsets: for troubleshooting, adjust Kodiak's printing offsets.
Networking Settings
If you have questions on the correct network settings for your system, check with your IT team.
- To connect your Kodiak to a network, click the network icon on Kodiak's main toolbar. This utility shows the current network state, and a list of any available Wi-Fi networks.
- To connect to a Wi-Fi network, select the desired network from the list, and click Connect. If a password is required, you will be prompted to enter it.
- To connect to a wired (Ethernet) network, make sure that your Kodiak is physically connected to the network with a standard Ethernet cable. Then, click the Ethernet button in the Network Settings utility, and enter the required settings.
System Utilities
These utilities are used for advanced functions or system troubleshooting and can be found in Kodiak's Utilities menu.
DATABASE MANAGER
Several of the labeling modules in your Kodiak use internal databases to store and retrieve data for label printing. With the Database Manager utility, you can create a new database for a fresh start, import or export databases, or set up a network connection for using an external database with Open Database Connectivity (ODBC).
Start by selecting the database type with the dropdown menu. To create a new database, enter a name for the new database and press the Add Database button. To adjust, import, export, or copy an existing database or connection, select the existing database from the list, and use the buttons below the list or the editable fields to the right to fill in the appropriate information.
TOUCH CALIBRATION
If Kodiak's touchscreen seems to respond strangely, you can recalibrate it with the Touch Calibration utility. You will be asked to touch a series of targets on the screen; when each target has been touched, the calibration will be complete. Calibration may be repeated any number of times.
UPDATER
The Updater utility shows the currently installed software on your Kodiak. If an internet connection is available, the utility will check if any updates are available from Graphic Products and give you the option to download and install them. If you have a USB flash drive or other USB-connected storage device with software updates on it, you can install those updates using the Updater utility by clicking the USB button.
While the Updater allows updates to Kodiak's existing software and may allow additional software from Graphic Products to be added in the future, no user software may be installed.
USERS AND PASSWORDS
By default, Kodiak will not be locked; any person can use the system. To require a password, use the Users and Passwords utility to add an authorized user. Each individual user will have their own password, and there is no limit to the number of users that may be added.
Once an authorized user has been added, you can click the Lock button in this utility to lock the system. Any authorized user can also add or remove other authorized users in this utility.
If your Kodiak has been locked, but all user passwords have been lost or forgotten, contact Graphic Products for support at 800-788-5572 or at DuraLabel.com.
More Support Options
If you have any questions about using your DuraLabel Kodiak printer, get help from Graphic Products' world-class support team by calling 800-788-5572 or visiting DuraLabel.com. We're here to help with all your labeling needs!


