Creating Labels in LabelForge
Video Transcription
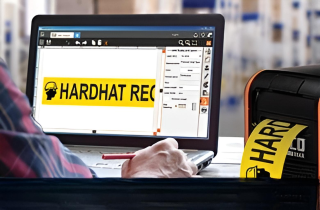
Using the LabelForge labeling software, can quickly and easily create custom label designs. This video will walk you through the process.
When you open LabelForge, you'll start with a blank canvas. The first thing to do is make sure that canvas is the right shape, size, and color. On the toolbar at the top of the screen, click the label setup button, which looks like a page with a wrench.
At the top of this window, can set the width, height, and orientation of your label. Lower down, you can choose the type of label stock you're printing on and the ribbon color you're printing with. The label length options, fixed and dynamic, let you choose whether your label design stays at your set size or adjusts its length automatically to fit the elements you add to it.
Now let's add a symbol to the design. LabelForge includes a huge library of standardized symbols for a variety of applications.
In the menu on the left, click the Symbols button. Then choose the category of symbols that you're looking for, or choose All to scroll through all of the included symbols.
When you see the image you'd like to use, click on it to add the symbol to your design.
Once the symbol has been placed, you can drag it around the design area and use the plus or minus buttons on the toolbar to increase or decrease the symbol's size.
Most labels or signs will include some text, so let's add that now. Close the symbols menu by clicking the X button below the list of symbols. This will show the main menu again. This time, choose text.
In this menu, choose your font style, size, and alignment. Click the add text button to add your new text object to the design and type your message. Then position your text on the label by dragging it into place.
It's also easy to include your company logo or other custom images on your label designs. First, you'll need to have the image file saved on your computer or labeling system. If you're using a DuraLabel Toro, you can transfer the image file from a computer using a USB thumb drive. When you plug the thumb drive into the Toro, a new folder will appear on the Toro main screen. Just open that folder and drag your image file onto the Toro desktop.
Back in LabelForge, click the import button. This will open a file browsing window. Simply locate the image file you want to use and click open. The image will appear in your design as a new object.
If you start with a very small image and make it larger with the resizing tools, it may look grainy or jagged when printing. If you notice this, try using a larger version of the image.
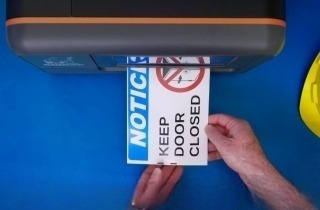
When you're happy with the label design, you can save it for later by clicking the save button in the toolbar. You'll be prompted for a file name. If you're ready to print, just click the print button and you'll have a label in hand in just a few seconds.

.webp)