How-To Create Custom Multi-Color Labels with LabelForge PRO
Video Transcription
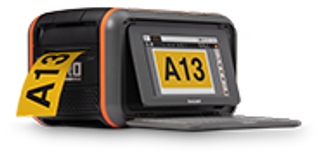
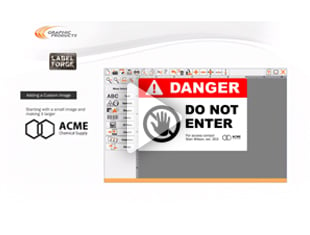
This video will describe how to create a basic multi-color label from scratch using the Label Forge Pro software The Label Designer module lets you create completely custom designs and also lets you sustomize labels that were created in the other modules of Label Forge Pro. On Kodiak, click the Label Designer button on the home screen to get started. The "NEW LABEL" window will appear. You can set your label's dimensions here, or select a template.
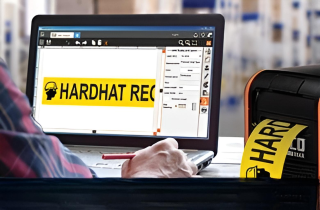
Once you've made your selections, click finish to continue Label Forge Pro offers a wide variety of symbols and shapes that can be used to design your own custom label. On the right side of the screen, the Insert Menu shows the different kinds of design objects that you can add. For this example, we'll select "Text" A text box will appear in the middle of the canvas. To change the text, simply type the desired message.
Because the Text Box is selected the Insert Menu on the right side of the screen changes to Text Options menu. Here you can change the detailed options for this object, such as its Font, Alignment, Style and Size. To move the text object on the label, simply drag it toa new location. Next, we'll add a colored graphic to this label.
Click the Insert Menu button here, to go back to the Insert Menu. This time select Symbols. Here you can scroll through the library of symbols or scroll through the categories on the left to refine your search. When you find the desired symbol, click on it and then click the Insert button to add that symbol to the design.
Again, you can drag the symbol to a new location on the label. You can also resize it quickly by dragging the orange squares at the corner of the object. Hold down the shift key on your keyboard while you drag an orange square to resize proportionally. To change the color of the selected symbol, click the color menu icon on the far right.
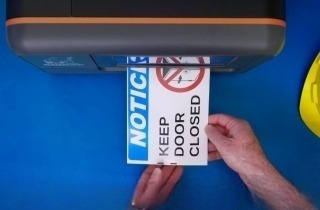
Here you can choose a background color for the symbol, and a separate line or border color. For most symbols the border color is the one you'll want to change. Simply select the desired color to see the change in your design. While you can design a label using any colors, the DuraLabel Kodiak can only print the colors that match the supplies that are loaded.
You can check which supplies are loaded by looking in the main task-bar, here. Once your label is finished, you can save the label design with the Save Label button at the top of the screen, or start printing right now.