.png)
.png)
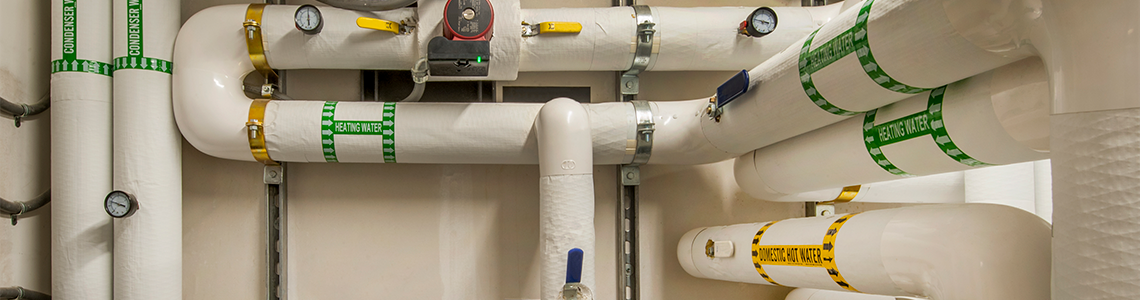
Directional pipe markers are labels applied to piping systems that display an arrow indicating flow direction, the contents of the pipe, and a color code per the ANSI/ASME A13.1 standard. Yellow with black text indicates flammable materials; green with white text indicates non-potable water; red with white text indicates fire-suppression lines. Proper directional markers reduce misidentification errors during maintenance, emergency shutoffs, and lockout/tagout procedures — making them a critical compliance element under OSHA 29 CFR 1910.261 and related general-duty obligations.
Join us as we explore the purpose, analyzation, and application process of directional pipe markers. If your facility does not yet have a pipe marking system in place, start with our comprehensive guide to getting started with pipe marking.
What are directional pipe markers and why are they required?
Before we talk about how workers use directional pipe markers, it's key to know why they are important. Directional pipe markers show which way things are moving in the pipes and what's inside them. The benefits of pipe markers include workers using them to find their way around and avoid accidents.
How do you read directional pipe markers?
Directional pipe markers show:
- Colors
- Shapes
- Symbols
The markers communicate critical information immediately. Understanding these visuals is crucial for workers asked to apply these markers. Let's break down the key elements:
What do the colors on pipe markers mean?
Different colors represent various types of substances or contents flowing through the pipeline. For instance, yellow denotes flammable materials, while green signifies non-potable water. Workers need to understand these color codes so they can identify what is moving through the pipes and take the right precautions.
In facilities with legacy piping, we frequently see directional markers installed with arrows pointing toward drain outlets rather than tracing from the source. During emergency response, this reversal can send a technician walking the wrong direction to find a shutoff. When auditing existing markers, always verify arrow orientation against as-built P&ID drawings — never assume the previous installer got it right.
Which direction should the arrow point on a pipe marker?
Arrows on directional pipe markers show the direction of flow within the pipeline. Whether it's fluid moving horizontally, vertically, or in many directions, these arrows provide clear guidance for workers. This ensures they follow the correct path and avoid potential setbacks.
What text and symbols are required on directional pipe markers?
Alongside colors and arrows, directional pipe markers often feature text and symbols that provide additional information. This could include details such as the contents' temperature, pressure, or specific hazards associated with the pipeline. Interpreting these elements is vital for workers to make decisions and follow safety protocols.
How do I ensure pipe markers comply with ANSI/ASME A13.1?
Making OSHA-compliant pipe markers is a critical element for creating a safe job site. The best way to know if your signs meet those requirements is by following the ANSI/ASME A13.1 standard.
Workers must follow industry standards and regulations for installing directional pipe markers, including the ANSI guidelines, especially the ASME A13.1 standard. ASME A13.1 provides instructions for the size, color coding, and placement of pipe markers. This allows consistency and clarity in sharing information about the contents and flow direction of pipelines.
|
Pipe Contents |
Background Color |
Text/Arrow Color |
Example |
|---|---|---|---|
|
Flammable fluids/gases |
Yellow |
Black |
Natural gas, diesel fuel |
|
Non-potable water |
Green |
White |
Cooling water, chilled water |
|
Fire suppression |
Red |
White |
Sprinkler supply, fire main |
|
Toxic/corrosive |
Orange |
Black |
Acids, chlorine gas |
|
Compressed air |
Blue |
White |
Plant air, instrument air |
|
User-defined |
Per facility SOP |
Per facility SOP |
Custom process lines |
The ASME A13.1 standard sets up color-coded systems for various substances. For example, it shows:
- Yellow is for flammable fluids
- Green is for non-drinkable water
- Red is for fire-fighting substances
This standard also states the use of directional arrows to show the flow direction within the pipes. This allows workers to quickly interpret the information provided by the markers.
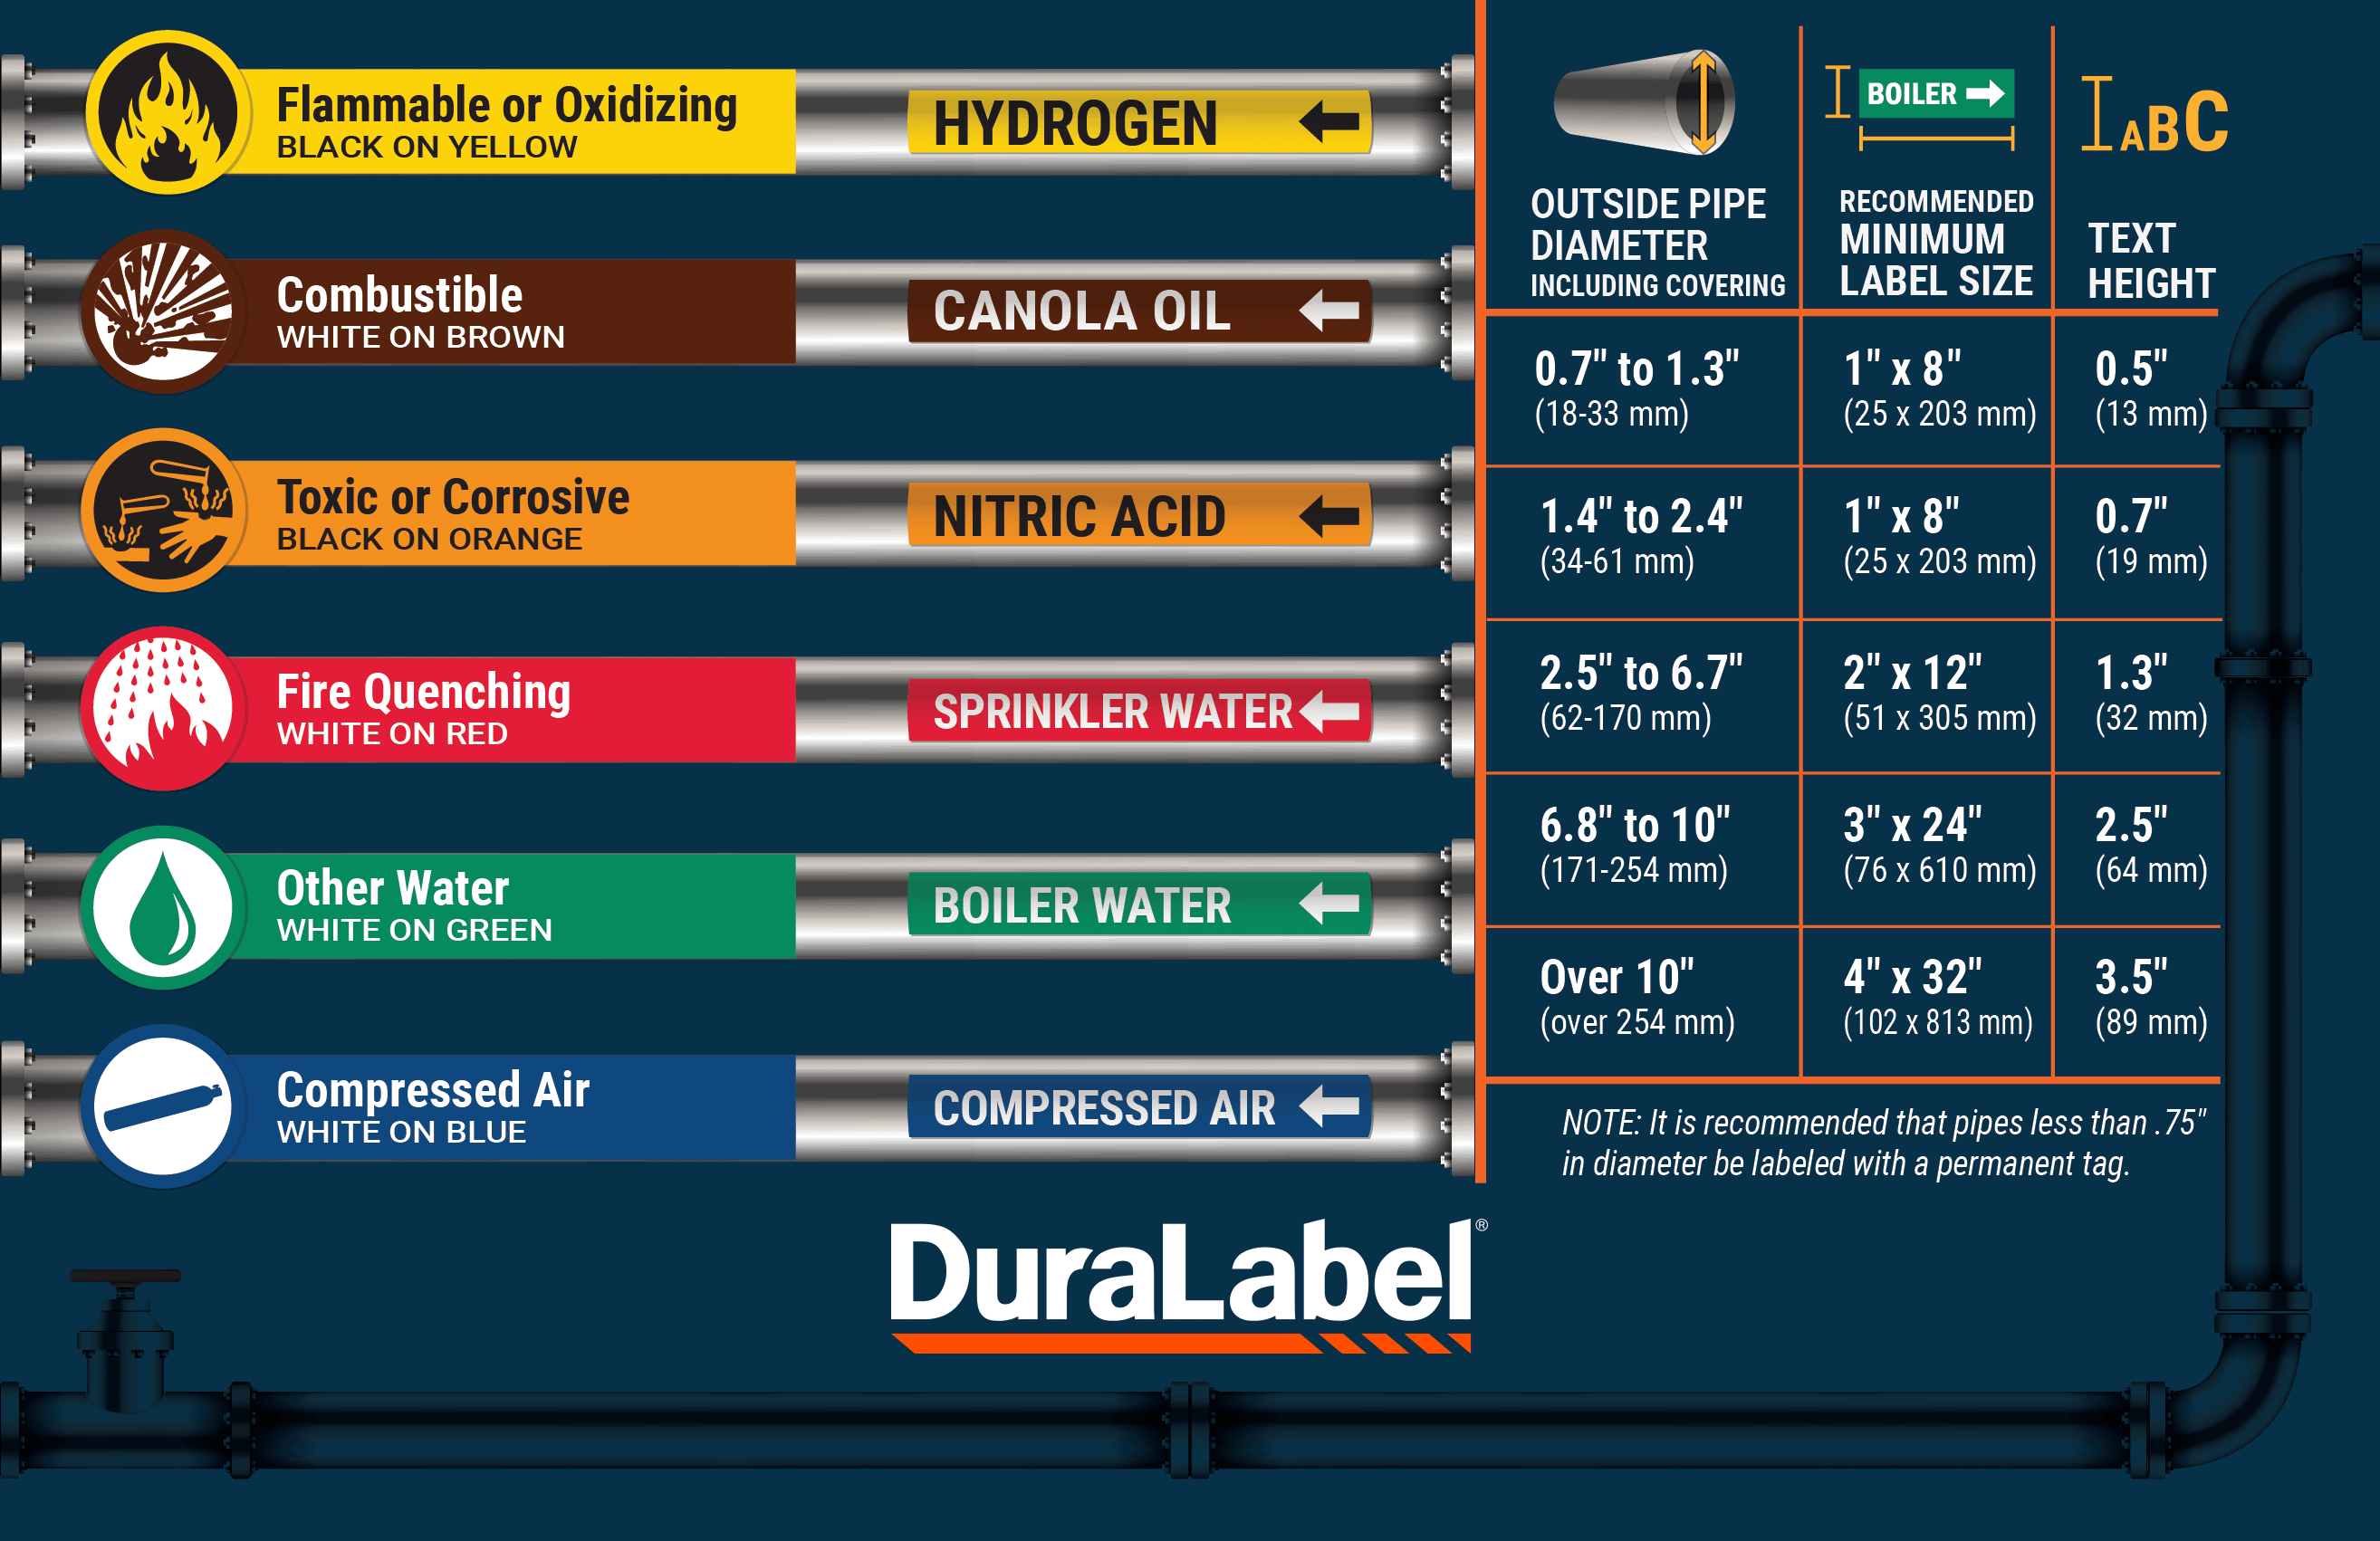
Workers who follow ASME A13.1, and other important standards, help keep pipeline systems consistent and organized. Creating markers that look and go the same way not only makes things safer by reducing confusion, but also helps workers discover what is in the pipes faster and more accurately.
Obeying standards like ASME A13.1 shows a dedication to following rules and doing things safely in industries. It helps companies:
- Lower the chances of problems with pipelines
- Keep workers safe from dangers
- Reduce the chances of accidents
By incorporating ANSI and ASME guidelines into their practices, workers allow directional pipe markers to do their job well. These standards are crucial for keeping workplaces safe, efficient, and compliant.
Why Flow Direction Matters: The Isolation Logic: Explain that during emergency shutdowns or lockout/tagout procedures, a technician must trace flow direction backward to locate the correct isolation valve. Without directional arrows, a worker responding to a pipe rupture could close the wrong valve — isolating the downstream side while the upstream side continues to feed the breach. This is especially critical in ammonia refrigeration systems and chemical processing, where a misdirected shutoff can escalate a leak into a catastrophic release. Connect this to the reason A13.1 mandates arrows at every change of direction — each turn is a potential decision point for a maintenance worker under pressure.
How to install directional pipe markers: step-by-step?
Now that we've explained why directional pipe markers are key and how to make sure they meet labeling rules, let's see the right way to put up a directional pipe marker:
-
Preparation and Planning
Before any installation, gather all the tools and materials needed, including directional pipe markers, attachment equipment (such as pipe grabber sleeves or cable ties), and cleaning supplies.
Look at the pipeline layout and find spots where you need directional pipe markers. Remember any turns, places where pipes meet, or where you can get to the pipes. -
Surface Preparation
Make sure the pipeline surface is clean, dry, and clear of any dirt, debris, or grease that might stop the pipe marker from sticking.
Clean the area where you'll put the directional pipe marker using supplies like isopropyl alcohol or mild soap. Let the surface dry before you move on.
-
Selecting the Correct Pipe Marker
Refer to the standards and rules, like ANSI/ASME A13.1, to decide on the color coding and labeling requirements for what's in the pipeline.
Pick directional pipe markers that follow these rules and work well for what you need, thinking about things like the size of the marker for guidance on matching marker dimensions to your pipe diameters, see selecting the right pipe label size for every pipe diameter, and how durable they are.
-
Positioning and Alignment
Carefully position the directional pipe marker at the right location on the pipeline, ensuring that it is pointing the same way as what is flowing inside the pipe.
Use measuring tools, such as a tape measure or level, to check the alignment and placement of the pipe marker. This is especially important if multiple markers need to be installed along a straight section of pipe. -
Securing the Pipe Marker
There are countless methods to properly secure your pipe marker. For example, you can take advantage of DuraLabel’s Coiled Pipe Markers to snap markers into place. You may also prefer DuraLabel’s easy-to-apply, pressure-sensitive adhesive pipe markers that let you place the marker directly onto the pipe.
No matter how the markers are locked in place, it’s critical they are done effectively to ensure they will not become easily moved.
-
Final Inspection and Testing
Once the directional pipe marker is placed, inspect it to verify that it is securely attached and positioned correctly.
Test the visibility and legibility of the pipe marker from different angles and distances. Confirm that it can be easily read and understood by workers in the area.
Make any adjustments to the installation as needed to ensure compliance with standards.
-
Documentation and Maintenance
Keep detailed records of the installation, including the locations and details of each directional pipe marker. Outdoor pipe runs face accelerated wear; learn more about how UV and sun exposure degrade pipe markers over time.
Have a regular inspection and maintenance schedule to monitor the condition of the pipe markers.
While looking over each pipe, check that they remain:
-
- Visible
- Legible
- Securely attached
Workers can effectively put in directional pipe markers to improve safety, navigation, and follow the rules in industrial pipelines by carefully following these steps and implementing best practices.
UV exposure and chemical splash are the two fastest killers of pipe marker legibility. In outdoor pipe runs or chemical processing areas, inspect markers on a 6-month cycle rather than annually. A marker that is technically 'still attached' but no longer readable is the same as having no marker at all during an emergency.
What training do workers need for pipe marker identification?
Lastly, it's crucial your workers have the knowledge and skills needed to understand and apply directional pipe markers. Employers should provide in-depth training programs covering topics such as:
- Understanding color coding protocols
- Interpreting directional signs
- Familiarizing with common symbols and written information
- Practicing proper installation techniques
- Reinforcing safety protocols and regulatory compliance
The Final Pipe Dream with DuraLabel Pipe Markers
Directional pipe markers serve as essential wayfinding aids within industrial pipeline systems. These markers accurately lead workers through complex pipe networks. By understanding pipe markers and mastering their application process, workers boost safety, efficiency, and regulatory compliance in the workplace.
With the right tools it can make all the difference when it comes to making reliable pipe markers. That’s why it’s important to find a high-quality printer designed to simplify the creation of pipe marker labels. The DuraLabel Toro Max Industrial Label Printer is the perfect, all-in-one industrial printer for all of your pipe marking needs. Through continued education and training, you can ensure these printed signs protect your workers and the environment.
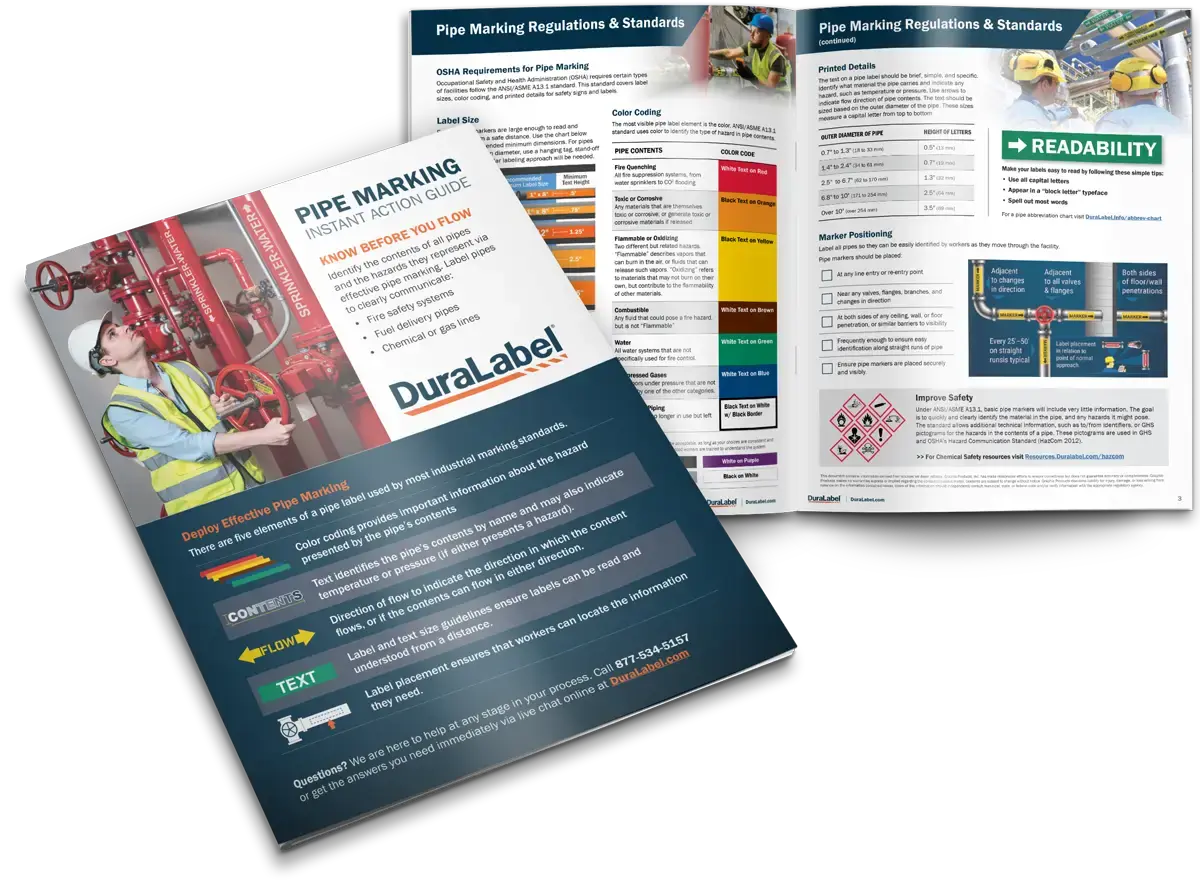
One way to learn more about pipe marking is with DuraLabel’s free Pipe Marking Instant Action Guide. This guide can help with being compliant with OSHA/ANSI standards, hazards that may be flowing through pipes and staying up to date with industry-specific standards. Get help crafting a system that will provide the safety communication you need. Call 1-888-695-5670 and one of our experts will guide you through the process.
Read Next:
Benefits of Pipe Marking
Water Treatment Pipe Marking Benefits

Facility Safety and Compliance: Utilizing the Right Pipe Markers
What Does ANSI/ASME A13.1 Require for Pipe Marking? Effective pipe marking requires four elements: accurate ...
Read
Water Treatment Facility Pipe Marker Benefits
Pipe markers in water treatment facilities are governed primarily by the 10 States Standards (Recommended ...
Read
The Benefits of Pipe Marking
Why Is Pipe Marking Important for Workplace Safety? Industrial pipe marking is an economical solution to any ...
ReadTake Action

Print Your Own Signs
Free Label Design Software