20
February,
2024
2 MINUTE READ
Periodic cleaning will help prevent jams, and keep your Kodiak Max running smoothly. If specks, spots, or streaks appear in your printed labels, clean the inside of the printer. If printed labels stick in the cutter opening or do not fall out on their own, clean the cutter.
Cleaning Inside Kodiak
To clean the inside of your Kodiak Max, lift lid to its fully raised position.
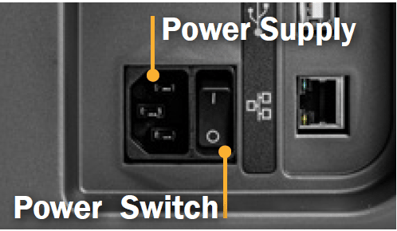
- Power the printer down by switching the power switch to the off position, then disconnect the power supply directly from the wall outlet or from the back of the printer. This must be done whenever cleaning Kodiak Max.
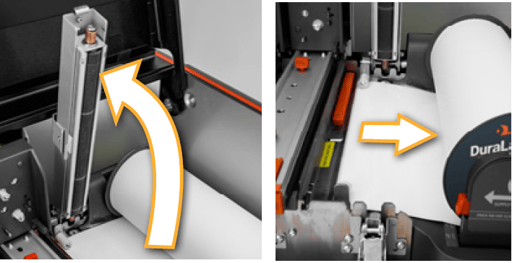
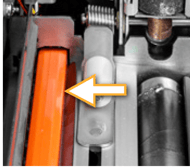
- Unlatch the two print heads, and lift them by their orange tabs until they hold in their fully raised positions. Slide the ribbon cartridges out of place, and set them aside (Place the cartridges upside-down to avoid accumulation of contaminates).

- Unlatch the spring-loaded feed roller bar, and let it rise out of the way. Turn your roll of label stock by hand to rewind any supply that is fed through the printer.
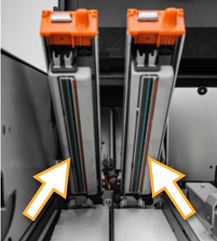
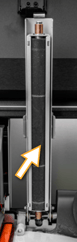
- Using a pre-moistened cleaning swab or a soft cloth with some isopropyl alcohol, wipe the underside of each print head, paying attention to the black area, located the left of the green strip, and the shiny metal feeding guide.
- On the bottom side of the printer, where the print heads make contact, wipe the rubber rollers manually and advance the rubber rollers (by hand), to clean the entire circumference of the rollers. Then wipe the rubber roller in the raised feed roller bar.
- Check the adjustable supply guides for any adhesive build-up, especially under the small white rollers, and clean them as well.
Cleaning the Cutter
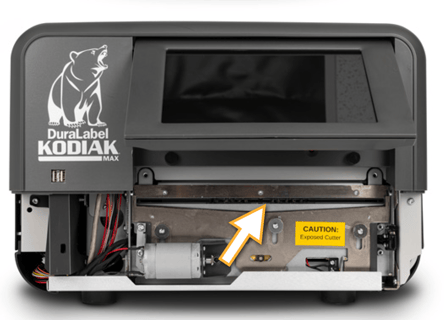
The best way to reach the cutter for cleaning is from the front of the printer. When cleaning the cutter, be sure that your Kodiak Max is powered off and disconnected from any power source.
- Raise the touchscreen to its highest position. Locate two Philips screws behind the screen, just above each end of the cutter slot, Remove the two screws, and set aside.

- Slide the cutter faceplate down to release and remove it. This will expose the cutter blades.

BE CAREFUL: while the face plate is removed, the cutter motor will not engage, but the blade is still sharp. - Using a pre-moistened cleaning swab or a soft cloth and some isopropyl alcohol, remove any built-up adhesive from the blades.
- Replace the cutter faceplate by sliding it up into place, and re-inserting the two screws.
More Support Options
If you have any questions about using your DuraLabel Kodiak Max printer, get help from DuraLabel's world-class support team by calling 800-326-9244 or visiting DuraLabel.com.


